What Pottery Tools Do Beginners Need to Get Started?
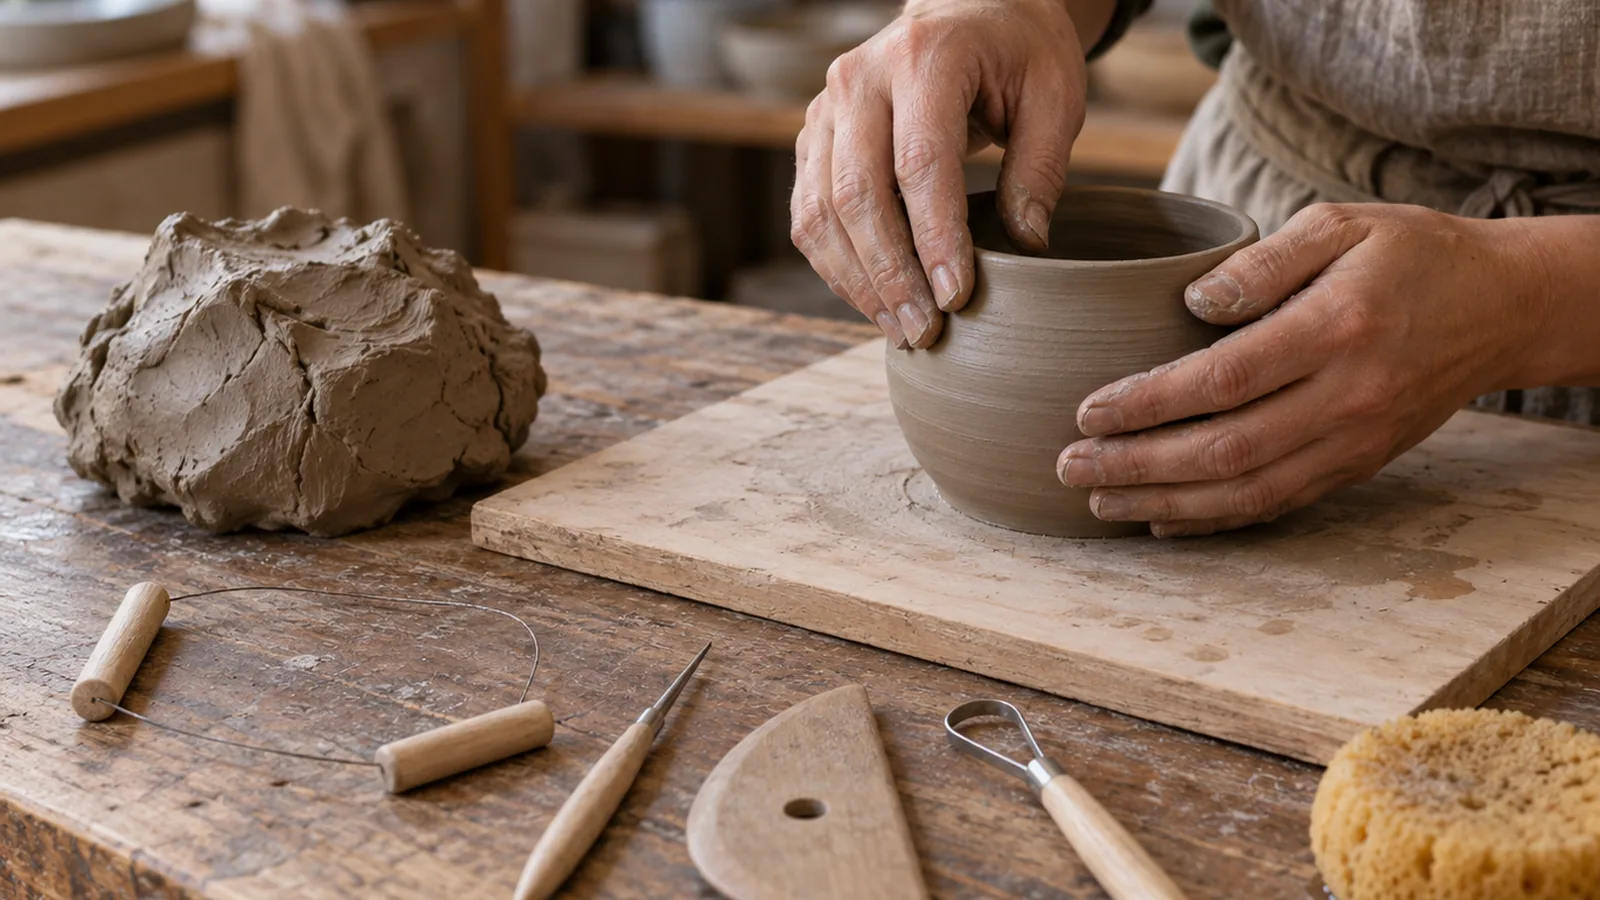
Beginners can start with 7 basics: clay, a work surface, a cutting wire, a needle tool, a rib, a loop tool, and a sponge. You don’t need a wheel to make pottery, but your forming method and studio rules affect which tools and clay to choose.
Quick answer
What pottery tools do beginners need?
Start with clay, a sturdy work surface, a wire tool, a needle tool, a rib, a loop tool, and a sponge. You can handbuild without a wheel, and you don’t need a full kit; check your class or studio rules before buying tools or clay.
- Prepare: Cut a manageable piece of clay with the wire tool, then wedge it on a clean, sturdy surface.
- Shape and join: Use the rib to shape or smooth; score both joining surfaces with the needle tool, apply thick slip, and press them together.
- Finish: Use a loop tool to trim a firm pot and form a foot ring, then smooth the foot with the sponge.
- Choose by method: For wheel work, trim when the pot is leather-hard; handbuilders can pinch, roll coils, or make slabs without a wheel.
Which tools should you gather first?
Check your class or studio rules before buying clay or tools, since a full kit isn’t needed for handbuilding. A beginner kit can suit both handbuilding and wheel work, but some tools have a clear job only at particular stages.
| Tool | Use or place in a beginner setup | Source |
|---|---|---|
| Sponge | Included in a beginner kit for wheel and handbuilding students | northernclaycenter.org |
| Wire tool | Cut clay from a block or separate wheel-thrown work | northernclaycenter.org |
| Needle tool | Score, trim, or measure clay; use light pressure to avoid cutting too deeply | human.libretexts.org |
| Wooden rib | Included in a beginner kit for wheel and handbuilding students | northernclaycenter.org |
| Aluminum rib | Included in a beginner kit for wheel and handbuilding students | northernclaycenter.org |
| Trimming tools | Remove excess clay from a firm pot | northernclaycenter.org |
| Pin tool, wood knife | Included in a beginner kit for wheel and handbuilding students | northernclaycenter.org |
The kit also includes large and small trimming tools. For wheel-thrown work, trimming is done at the leather-hard stage, when the pot holds its shape but remains soft enough to cut cleanly. You can handbuild without a wheel by pinching, coiling, or making slabs.
Start with tools your method and studio require; you can add others as your work develops.
Prepare clay and your work surface
Clear and secure the work surface. Remove scraps and debris so they don’t get mixed into the clay, then set up a sturdy, clean surface that won’t shift while you wedge. Wood, canvas, or plaster can work as a wedging surface; plaster is particularly useful when the clay is very wet.
Choose a setup that fits your method. Handbuilding uses pinching, coils, or slabs and doesn’t require a pottery wheel. For handbuilding, prepare a clear area for shaping by hand. For wheel work, set up at the wheel and keep your clay and basic tools within reach. Check your class or studio rules before buying clay or tools, since they may set limits on what you can bring.
Cut off a manageable piece of clay. Use a wire tool to separate the amount you plan to prepare from the block. The wire can also separate wheel-thrown work later, so keep it nearby if you’re using a wheel.
Wedge the clay on the prepared surface. Knead and press the piece against the sturdy surface to prepare it for shaping. Keep the surface in place as you work, and use plaster if the clay is very wet.
Keep the work area clean as you go. Remove scraps before they dry, and clean residue from tools and surfaces before it hardens. Avoid dry sweeping or sanding clay residue, which can put clay dust into the air.
Shape and join pieces with basic tools
Cut the clay you need. Use a wire tool to separate a manageable piece from the block. For handbuilding, you can form that piece by pinching, rolling coils, or making slabs, without a pottery wheel.
Shape the pieces before joining them. Use your hands and a rib to smooth or shape the clay; a rib can also scrape away excess. Its effect depends partly on the material, so work gently and check the surface as you go.
Score both surfaces that will meet. Scratch the contact areas with a needle tool or scoring tool, making marks on each piece. A needle tool can also trim or measure clay, but use light pressure so you don’t cut too deeply into the form.
Apply thick slip to the scored areas. Use a brush to coat both contact surfaces, then press the pieces together so they meet firmly.
Blend and smooth the seam. Use a modeling tool to work the joined clay across the seam, then smooth the area with a rib. Check that the join feels secure before moving on.
Remove residue before it dries. Wipe clay from tools and clear scraps from your work area. Don’t dry-sweep or sand clay residue, since that can put clay dust into the air.
Trim, refine, and clean your work
Check the clay’s firmness before trimming. For a wheel-thrown pot, wait until it is leather-hard: firm enough to hold its shape during handling, but still soft enough for a trimming tool to remove clay cleanly. Trimming too early risks deforming the pot, while clay that is too firm may not cut cleanly.
Remove excess clay with a trimming tool. Use a loop or ribbon tool to refine the base of a suitable pot and shape a foot ring. Work only where the pot has excess clay, and keep the piece supported as you trim.
Smooth the trimmed area. Use a sponge to smooth the foot after trimming, and to manage moisture on the clay surface. A rib can also smooth, shape, or scrape clay; its effect depends partly on the rib material.
Clear scraps and residue while they’re damp. Remove clay scraps and debris from your work area so they don’t get mixed into clay. Clean residue from tools and surfaces before it dries, when it is easier to remove.
Clean without stirring up clay dust. Wipe work surfaces and tools with a damp sponge or cloth rather than dry sweeping or sanding, which can put clay dust into the air. Clean residue before it dries to make cleanup easier.
Frequently Asked Questions
What type of clay should a pottery beginner use?
Start with the clay your class or studio recommends, since its rules may limit which clay you can bring. If you’re working independently, choose clay suited to your forming method and firing access, then keep the first project simple; the core beginner tools support both wheel work and handbuilding.
Do I need a kiln to make pottery at home?
You don’t need a wheel to make pottery, since you can handbuild with pinching, coils, or slabs. Firing still needs a suitable kiln to turn clay into finished pottery, so arrange access through a class or studio before choosing clay.
How much should a beginner pottery tool set cost?
A full tool kit isn’t required for handbuilding. Start with simple tools or household objects, and check your class or studio rules before buying anything; wheel students may need a broader set of tools.
What tools do beginners need to glaze pottery?
Glazing tools aren’t covered by the beginner tool guidance here, so ask your class or studio which supplies its process requires before buying them. For basic clay work, a sponge helps manage moisture and smooth surfaces, while a rib shapes or smooths clay.
How should beginners store clay between pottery sessions?
Keep clay from drying out between sessions by sealing it in an airtight container or wrapping it tightly in plastic. According to Blueprint Kentucky, cleaning tools and surfaces while residue is still damp also makes cleanup easier.
Conclusion
If you’re handbuilding, start with the tools your class or studio requires and use a clear, sturdy work surface. If you’re throwing on a wheel, keep a wire tool nearby for separating work, and add trimming tools when you’re ready to refine a leather-hard pot. Before buying anything, check what your studio provides and what you’re allowed to bring. Then gather that short list and prepare your workspace before opening the clay.
Sources
- Education FAQs – Northern Clay Center (northernclaycenter.org)
- ceramicartsnetwork.org (ceramicartsnetwork.org)
- blueprintkentucky.mgcafe.uky.edu (blueprintkentucky.mgcafe.uky.edu)
- ceramicartsnetwork.org (ceramicartsnetwork.org)
- ceramicartsnetwork.org (ceramicartsnetwork.org)
- ceramicartsnetwork.org (ceramicartsnetwork.org)
- ceramicartsnetwork.org (ceramicartsnetwork.org)
- human.libretexts.org (human.libretexts.org)
- theclayhole.com (theclayhole.com)
- ceramicartsnetwork.org (ceramicartsnetwork.org)
- ceramic.school (ceramic.school)
- thepotterynetwork.com (thepotterynetwork.com)
- sites.google.com (sites.google.com)
- ceramicartsnetwork.org (ceramicartsnetwork.org)