For ceramic artists and enthusiasts, the world of pottery offers a realm of boundless creativity. Among the numerous techniques available, underglaze stands out as a versatile and captivating method that allows artists to add color, depth, and intricate designs to their pottery creations.
Whether you are a beginner or a seasoned potter, mastering the art of underglaze opens up a world of possibilities. In this comprehensive guide, we will delve into the fascinating realm of how to use underglaze, exploring its various forms, application techniques, and essential tips to help you achieve stunning results in your ceramic artwork.
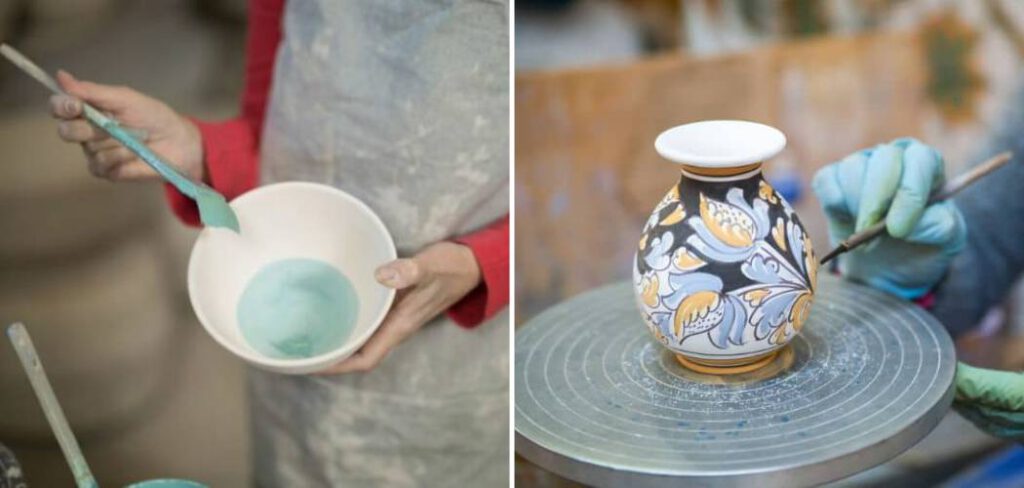
Table of Contents
What Is Underglaze?
Underglaze is an oxide-colored ceramic slip used for decoration on pottery, tiles, and sculptures. It can be applied as a liquid or in dry powder form and is fired at lower temperatures than overglaze enamels. The colors of the underglaze are stable and won’t run or fade during firing. This makes them ideal for creating designs that will remain vibrant over time.
When applied to greenware, underglaze creates a low-fire color that won’t burn away in higher firing temperatures. It can also be used on bisque and is often followed by glazing with a clear or translucent glaze to enhance the colors and add depth. Underglaze can also be layered with other types of glazes and finishes, such as clusters, to create unique looks.
Underglaze is available in a variety of colors and textures. It can be used alone for simple designs or combined with other glazes and techniques for more intricate results. For best results, it should be applied evenly and smoothly to avoid cracking during firing. It’s important to note that underglaze should always be fired before overglaze enamels, as high-temperature firings can cause the underglaze to burn away.
The Versatility and Beauty of Underglaze
Underglaze is a versatile medium for decoration that can be applied to many different types of ceramics, including earthenware, stoneware, and porcelain. Underglaze offers an extensive range of colors and finishes that are perfect for creating unique designs to enhance any type of ceramic piece.
The most popular method for applying underglaze is through brushing or sponging on the glaze, but it can also be applied with stencils, stamps, or by using a pen or brush with a special underglaze ink. Depending on the desired effect, underglaze can either be matte or glossy. After application, the pieces need to be fired in a kiln before they are finished.
Underglaze is known for its vibrant colors and beauty, and can be used to create a wide variety of decorative effects. It can even be layered with other glazes to create interesting new textures and color combinations. The possibilities are only limited by the imagination of the artist! With underglaze, it is possible to make one-of-a-kind pieces that will stand out from all the rest.
Underglaze is an excellent choice for anyone who wants to add a unique touch to their ceramics project or artwork. Not only does it have a wide range of uses, but it is also easy to apply and durable when fired in the kiln.
Benefits of Using Underglaze in Ceramic Artwork
Underglaze is a type of stain, colorant, and sealant that can be applied to ceramic works before glazing. It’s often used to create vivid designs on earthenware pottery and can also be used in combination with other techniques such as carving, sgraffito, and slip trailing for decorative effects.
Using underglaze offers many advantages when it comes to making ceramic artwork. One benefit is that it dries quickly, so it won’t take long before you are able to work on the next step in your creative process. If you use multiple colors, you don’t have to worry about them running together because the underglaze will hold each color in place until the glaze is applied.
Underglaze can also be used to create an infinite range of colors and techniques. Colorants such as oxides, stains, and washes can be mixed into underglaze to create a variety of hues that will remain vibrant and true throughout the firing process. Additionally, it’s easy to control the intensity of the color so you can create subtle shades or bright, vivid designs.
Using underglaze is also a great way to add detail and texture to your artwork. It’s easy to carve, emboss, and stamp into the surface of the clay before it dries, allowing for intricate details that will remain even after glazing. This gives artists an amazing amount of freedom to express their creativity and craft pieces with unique and complex patterns.
10 Ways How to Use Underglaze
1. Brushwork Technique:
The brushwork technique is one of the most common and versatile methods of applying underglaze. With a wide range of brush sizes and shapes available, artists can create fine lines, bold strokes, and intricate details on their ceramic pieces.
Experiment with different brushes, pressures, and brushstroke techniques to achieve the desired effects, from smooth and controlled lines to expressive and spontaneous brushwork.
2. Sgraffito:
Sgraffito is a captivating technique that involves scratching through layers of underglaze to reveal the contrasting color beneath. This method allows artists to create intricate patterns, textures, and even illustrations on their ceramics.
Apply a base layer of underglaze, let it dry, and then use a sharp tool or a sgraffito tool to scratch away the top layer, revealing the color underneath. Explore the interplay of colors, experiment with various scratching patterns, and let your imagination run wild with this expressive technique.
3. Stencil Application:
Using stencils is an excellent way to achieve precise and repetitive patterns with underglaze. Cut out or purchase pre-made stencils in various shapes and sizes. Secure the stencil onto your ceramic surface and use a sponge or brush to apply the underglaze over the stencil.
Carefully remove the stencil to reveal the clean and crisp design. Stencils offer endless possibilities for creating geometric patterns, nature-inspired motifs, or even intricate lace-like designs on your pottery.
4. Marbling Technique:
Create mesmerizing patterns reminiscent of swirling marble with the marbling technique. Apply different colors of underglaze onto a palette or a flat surface, and then use a comb, toothpick, or skewer to gently swirl the colors together.
Once you achieve the desired marbling effect, roll your ceramic piece onto the surface, allowing the colors to transfer onto the pottery. This technique produces unique and unpredictable patterns, making each piece truly one-of-a-kind.
5. Wax Resist:
Wax resist is a versatile technique that allows artists to create contrasting designs by applying wax over an underglaze layer. Once the wax dries, apply a different underglaze color on top. The wax acts as a barrier, preventing the second layer of underglaze from adhering to the waxed areas.
After the second layer dries, gently remove the wax, revealing the original underglaze color beneath. Experiment with various wax resist designs, from simple lines and shapes to intricate drawings, to achieve stunning visual effects.
6. Mishima:
Mishima, a traditional Japanese technique, involves incising lines or designs into leather-hard clay and filling them with underglaze. Start by creating shallow lines or etchings on the clay surface using a sharp tool.
Once the lines are complete, carefully apply the underglaze, ensuring it fills the incised areas. Afterward, gently wipe off the excess underglaze on the surface, leaving the color only in the incised lines. Mishima adds depth and dimension to your ceramics, highlighting the intricacies of your designs.
7. Stamping and Texture:
Incorporate texture and depth into your underglaze designs using stamps or textured objects. Roll underglaze onto a stamp or press the stamp onto an ink pad before applying it to your pottery. This technique allows you to create repetitive patterns, add intricate details, or even simulate the appearance of fabric, wood grain, or natural elements.
Explore various stamps, experiment with different textures, and discover how this technique can enhance the tactile and visual aspects of your ceramic art.
8. Watercolor Effect:
Embrace the ethereal beauty of watercolor by using underglaze in a diluted form. Mix underglaze with water to create a transparent wash of color. Apply the diluted underglaze onto the ceramic surface using a brush or by dipping the pottery into the mixture.
This technique creates soft, translucent layers of color that blend and flow, evoking a watercolor-like effect on your ceramics. Experiment with layering and blending different colors to achieve a range of captivating and dreamy effects.
9. Airbrushing:
For artists seeking a more precise and uniform application of underglaze, airbrushing is an excellent technique. Using an airbrush tool and compressor, spray a fine mist of underglaze onto your pottery, creating smooth and even layers of color.
This method is ideal for achieving gradients, seamless transitions between colors, and precise detailing. Explore the possibilities of airbrushing, experiment with different nozzle sizes, pressures, and masking techniques to achieve the desired effects in your ceramic art.
10. Decals and Transfers:
Expand your creative options by incorporating underglaze decals and transfers into your ceramic artwork. These pre-designed images or patterns can be transferred onto your pottery by applying water or underglaze solution to the decal, placing it onto the ceramic surface, and gently sliding off the backing paper.
Once applied, carefully smooth out any air bubbles and allow the decal to dry before firing. Decals and transfers offer a wide range of designs, from intricate illustrations to vintage-inspired motifs, enabling you to enhance your ceramics with precision and complexity.
Some Common Mistakes When Underglazing Your Ceramics
Underglaze is a great way to add vibrant colors and intricate designs to your ceramic pieces. However, if you’re new to the process, there are some common mistakes that can occur when underglazing. Here are a few mistakes to watch out for:
1. Applying Too Much Underglaze.
Underglaze is very thick, and it can be tempting to apply a lot of it to your piece. However, too much underglaze will cause runs and smears, making your design look sloppy. Instead, use thin layers and build up the color gradually.
2. Not Letting the Glaze Dry Completely Between Coats
Underglaze should be allowed to dry completely between coats in order to prevent smearing or cracking when you fire it in the kiln. If you don’t allow enough time for drying between coats, you may end up with an uneven finish on your piece.
3. Not Testing Your Underglaze Colors Before You Fire
You never know how a particular color will turn out until after it has gone through the firing process. Before you commit to a design, make sure to test out your underglaze colors on some test tiles to ensure that you get the results you’re looking for.
By following these tips, you can avoid common mistakes and create beautiful pieces with underglaze! With practice, anyone can become an expert in underglaze their ceramics.
Conclusion
To conclude, using underglaze is a great way to add intricacy and detail to pottery. It takes practice to learn to use it correctly, but the rewards are worth it! From various designs and colors to shiny glazes, this type of decoration offers an attractive finish. Start by experimenting with simple brush strokes or drawing tips, and continue exploring from there. No matter your skill level, our guide on how to use underglaze has something for you. Become a pro at handpainting ceramics or check out other applications such as wax resist designs. Now you have all the tools needed to create beautiful ceramics with underglaze! So get started now and show us your creative works!
