Aspiring potters and creative people alike, it’s time to explore the world of art and create beautiful objects with your own hands! Have you ever had the desire to learn pottery but weren’t sure where or how to start? With the right supplies, some patience, and a bit of practice, you can establish a home pottery studio in no time.
In this blog post, we’ll be taking an in-depth look at how to start a home pottery studio – from determining what type of clay is best suited for your projects to finding inspiration. Read on to discover just how easy and exciting embarking on this crafty journey really is – let’s get started!
Table of Contents
What Is the Best Floor for a Pottery Studio?
When it comes to setting up a home pottery studio, the type of flooring you choose is an important consideration. The ideal floor should be strong enough to handle heavy equipment and materials, easy to clean, and slip-resistant. Possible options include tile, concrete, vinyl, laminate, or epoxy flooring.
Tile is a great choice for pottery studios since it’s durable, easy to clean, and water-resistant. It also provides insulation against cold temperatures. However, tiles can be expensive and may need to be replaced over time if they become cracked or chipped.
Concrete floors are often used in commercial settings but can also be effective at home. Concrete is very strong and cost-effective and can be painted for a more finished look. However, it can be difficult to clean and may require sealing or waxing to protect the surface from water damage.
Vinyl flooring is also a popular choice for pottery studios since it’s inexpensive, easy to install and maintain, and slip-resistant. It can be purchased in a wide variety of colors and styles to complement any décor. However, it may not be as durable or long-lasting as other flooring options.
10 Steps How to Start a Home Pottery Studio
1. Gather the Necessary Equipment and Supplies:
To start a home pottery studio, you will need to gather the necessary equipment and supplies. This includes clay, kiln, potter’s wheel, wedging table, trimming tools, glazes, and more.
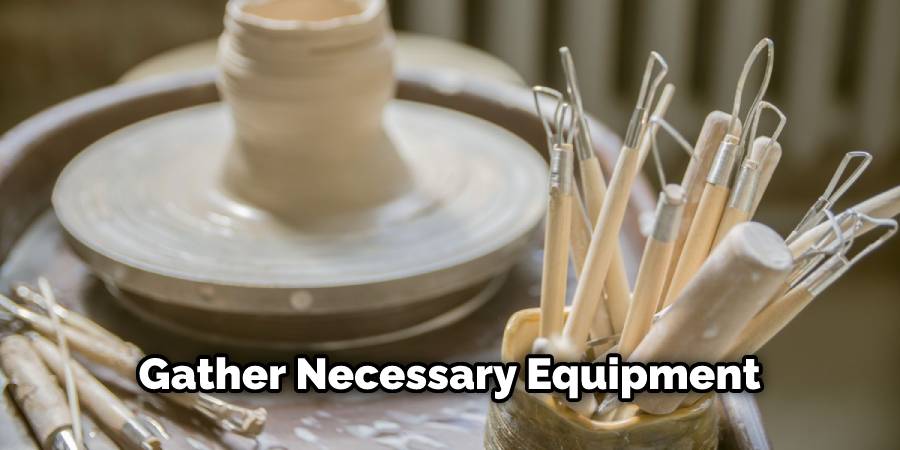
Consider researching and buying high-quality pieces of equipment that are designed specifically for pottery. Make sure to also buy a good set of books or videos that will help you understand and practice the techniques used in pottery.
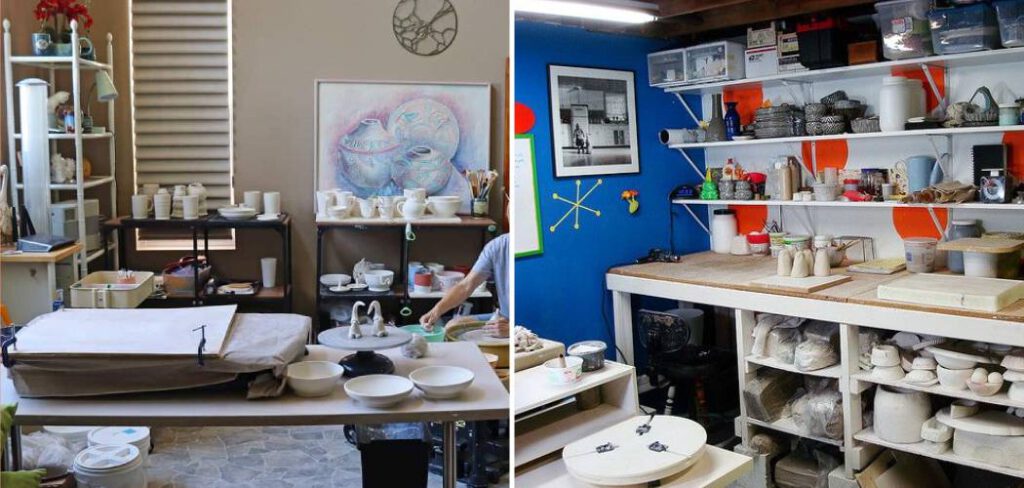
2. Choose a Suitable Space:
Select an appropriate room or area of your home to set up your pottery studio. Ensure that the space is well-ventilated and large enough to accommodate all the necessary equipment and materials.
Make sure to also add items like shelves for storing pieces or hooks for hanging tools in order to keep everything organized and easily accessible. Additionally, you’ll need a space to dry completed pieces and wheel-thrown pots. The ideal spot would have natural light and offer plenty of space for creating.
3. Prepare the Studio:
Once you have chosen a suitable space for your home pottery studio, you can begin by preparing it for use. Thoroughly clean the space so that it is free from dust and dirt before setting up all the required supplies and equipment.
Ensure that all items are securely placed on tables or other surfaces, so they do not slip or fall during operation. You will also need to make sure that there is ample ventilation in the space, as pottery creation can generate a lot of heat.
Finally, ensure that the space is well-lit, as this will make it easier to see the details and colors of your pottery pieces.
4. Learn about Different Types of Clay:
To get started with pottery creation, you will need to first learn about various types of clay available in the market today – earthenware clay (low-fired), stoneware clay (mid-fired), or porcelain clay (high-fired).

Different clays require different temperatures when firing them in kilns; therefore, learning which type works best with your existing setup is essential before starting any creative work with clay.
Additionally, you should also learn about other materials such as additives, glazes, and slips that are necessary for pottery projects. Knowing when and how to use each material is key to getting the right results.
5. Practice Basic Techniques:
Before attempting any complicated projects with clay, make sure to practice basic fundamental techniques first, such as pinching, coiling, slabbing, or throwing on a wheel regularly until they become second nature to you.
This will help ensure proper consistency in your creations and achieve professional results every time. With a little bit of practice, you will be able to create some beautiful works with clay.
However, don’t be discouraged if the results aren’t exactly what you wanted at first. Just like any craft, it takes time and patience to master pottery. Keep experimenting, and with each piece you make, your skills will improve.
6. Utilize Glazing Methods:
In order to give life to your finished projects made from clay, glazing is essential as it adds color and texture, along with making them waterproof once fired in a kiln at high temperatures (depending on the type of clay used).
Learn about different glazing techniques, such as dipping into liquid glaze before firing them in a kiln for desired results every time you work on a project from the start till finish at a home pottery studio setting!

7. Test out Finishes:
It’s important to test out finishes on small pieces of fired clay before applying them on actual projects so as to ensure desired results are achieved each time; this helps avoid potential mistakes down the line during the completion stages of more complex artworks later on!
Finishes can range from applying a clear glaze on the surface of the pottery to adding oxides and stains. Experiment with different finishes that produce unique and interesting textures, or simply add a pop of color. Be sure to document what works and what doesn’t in your test pieces so that you can refine your process and achieve the desired results.
8. Experiment with Shapes:
Experimenting with shapes while working with clay helps hone creative skills as well as develop intricate designs quickly over time after much practice; this also allows flexibility when trying out new ideas during artistic projects, which may come in handy during future works too! Playing around with shapes also helps familiarise with the different properties of clay and how they can be used to create different textures.
9. Fire Safely:
When firing any kind of project made from ceramic material in a kiln at high temperatures, always wear protective gear such as gloves or glasses since hot debris may fly around due to sudden changes in temperature inside enclosed chambers if not monitored carefully, resulting in serious accidents if not taken seriously beforehand!
Make sure to read the safety manual provided with the kiln or any other equipment before use and understand all warnings. Additionally, install a carbon monoxide detector in the vicinity of the kiln as a safety precaution.
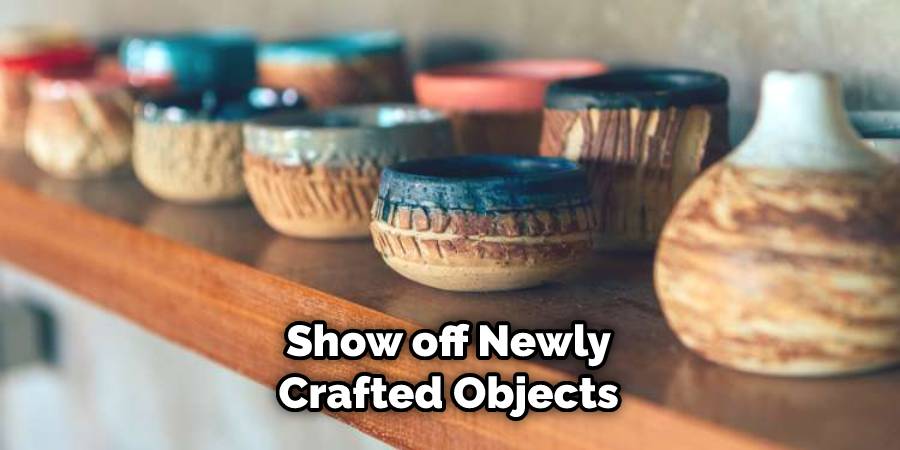
10. Showcase Your Work:
After perfecting each piece made from the beginning till completion stages, show off newly crafted objects proudly either online through social media platforms or through exhibitions located near local areas where possible, showcasing talent acquired over time; this will also help draw attention towards own artwork enabling sales opportunities too!
Aim to create more diverse, unique, and quality-based objects (pottery items), which will help build a strong portfolio. And finally, never forget the power of customers’ feedback, so encourage it as much as possible!
Things to Consider When Starting a Home Pottery Studio:
1. Space:
You need to decide on the size and shape of your studio space. Do you want a dedicated workspace, or can you make do with a corner of your garage or basement? Consider how much room you will need for all the tools, raw materials, equipment, and finished pieces.
2. Finances:
Starting a home pottery studio can be expensive, so it’s important to make sure you have the financial resources available. You will need to buy tools and supplies, as well as invest in either an electric kiln or a gas-fired one. Consider how much money you realistically have available for setup costs.
3. Equipment:
Your workspace should be equipped with everything necessary for creating and firing your pieces safely and effectively. You will need clay, potter’s wheels, wedging tables, glaze materials, tongs, and other tools to work with hot pieces, kilns of various sizes depending on the scale of your projects, ventilation systems to handle gases emitted during firing processes, and more.
Conclusion:
Be patient with yourself as you learn, remember to take breaks when needed, and enjoy the creative process. Even if you are a first-time potter, practice will make perfect and help advance your skills over time.
Setting up a home studio provides an inviting environment for creativity and exploration free from judgment—have fun with it! So don’t wait—dedicate yourself to discovering or fine-tuning this unique craft today by taking this first step of How to Start a Home Pottery Studio!


