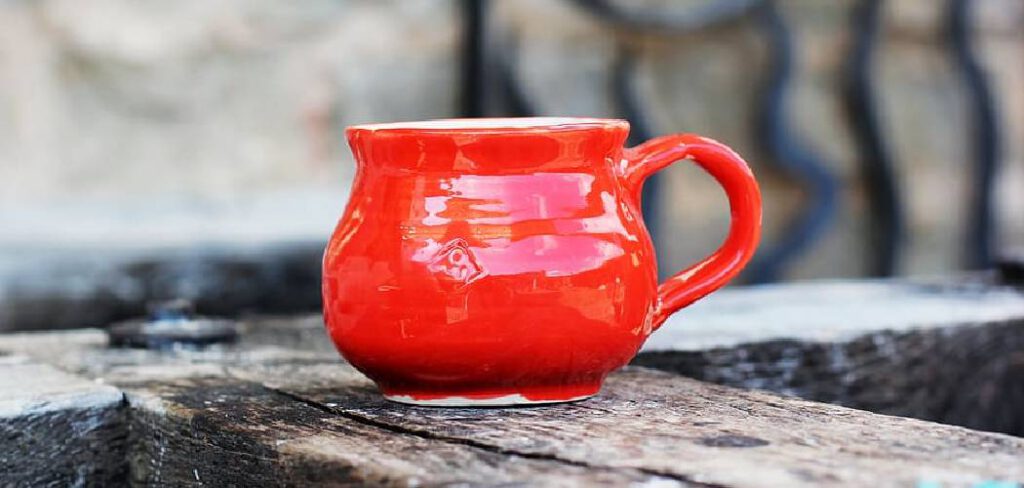
If you’re a fan of unique, handcrafted mugs, then learning how to make stoneware mugs is a skill worth exploring. Stoneware, known for its durability and earthy aesthetic, has been a popular choice for pottery enthusiasts for centuries.
Whether you’re a seasoned potter or just starting your ceramic journey, creating your own stoneware mugs can be a rewarding and fulfilling experience. In this article, we’ll guide you through the essential steps involved in making stoneware mugs, from preparing the clay to glazing and firing the finished pieces.
We’ll discuss the different types of stoneware clay available, essential tools and techniques for shaping and molding the mugs, as well as tips for adding personalized touches and designs. By the end, you’ll have the knowledge and confidence to embark on your stoneware mug-making adventure, turning clay into functional art for your daily coffee or tea rituals.
Table of Contents
Understanding Stoneware Mugs
Before we jump into the practical aspects of making stoneware mugs, let’s take a moment to understand what stoneware is. Stoneware is a type of ceramic pottery fired at high temperatures, typically between 2,100 and 2,300 degrees Fahrenheit (1,150 and 1,260 degrees Celsius).
It is known for its durability, strength, and ability to hold both hot and cold liquids. Stoneware mugs offer a balance between functionality and aesthetics, making them a popular choice for everyday use and special occasions.
Materials and Tools Needed
To get started with making stoneware mugs, you’ll need a few essential materials and tools. Here’s a list of what you’ll need:
- Clay: Choose a high-quality stoneware clay suitable for mug making.
- Pottery Wheel: An electric pottery wheel will help you shape the clay with precision.
- Trimming Tools: These tools are used to refine the shape and remove excess clay.
- Kiln: A kiln is essential for firing the mugs at high temperatures.
- Glazes: Select food-safe glazes that will give your mugs a beautiful finish.
- Brushes and Sponges: These tools are used for glaze application and cleaning.
- Sandpaper: Sandpaper of different grits will help you achieve a smooth surface.
- Apron and Protective Gear: Protect yourself with an apron, gloves, and safety goggles.
10 Steps How to Make Stoneware Mugs
Steps: 1. Preparing the Clay
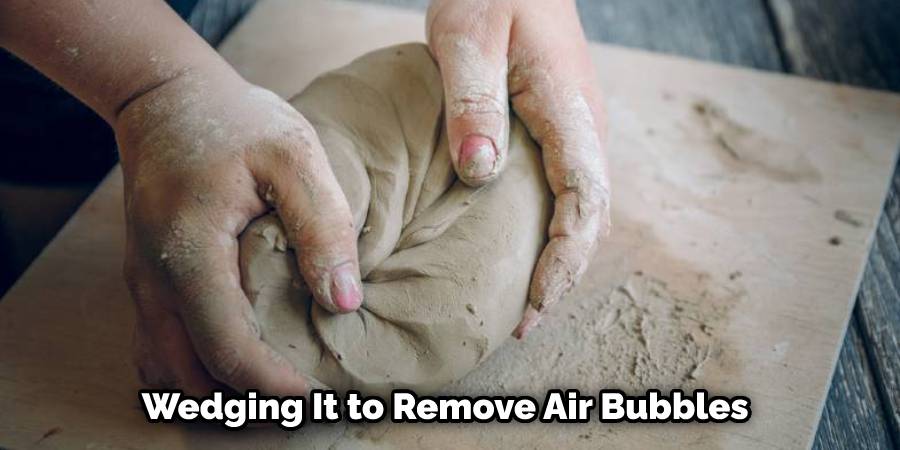
Prepare the stoneware clay by wedging it to remove air bubbles and ensure uniform consistency. Use a cutting wire to slice the clay into workable portions and cover them with plastic to prevent drying.
While you can purchase ready-made clay, it’s possible to make your own using a basic recipe. Make sure to knead the clay until it’s soft and pliable. While kneading, add a pinch of wax for plasticity.
Steps: 2. Centering and Throwing the Mug
Center the clay on the pottery wheel and start throwing the mug. Apply water to the clay’s surface, use your hands to shape it, and gradually create the desired shape and height. Pay attention to the thickness of the walls and ensure they are even.
If you need to, use a sponge or damp cloth to even out the clay. Once the desired shape is achieved, create a foot for your mug to sit on. Push the top of your mug down with a rib tool, and then cut it off from the wheel. Let the mug dry for several hours.
Steps: 3. Shaping the Mug
Using your fingers, a rib, or a wooden modeling tool, refine the shape of the mug. Create a smooth transition from the bottom to the walls and shape the handle if desired. Pay attention to details such as curves and symmetry.
Use a damp sponge often to keep the surface of the mug moist and easier to shape. Although the overall shape is a matter of personal preference, keep in mind that mugs should have an opening at the top wide enough to fill with coffee, tea, or hot chocolate.
Steps: 4. Drying and Trimming
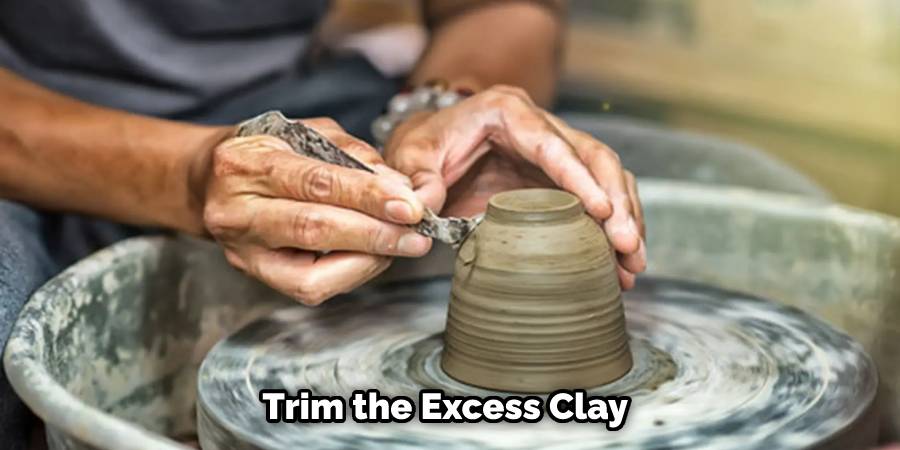
Allow the mug to dry partially on the pottery wheel, and then remove it carefully. Trim the excess clay from the base and refine the foot of the mug using trimming tools. Smooth the edges for a clean finish. If you want a handle, attach it now and shape it to the desired size and shape.
If you’re using a mold, allow the clay to dry until it is leather-hard, then carefully remove it from the mold. Smooth the edges and refine the shape as desired. Once you’re satisfied with the mug’s shape, let it dry completely before moving on to the next step.
Steps: 5. Adding a Handle
If you wish to add a handle to your stoneware mug, score the attachment points on the mug and the handle. Apply slip (clay mixed with water) to both surfaces and firmly attach the handle, ensuring it is securely anchored.
Once the handle is attached, use a soft cloth to press down and eliminate any air pockets. Allow the mug to dry for at least 24 hours before proceeding to the next step. Once dry, use a knife or other cutting tool to carefully carve away any excess clay surrounding the handle. Use your fingers to smooth out and blend the handle with the mug.
Steps: 6. Drying and Finishing Touches
Allow the mug to dry completely, which can take several days or more. Smooth any rough spots using a sponge or sandpaper. Add personalized touches such as carving, stamping, or texturing to enhance the mug’s aesthetics.
Finally, fire the mug in a kiln for durability and to achieve its finished look. If desired, apply a glaze before firing to create a glossy exterior. Follow the manufacturer’s instructions for firing and glazing to achieve the best results. Though time-consuming, the process of making stoneware mugs is simple and rewarding.
Steps: 7. Firing the Mug
Place the finished mug on a kiln shelf and carefully load it into the kiln. Follow the manufacturer’s instructions to program the firing cycle based on the type of stoneware clay and glazes used. Slowly raise the temperature to bisque fire the mug, then let it cool.
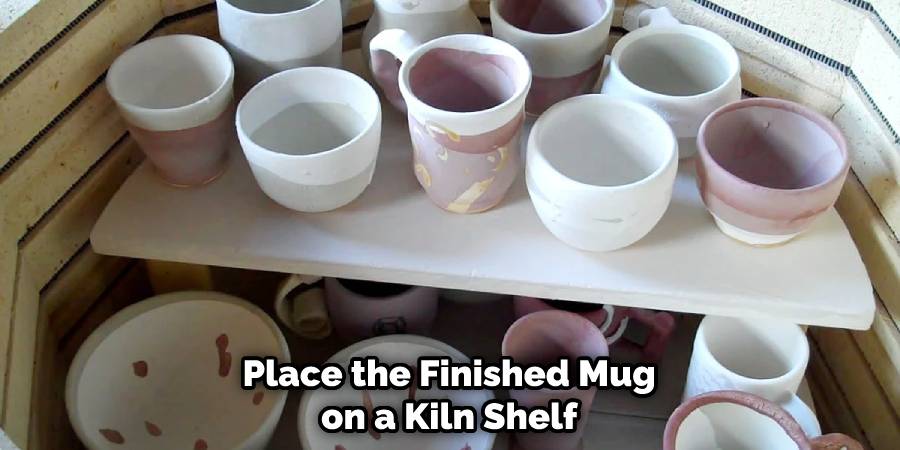
Once cooled, you can place the mug in a glaze firing cycle, raising it to temperature slowly and then cooling it. After the glaze firing is complete, unload the mug from the kiln and let it cool completely. Enjoy your handmade stoneware mug!
Steps: 8. Sanding and Polishing
After the handles have been attached, use sandpaper to smooth any rough edges or imperfections around the handle area. Pay attention to details and make sure the handle seamlessly integrates with the mug’s body.
Sanding and polishing add a touch of finesse to your stoneware mugs. To further enhance the appearance of your mugs, use a buffing wheel and buffing compound to give them a final glossy shine. While you can use a buffing wheel to create a smooth finish, it is important not to over-buff your mugs or else they may become too glossy.
Steps: 9. Glazing
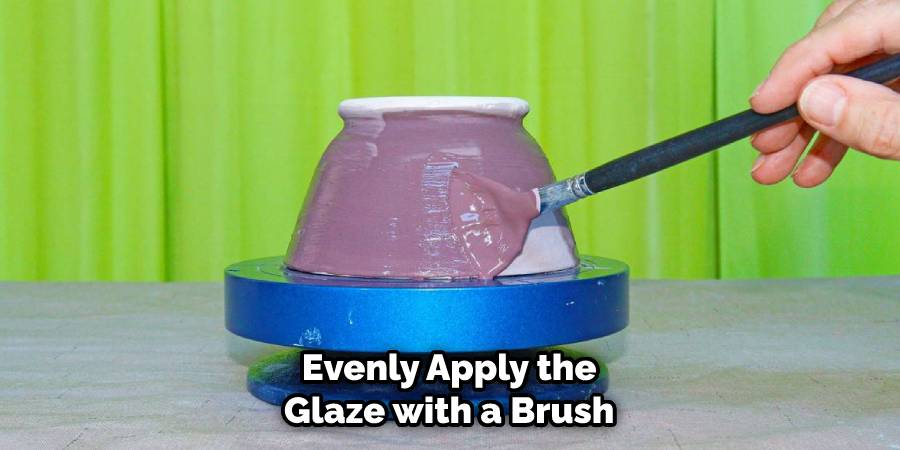
Once the bisque firing is complete, apply glazes to the mug using brushes or dipping techniques. Experiment with different glaze combinations and application methods to achieve desired colors and effects. Allow the glaze to dry before proceeding to the final firing.
To learn more, it is recommended to consult glaze manufacturers or join a ceramics class. Additionally, research the different materials used in glazes as some may have toxic elements. However, in most cases, a commercially prepared glaze is sufficient.
Steps: 10. Final Firing and Finishing
Load the glazed mug into the kiln, ensuring proper spacing between pieces. Program the kiln to fire at the appropriate temperature for the glaze used. After the firing is complete, let the kiln cool before removing the finished stoneware mugs.

If needed, use a grinder to finish the bottom of the mug. Finally, inspect each mug for imperfections and discard any pieces that do not meet the desired standards. Once the mugs have passed inspection, they are ready for use.
Things to Consider When Making Stoneware Mugs:
1. Choose a Durable and High-Quality Clay Body:
Stoneware is the ideal material for making mugs as it has excellent thermal properties, meaning it holds heat well and is more resistant to cracks or warping. To ensure your mug will last a long time, be sure to invest in a high-quality clay body that has been fired at least once in order to make it durable and stronger over time.
2. Select an Appropriate Glaze:
Glaze is what gives your mug a glossy finish and can also affect its durability. It’s important to pick the right glaze for your project, as not all glazes are suitable for use on mugs. Look for a food-safe, waterproof, and heat-resistant glaze that will hold up over time.
3. Choose the Right Kiln:
The kiln you use for firing your mug will determine the final outcome. There are two types of kilns that can be used to fire mugs, electric and gas fired. Electric kilns offer consistent temperatures, while gas-fired kilns provide more control over the firing process. Be sure to select a kiln that is appropriate for the job and your skill level.
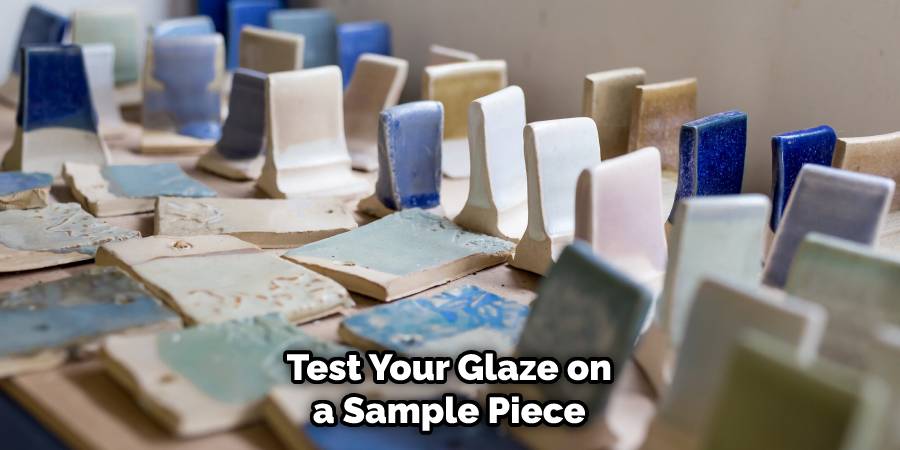
4. Test, Fire, and Repeat:
The key to achieving a great-looking mug is testing, firing, and repeating the process until you get it just right. Make sure to test your glaze on a sample piece of clay before applying it to your mug and fire it at the same temperature as your mug. This way, you can assess how it will turn out and make any necessary adjustments before firing your finished piece.
5. Invest in Quality Tools:
Having quality tools on hand is important when making stoneware mugs. Invest in a good pottery wheel, a variety of shaping tools, and other essential items such as kiln wash, brushes, sponges, knives, and scrapers. This will help make the process easier and ensure your mugs turn out great every time.
Some Common Mistakes to Avoid When Making Stoneware Mugs:
1. Improperly Firing the Mugs:
Applying too much heat or not enough heat will cause imperfections in the glazed surface. Be sure to use a kiln thermometer to ensure the temperature is accurate and consistent throughout the process.
2. Not Testing Glazes:
Before applying glaze to your mugs, it’s important to test different combinations on sample pieces of stoneware before moving forward with your mug-making project. This will help you determine the best glaze for your desired effects.
3. Skipping Refining:
Before firing, be sure to refine the edges of your mugs and any other surface details by sanding or filing. This will ensure perfect alignment when it’s time to fire the mugs.
4. Not Applying Glaze Evenly:
When applying glaze, be sure to evenly apply the glaze with a brush and use several thin coats for best results. Thick glazes can form bubbles during firing that will ruin your mug’s finish.
5. Not Cleaning Mugs Thoroughly:
Once you’ve fired your mugs, use a wet sponge or cloth to remove any dirt or dust that may have accumulated during the process. This will help keep your mug clean and free of imperfections.
By avoiding these common mistakes, you’ll be sure to create beautiful stoneware mugs with perfect glazed surfaces. Follow these tips and your mugs will be the perfect addition to any kitchen.
Conclusion
In conclusion, mastering the art of making stoneware mugs opens up a world of creativity and self-expression. Through the various stages of clay preparation, shaping, glazing, and firing, you have the opportunity to craft unique, functional pieces that reflect your personal style.
The durability and timeless appeal of stoneware makes these mugs perfect for everyday use or as thoughtful gifts for loved ones. As you gain experience and experiment with different techniques and designs, your skills will continue to evolve, allowing you to create truly one-of-a-kind pieces that bring joy to both yourself and those who use them.
So, gather your materials, embrace the tactile nature of clay, and embark on this fulfilling journey of making stoneware mugs. Hopefully, this article gave you some helpful tips about how to make stoneware mugs successfully, so now that you have the proper knowledge on how to get the job done, why not give it a try today?
FAQs
How long does it take to make a stoneware mug?
The time required to make a stoneware mug varies depending on factors such as experience level, drying and firing times, and complexity of the design. On average, it can take several hours spread over several days or weeks to complete a single mug.
Can I use any type of clay for making stoneware mugs?
It’s best to use high-quality stoneware clay specifically formulated for pottery and ceramics. This type of clay has the necessary properties to withstand high firing temperatures and create durable mugs.
Can I microwave stoneware mugs?
Yes, stoneware mugs are microwave-safe. However, it’s always a good idea to check the specific glazes used to ensure they are labeled as food-safe and microwave-safe.
Can I sell the stoneware mugs I make?
Absolutely! Once you have honed your skills and are confident in the quality of your stoneware mugs, you can explore selling them. Consider setting up an online shop, participating in local craft fairs, or approaching local boutiques and cafes.
Are stoneware mugs dishwasher-safe?
Yes, stoneware mugs are generally dishwasher-safe. However, it’s recommended to hand wash them to preserve the glaze and extend the lifespan of your handmade creations.


