Creating intricate and personalized pottery often involves mastering various techniques, and making sprig molds is a valuable skill for adding detailed embellishments to your clay creations. Sprig molds, or press molds, are used to replicate small, decorative elements that can be attached to the surface of your pottery, enhancing its texture and visual appeal.
In this detailed guide, we’ll delve into the step-by-step process of how to make sprig molds for pottery, covering essential materials, techniques, and considerations. Whether you’re a novice potter or an experienced artist, understanding the art of sprig mold creation opens up a world of possibilities for expressing your creativity in clay. From designing your molds to properly casting and attaching the sprigs, this tutorial will provide you with the knowledge and confidence to elevate your pottery to new levels of craftsmanship.
Table of Contents
Importance of Sprig Molds in Pottery
Pottery is an art form that has been around for thousands of years. It involves shaping and firing clay to create different objects such as bowls, vases, and figurines. While the techniques and styles may vary across different cultures and time periods, one thing remains constant – the use of molds.
Molds are essential tools in pottery making, allowing artists to replicate intricate designs and create detailed textures on their pieces. Among the many types of molds used in pottery, sprig molds are particularly useful and versatile.
What are Sprig Molds?
Sprigs are small decorative elements made from clay or other materials that can be attached to a larger piece of pottery. Sprigging is the process of attaching these elements to a clay surface before firing. To make the sprigs, a mold is needed.
A sprig mold is essentially a small plaster or plastic form that has a negative impression of the desired design. Clay or slip (liquid clay) can be pressed into these molds to create multiple copies of the same design. Once dry, the sprigs are then attached to the pottery piece using a slip and fired together in a kiln.
9 Steps How to Make Sprig Molds for Pottery
1. Gather Materials:
The first step in creating a sprig mold for pottery is to gather the materials needed. This includes clay, a rolling pin, a knife or other cutting tool, and a sprig or stamp of your choice. You will also need a flat surface to work on and some water to moisten the clay.
2. Roll Out Clay:
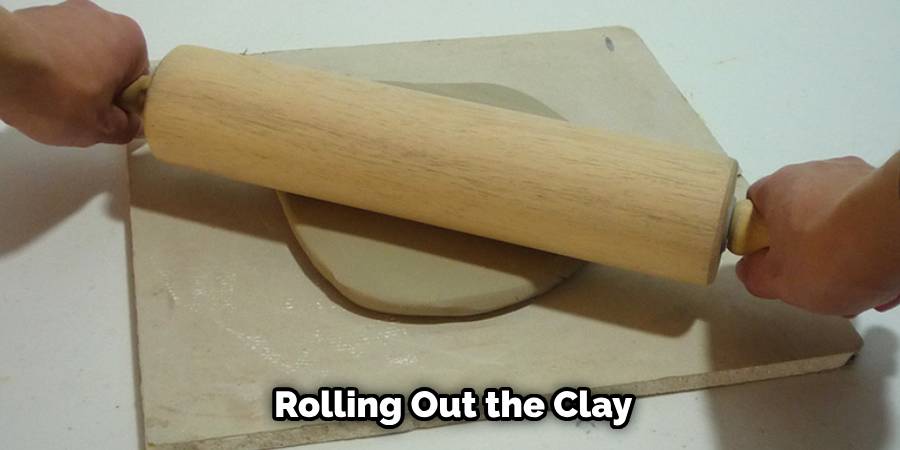
Once you have all of your materials, you can begin by rolling out the clay into a thin sheet. You can use either a rolling pin or your hands to do this. Make sure that the sheet is even and not too thick, as it will be easier to work with when creating the mold.
3. Cut Out Shape:
Using your knife or other cutting tool, cut out the shape of your sprig or stamp from the clay sheet. Make sure that it is large enough to cover the area where you want to make your mold but not so large that it won’t fit onto the piece of pottery you are working with.
4. Place Spig On Clay Sheet:
Once you have cut out your shape, place it on top of the clay sheet and press down firmly so that it adheres to the surface evenly. If necessary, add some water to help it stick better.
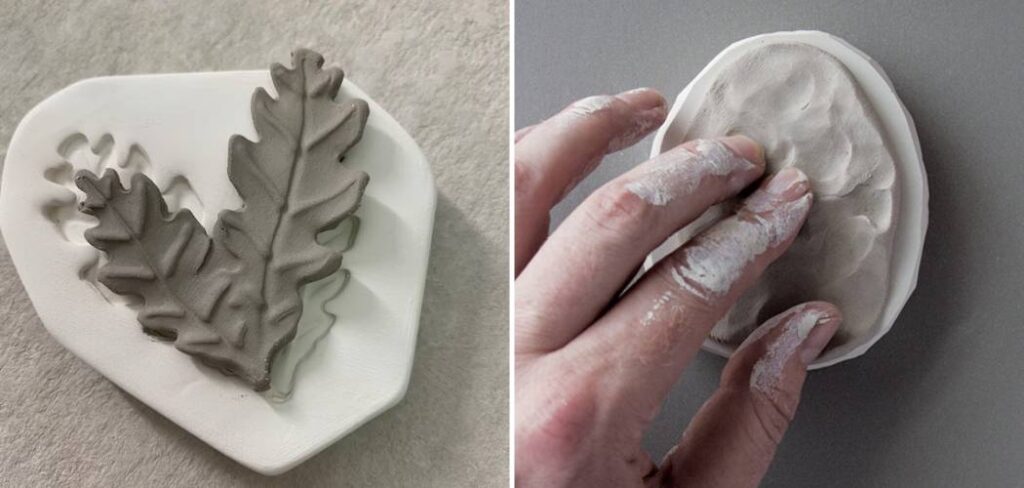
5. Create Impressions:
Now it’s time to create impressions in the clay with your sprig or stamp by pressing down firmly on each side of it while rotating in small circles with your fingers or thumbs until an impression has been made in all areas of the shape.
6. Remove the Spig From the Clay Sheet:
Once you have created enough impressions in all areas of your shape, carefully remove it from the clay sheet by lifting up one side and then slowly peeling away any excess clay around its edges until it is free from the surface completely.
7. Trim Excess Clay:
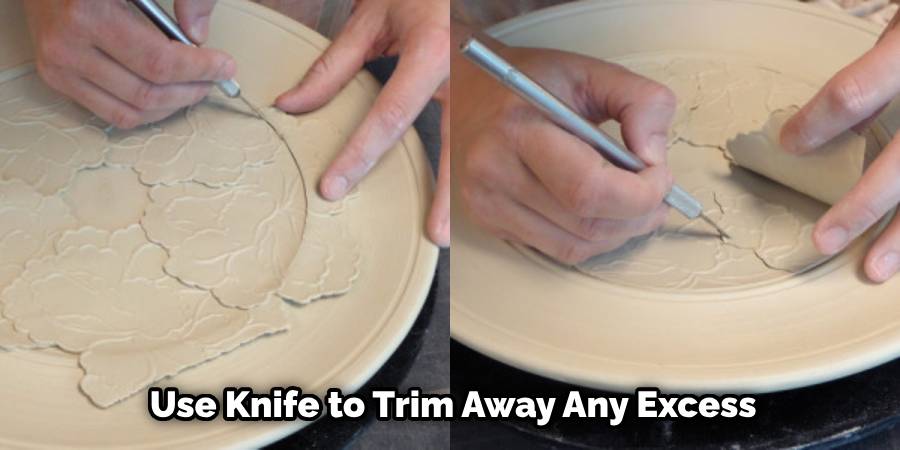
Use your knife or other cutting tool to trim away any excess clay from around the edges of your sprig mold so that its size matches what you need for pottery-making purposes more accurately.
8 Dry Mold:
Allow your sprig mold to dry completely before using it for pottery-making purposes; this could take several hours depending on how thickly you rolled out the clay initially and how much moisture was added during the creation process.
9 Fire Mold :
Before using your sprig mold for pottery-making purposes, fire it in an oven at approximately 1200 degrees Fahrenheit for about 30 minutes; this will ensure that its form holds up properly during use.
Modifying the Design if Necessary
Sometimes, even after creating a sprig mold for pottery, you may find that the design is not exactly what you had envisioned. In such cases, there are several options to modify the design and create a new mold.
One option is to carve or add details directly onto the clay surface of your existing mold. This can be done using carving tools or by pressing additional clay pieces onto the surface. This method allows you to make small changes or additions without having to create an entirely new mold.
Another option is to use silicone putty to make adjustments to the existing mold. Silicone putty can be molded and pressed directly on top of your existing sprig mold, allowing you to add or subtract details as needed. Once the putty has hardened, you can remove it and use it as a template to create a new mold.
If the changes needed are more drastic, you may need to start from scratch and create a new sprig mold altogether. This can be done by using the same techniques discussed earlier – shaping clay into your desired design, adding details with carving tools or additional clay pieces, and creating a mold using plaster or silicone.
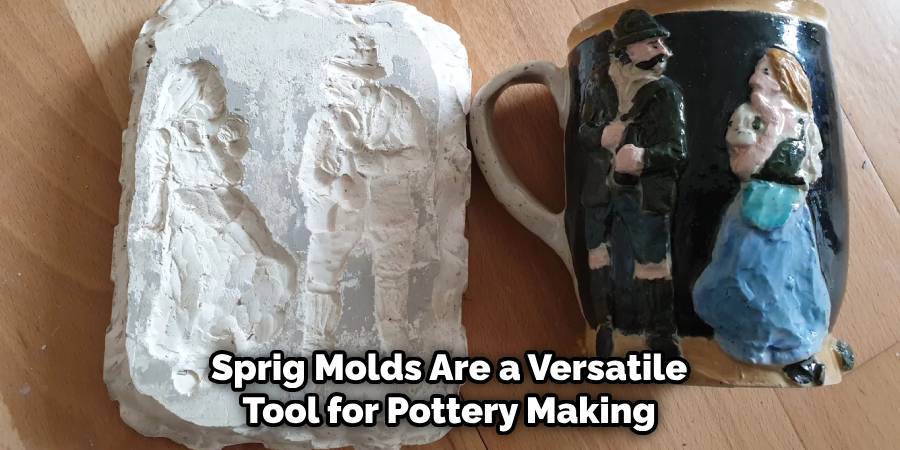
Creating Variations for Versatility
Sprig molds are a versatile tool for pottery making. Not only do they allow you to replicate intricate designs, but with a bit of creativity, they can also be used to make variations on your original design. By adding subtle or bold changes to your sprig mold, you can create unique pieces that will stand out in any collection. In this section, we will explore some ways to make variations on your sprig molds for even more versatility in your pottery.
Adding Texture
One way to create variations with your sprig molds is by adding texture to the surface of your clay. This can be achieved by pressing different materials onto the surface of your mold before pressing it onto the clay. Some popular options include lace, fabric, leaves, and even bubble wrap. The texture will transfer onto your clay, giving your sprig mold design an added dimension and visual interest.
Layering Designs
Another way to add variation to your sprig molds is by layering different designs on top of each other. This can be done by using multiple sprig molds or by cutting and rearranging pieces from the same mold. By layering designs, you can create a more complex and unique look that will make your pottery stand out.
Mixing and Matching
Don’t be afraid to mix and match different sprig molds together. This is a great way to create new designs and experiment with different shapes and patterns. Try combining elements from nature, geometric shapes, or even abstract designs for a truly one-of-a-kind piece.
Altering the Shape
Another way to create variations is by altering the shape of your sprig molds. This can be done by cutting, bending, or reshaping the mold before pressing it onto the clay. By changing the shape of your mold, you can create different silhouettes and forms that will add interest and diversity to your pottery collection.
Conclusion
In conclusion, sprig molds enable potters to create captivating and unique finishes to their creations. No matter what the project, there is sure to be a sprig mold that will bring your masterpiece to life. The selection of sprigs available can provide an immense amount of creative possibilities, ensuring every piece is as beautiful as you envision it.
With patience and practice, anyone can learn how to make sprig molds for pottery in order to adorn their projects with the perfect finishing touch. So try now and see for yourself just what timeless beauty you can create by learning how to make sprig molds. In doing so, you will unlock unlimited potential for individuality and style—take a leap into the world of wheel-thrown pottery and get creative!


