If you’re interested in making traditional Mimbres pottery, you’ve come to the right place. From pre-historic designs to vibrant colors and patterns, these ancient vessels have enchanted modern-day hobbyists for decades. Not only is creating your own pottery a labor of love that can bring hours of joy and satisfaction — it’s also an art form with deep historical significance.
In this blog post, we’ll provide detailed step-by-step instructions on how to make Mimbres pottery at home, as well as cover some key cultural context about the origin of this distinctive tradition so you can really appreciate it!
Table of Contents
What Is a Mimbres Pottery?
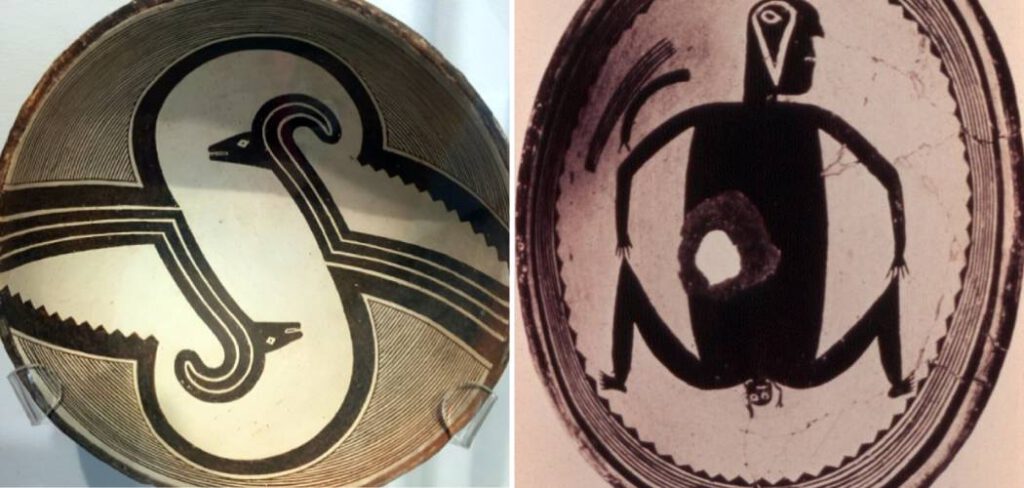
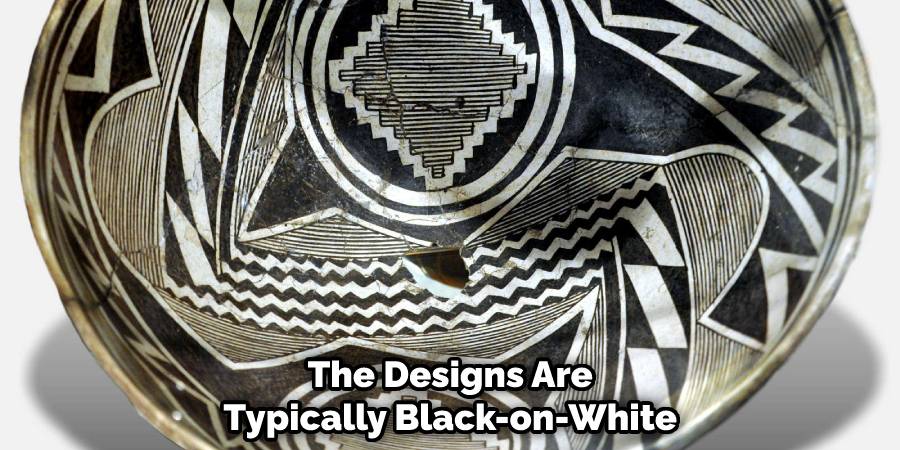
Mimbres pottery is a type of pre-Columbian pottery made by people of the Mimbres culture in what is now southwest New Mexico, USA. The pottery was made between about 1000 and 1130 AD, during a period known as the Mimbres Classic Period. This type of pottery is characterized by black-on-white designs on polished gray or brown surfaces, often featuring geometric shapes and animal motifs.
These designs are often arranged in panels that depict hunting scenes, life events such as marriage or death, and religious ceremonies. In addition to this painted decoration, many pieces feature incised lines, holes, and stippled surfaces that are unique to Mimbres pots.
The iconic black-on-white designs of Mimbres pottery have become popular collector’s items, and reproductions are widely available. For example, the Arizona State Museum in Tucson offers a selection of reproduction Mimbres pieces for sale. Additionally, museums such as the New Mexico History Museum in Santa Fe feature exhibits of authentic Mimbres pottery for visitors to admire.
What Is Mimbres Pottery Made of?
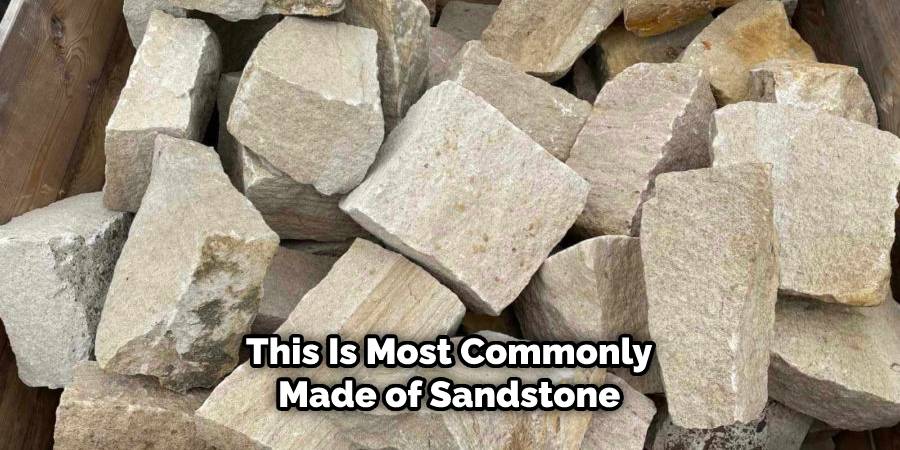
Mimbres pottery is most commonly made of clay and other local materials, such as sandstone. The clay used to make Mimbres pottery is often sourced from the nearby Gila River Valley in New Mexico. Using locally-sourced materials was important to the Mimbres people, since many of their decorations used natural elements that could only be found in specific areas.
The process of creating Mimbres pots begins with gathering the raw material from its source. This includes collecting clay from the riverbank, grinding different kinds of rocks for tempering and sifting it for consistency, and collecting plants for coloring pigments.
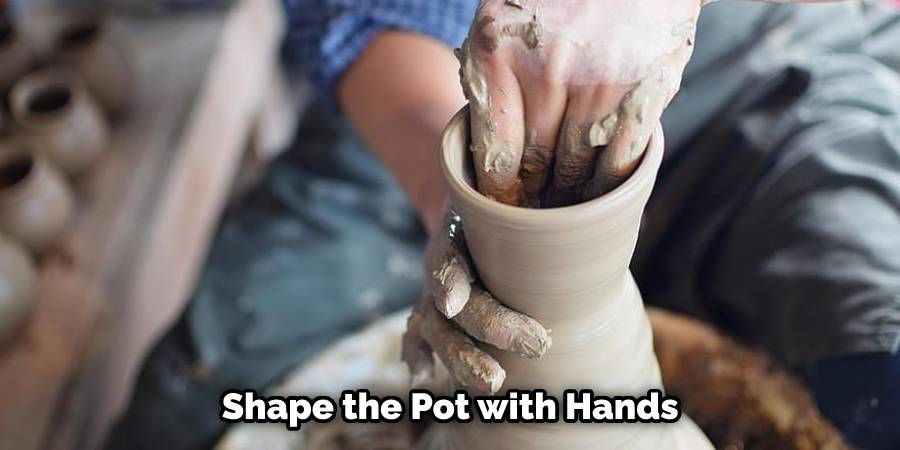
The clay is then formed into a rough shape before being placed on a spinning turntable and expertly shaped by hand. This is the most time-consuming part of the process, since it requires a great deal of skill to create Mimbres designs and ensure that they are symmetrical.
10 Methods How to Make Mimbres Pottery
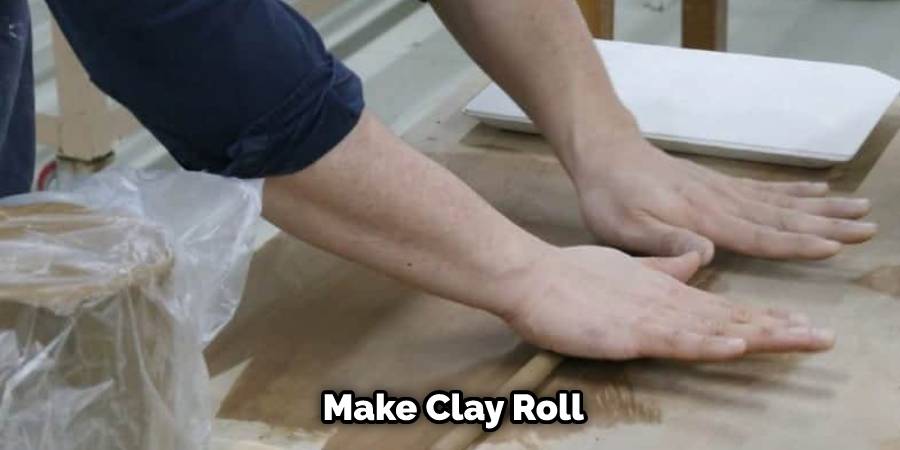
1. Gathering and Preparing Clay
The first step in making Mimbres pottery is to gather clay from a local source. The clay should be cleaned of debris and mixed with water to create a malleable clay mixture. The clay is then kneaded by hand to remove air pockets and improve its consistency.
If the clay is too dry, water can be added to make it more pliable. However, if the clay is too wet, more dry clay should be added to balance the consistency.
2. Shaping the Pot
Once the clay has been prepared, the potter will use traditional techniques to shape the pot. The potter will typically use a coiling technique, where long, thin ropes of clay are coiled on top of each other and smoothed together with a paddle and anvil.
The potter will shape the pot with their hands and may use tools to add decorative elements. As the potter shapes the pot, they will use their finger to create an indentation on the surface of the clay. This is an important element of Mimbres pottery and is used to create decorative patterns. Once the desired shape has been achieved, the pot is left to dry in the sun.
3. Drying the Pot
After the pot has been shaped, it must be dried slowly to prevent cracking. The potter will typically leave the pot to dry in a shaded area for several days or weeks, depending on the size of the pot. During this time, the pot may be smoothed with a scraper to remove any rough spots.
While the pot is drying, it should be rotated often to ensure an even and thorough drying process. While the pot is drying, the potter can prepare paints and begin to design decorations.
4. Polishing the Pot
Once the pot is dry, the potter will use a smooth stone or piece of bone to polish the surface of the pot. This process gives the pot a smooth, shiny surface that is ideal for intricate designs that will be applied later.
The pot is then set aside once more to allow the surface to dry. To ensure that the pot has a consistent, even finish, the polishing process is repeated up to several times. If the potter is satisfied with the result, they can move on to the next step. However, if there are any imperfections or areas that need more work, the polishing process should be done again.
5. Creating the Design
The designs on Mimbres pottery are typically black-on-white, with intricate patterns depicting animals, people, and geometric shapes. The designs are created by painting a thin layer of black slip onto the surface of the pot and then using a sharp tool to scratch away the slip to create the desired design.
The result is a highly detailed black-and-white design on the pot. The Mimbres people had unique methods for creating their designs. They used a number of tools to create intricate patterns, including brushes, feather quills, and sharpened sticks.
6. Firing the Pot
After the design has been applied, the pot must be fired to make it durable and waterproof. Mimbres pottery is typically fired at a low temperature, around 800-900 degrees Celsius. The potter will use a traditional outdoor firing method, such as a bonfire or pit firing, to heat the pot slowly and evenly.
7. Decorating the Rim
The rim of Mimbres pottery is typically decorated with a series of small dots, which are created by using a pointed tool to poke holes in the clay. These dots are thought to represent the stars in the night sky.
To create this decoration, the potter will press a pointed tool into the clay, turning it slightly to each side to create an indentation and then repeating the process in a circular pattern. The dots can be arranged in different patterns, such as spirals or diamonds, depending on the potter’s preference.
8. Adding Handles
Many Mimbres pottery pieces feature handles, which are added to the pot using the same coiling technique as the body of the pot. The handles are typically decorated with intricate designs that complement the design on the rest of the pot.
To make a handle, begin by rolling out a coil of clay that will fit along the circumference of the pot. Attach it to the pot and press it into the clay with your fingers. Use a small, sharp tool to carve designs into the handle.
9. Adding a Base

Some Mimbres pottery pieces feature a small base or foot, which is added to the bottom of the pot using the same coiling technique as the body of the pot. The base helps to stabilize the pot and prevent it from tipping over.
To make the base, start by rolling a soft ball of clay and flatten it into a disc that is slightly larger than the diameter of the pot. Place the disc onto a flat surface, and then press into the center so that it forms an indentation.
10. Finishing Touches
After the pot has been fired and cooled, the potter may add additional decorative touches, such as a layer of clear glaze to protect the design or a woven or leather strap for carrying the pot. Finishing off the pot in this way adds to its beauty and makes it more durable.
It is also a good opportunity to add any personal touches that the potter would like. Once the finishing touches are complete, the Mimbres pottery is ready to be admired and used.
What Are Some Facts about Mimbres Pottery?
Mimbres pottery was made using the coil-and-scrape method of construction. The potter would start with a lump of clay and roll it into a rope, then wrap that rope around itself to create the shape of the vessel. The potter would then scrape and smooth the surface until it was even and ready for painting.
The designs on Mimbres pottery were created with a brush made from yucca fibers or animal hair dipped in mineral pigments derived from plants, mushrooms, insects, minerals, or soil. They often featured birds, animals, and plants that were important to the Mimbres people. Many of these designs symbolize aspects of their culture, such as fertility or death.
Mimbres pottery was used for a variety of purposes, including storing and cooking food, serving water or other beverages, and ritual offerings. Today, it is highly sought after by collectors around the world for its beauty, craftsmanship, and history.
Conclusion:
The art of Mimbres pottery demonstrates the richness and variety of Puebloan culture. From its humble beginnings in the deserts of New Mexico to its present-day presence in museums and galleries, this craft is an exciting example of how we can look to the past for inspiration and innovation.
If you’re ready to try something new and unique, it’s time to grab some clay, research Mimbres imagery, and start creating! We hope you found our guide on How to Make Mimbres Pottery useful; now it’s your turn to make some beautiful works of your own.


