Are you eager to explore the potential of hybridization with animals? Have you ever been curious about how ceramic restoration techniques could be used to create one-of-a-kind, never before seen creatures? If so, then this post is for you! Here, we will introduce an inventive approach to creating unique animal hybrids through a combination of sculpting and traditional ceramics restoration methods.
We’ll take a look at some fascinating ideas on how to make hybrid animals using ceramics restoration techniques, as well as investigate the colorful history behind using clay in crafting outlandish animals. Read on to discover all that lies ahead if you want to make hybrid animals using ceramic restoration techniques!
Table of Contents
How Hybrids Animals Made?
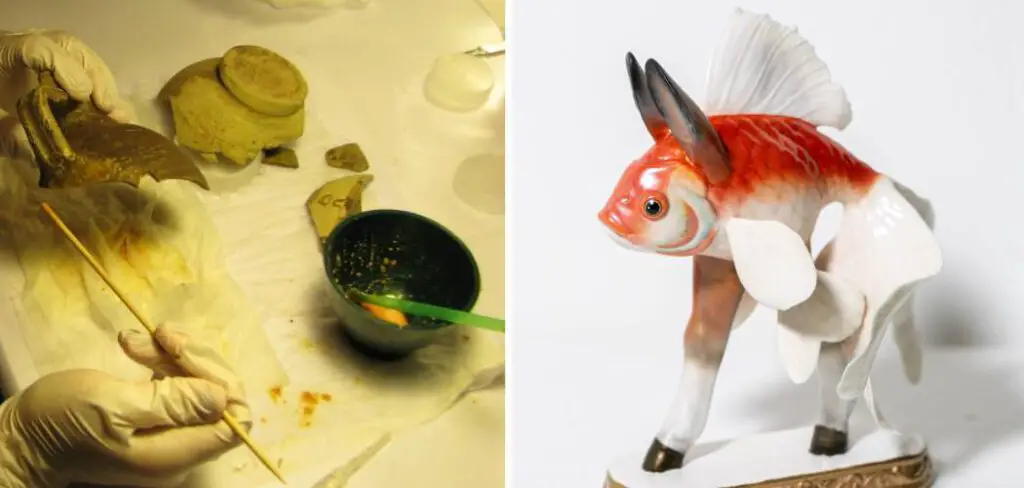
Hybrid animals are created using a combination of ceramic restoration techniques. First, the artist will create a 3D model of the hybrid animal using software such as ZBrush or Mudbox. The model is then printed out in full color, with each part representing a different ceramic material.
The next step in creating the hybrid animal is to shape the pieces of ceramics into the correct shape and size. This can be done using hand tools such as a potter’s wheel or with more modern technologies, like 3D printing. The ceramics are then fired in an oven at high temperatures to further harden them and make them ready for assembly.
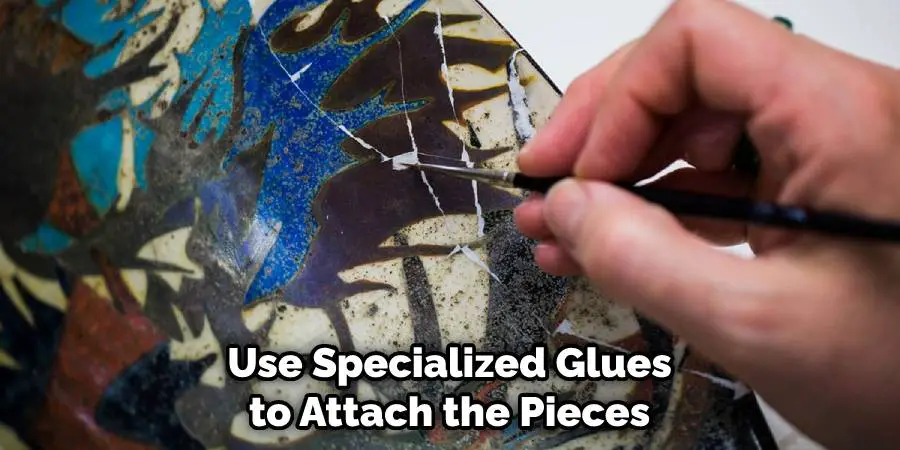
Once all of the pieces have been shaped and fired, they are ready for assembly. The artist will use specialized glues to attach all of the pieces together and form the hybrid animal. After that, any additional detail work is added to bring out features such as fur textures or facial features.
Finally, the hybrid animal is finished by being given a protective coating and then placed in a custom-made display. This will help to protect the hybrid animal from damage over time and show it off in its best light.
Creating hybrid animals using ceramic restoration techniques is a unique and creative way of mixing different elements to create something new and exciting. With enough practice, anyone can learn how to make these amazing creatures from their own home. Thanks to technology, the possibilities are now endless!
10 Methods How to Make Hybrid Animals Using Ceramics Restoration Techniques
1. Prepare the Clay:
Before beginning your hybrid animal project, it is important that you have the proper clay and tools. Depending on your design, you may need different types of clay. For example, if you plan to create a hybrid creature with an underlying structure, you will need a more supportive type of clay.
If you would like to add more detailed features, then a softer type of clay might be better. In any case, make sure that all the tools necessary for creating details are available before getting started.
2. Sketch Out Your Design:
Take some time to prepare a rough sketch of what you want your hybrid animal to look like in order to make sure all the pieces fit together properly before starting your project. It can help to draw out each section separately so that they can be modeled individually and then connected together later as one cohesive creation.
Make sure that you are aware of the outside shape and size of your hybrid animal, as well as its internal anatomy. If you need assistance with sketching, there are plenty of tutorials online that can help you create the perfect design.
3. Model Each Section Individually:
To ensure accuracy when crafting each part of your hybrid animal sculpture, start by modeling individual sections in clay until all parts are complete and ready for assembly. Make sure that the finished pieces have enough strength to support any additional elements or weight added during assembly.
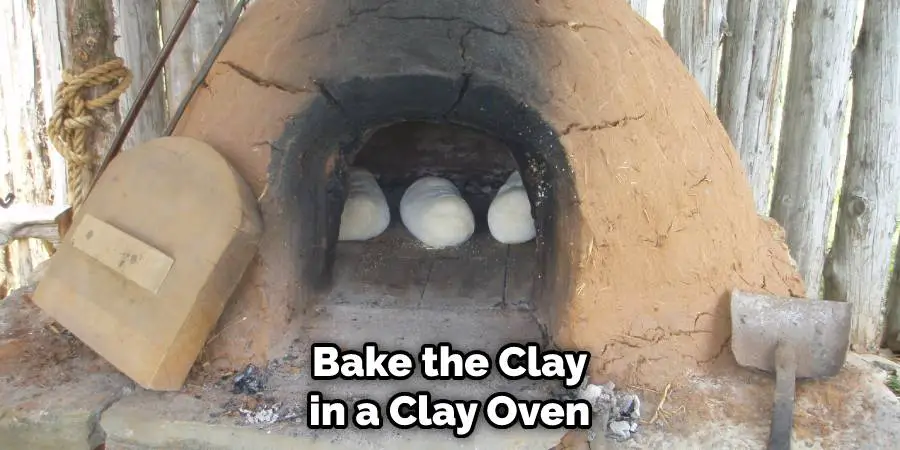
For example, if your hybrid sculpture involves a bird’s head and tail on the body of a lion, you’ll need to make sure that the neck and tail can support their own weight as well as the weight of other components. Once you’ve finished modeling each part, bake the clay in an oven to harden it and prepare it for assembly.
4. Assemble All Pieces Together:
Once each section has been fashioned and finalized, assemble them into one complete sculpture using techniques like pinching and pressing or gluing them together as needed for stability. Make sure that all pieces fit perfectly before hardening or firing the sculpture in its entirety.
This will ensure that the proportions are correct and there are no visible seams. Although the process of assembling the pieces together can be time-consuming, it is crucial to the overall look and function of the final product.
Make sure to use a spongy material between the sections to create a smooth transition, and make sure that none of the pieces are too tight or won’t fit together. Finally, complete the task by ensuring that all sections are securely attached to each other. With these steps in mind, you can create a beautiful hybrid ceramic animal using restoration techniques.
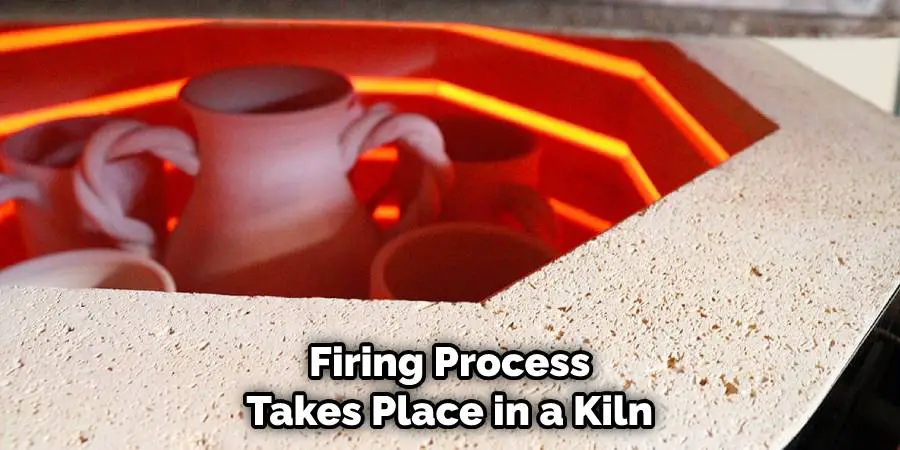
5. Fire The Sculpture:
When the sculpture is finished, and all components are secure, it’s time to fire it in order for it to solidify its shape and gain strength against further wear and tear over time. The temperature required will depend on the type of clay used but usually goes up between 950-1250°C (1742-2282°F).
In order to stay safe, it is recommended that the firing process takes place in a kiln. This can be done professionally or at home using an electric kiln. Once the firing is complete, you can begin to apply glaze, paint, or any other finishing touches needed in order to give your sculpture its final look.
6. Add Color During Glazing:
After firing has been completed and the sculpture cools down, the glaze can be applied in order to seal off any gaps or cracks between sections as well as give it a glossy finish suitable for paintings or decorations afterward if desired.
Glazing also helps protect against dust or dirt accumulation as well as water damage since ceramic objects can easily break when exposed to long periods of moisture exposure without this protective barrier.
Color can be added to the glaze by mixing certain oxides and also be used for detailing as well. Once the desired color has been achieved, it can be sprayed or brushed onto the sculpture’s surface until the desired effect is achieved. Wait for it to dry and fire again if necessary depending on the glaze used.
7. Paint Details On The Animal:
Using acrylic paint or other non-toxic pigments, begin adding details such as eyes, stripes, feathers, fur, etc., making sure not to cover up too much surface area with added detail so that the unique design still shines through clearly. Allow enough time for paint layers to dry between applications.
8. Install Accessories:
After the painting is done, feel free to accessorize your masterpiece with horns, shells, beads, stones, etc., securing them into place using either glue or wire, depending on their size. Make sure not to overdo it, though – small additions are best so that they don’t take away from the main structure of your piece while still adding interest.
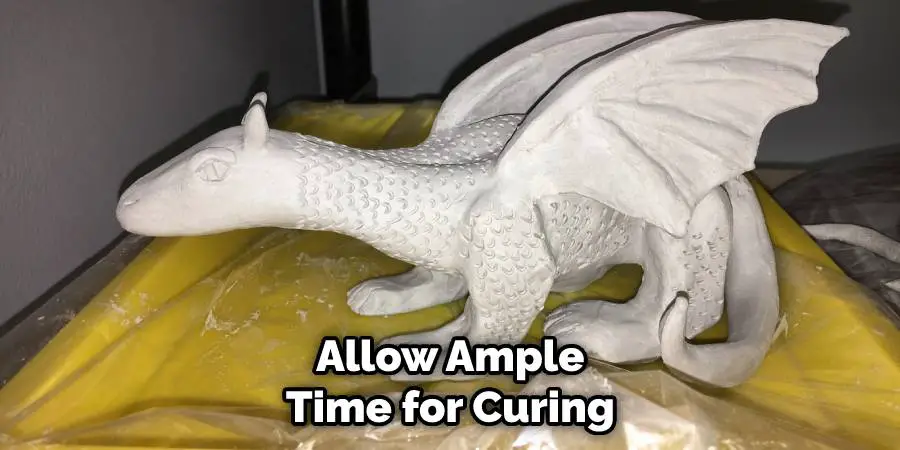
9. Allow Time To Cure:
Finally, allow ample time for curing (upwards of two weeks) after everything has been put together so that materials get accustomed evenly throughout the entire structure. If you’re using epoxy or plaster, these materials must be allowed to dry before they can be fired and glazed.
This will also help prevent any cracking or breakage of the ceramic structure as it is put into the kiln. Additionally, if the project requires painting, avoid using acrylic paints as they may burn off during the firing process.
10. Finishing Touches:
Once the curing is complete, check for any last-minute repairs needed, such as filling in any small cracks made during assembly or dealing with uneven surfaces from installation accessories.
Sanding lightly may be necessary at times, but careful attention must be paid not to damage painted designs in the process. Finally, do a final inspection ensuring everything looks presentable on both sides before displaying proudly!
What Is Ceramic Restoration Technique?
The ceramic restoration technique is a method of reconstructing broken or damaged objects made from ceramic materials. This technique combines traditional methods such as carving, molding, and glazing with modern technology to recreate an object in its original form.
The process involves the removal of non-original material, filling in any empty spaces with new clay, then reassembling and glazing the object. This method allows for the precise re-creation of an object, even if only a small portion remains intact. By using this technique, ceramic objects can be restored to their original beauty without sacrificing any of the artistic elements.
Conclusion:
If you’re interested in learning more about how to make hybrid animals using ceramics restoration techniques, be sure to check out our course on the topic. In this course, you’ll learn all about the different tools and materials you need to get started, as well as how to create your own unique designs.
Whether you want to make a replica of your favorite pet or create an entirely new creature, we’ll show you everything you need to know. So what are you waiting for? Sign up today and start making ceramic hybrids!


