If you’re someone who loves to create, you may be familiar with air-dry clay, a versatile material that doesn’t require a kiln to harden. But have you ever heard of cold porcelain clay? This type of clay has gained popularity in recent years due to its porcelain-like finish and durability, making it a great alternative to traditional porcelain for crafting and sculpting.
The best part is that you can easily make cold porcelain clay at home with just a few simple ingredients. In this article, we’ll walk you through the step-by-step process of how to make cold porcelain clay at home, so you can make your own cold porcelain clay and unleash your creativity.
Whether you’re a seasoned crafter or a beginner, making your own clay can be a fun and rewarding experience, and with cold porcelain, the possibilities are endless. So, let’s get started and learn to make cold porcelain clay at home!
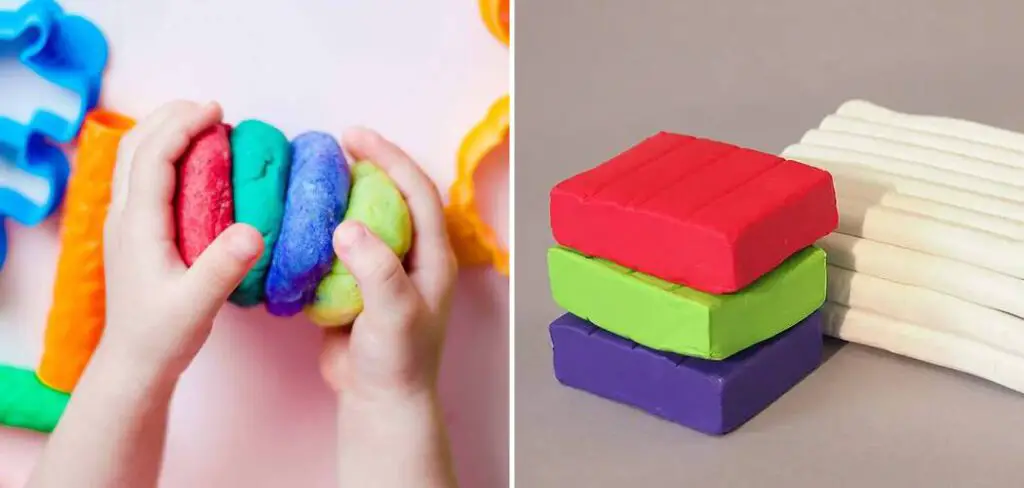
Table of Contents
What is Cold Porcelain Clay?
Cold porcelain clay is a type of air-dry clay made from a mixture of cornstarch, white glue, and some type of oil, such as baby oil or vegetable oil. It gets its name because it can be shaped and molded like traditional porcelain clay but does not require firing in a kiln to harden. Instead, it dries through exposure to air, which can take several hours to a few days, depending on the thickness of the clay and the humidity of the environment.
Materials Needed
Before you get started, you’ll need to gather a few materials. Here’s what you’ll need:
- 1 cup cornstarch
- 1 cup white glue
- 1 tablespoon white vinegar
- 1 tablespoon baby oil
- Mixing bowl
- Spoon or spatula
- Food coloring (optional)
10 Steps How to Make Cold Porcelain Clay at Home
Now that you have your materials, it’s time to get started on making your cold porcelain clay. Follow these steps:
Step 1: Gather the Ingredients
You will need 1 cup of cornstarch, 2/3 cup white glue (such as Elmer’s), 1 teaspoon of vegetable oil, and 1/4 cup of water. When you have all of these ingredients, you are ready to get started. While it is possible to make cold porcelain clay without vegetable oil, it will result in a less elastic, more brittle clay.
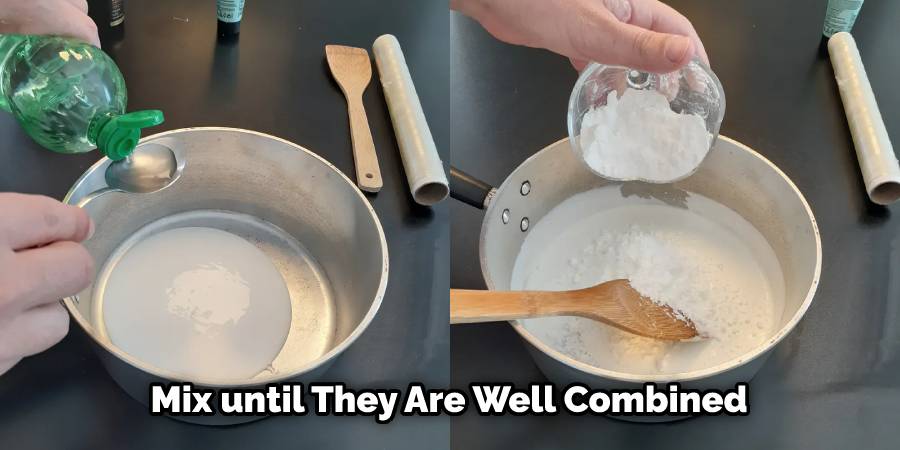
Step 2: Mix the Ingredients
In a mixing bowl, combine the cornstarch and white glue. Mix until the ingredients are well combined. When they are well mixed, it will have a dough-like consistency. You may also add food coloring at this time to make the cold porcelain clay a different color.
Next, add warm water to the mixture and mix until the desired consistency is reached. The amount of water needed may vary depending on how thick or thin you want the clay to be.
Step 3: Add the Vinegar
Next, add the white vinegar to the mixture. The vinegar helps to keep the clay from cracking as it dries. Mix the vinegar into the clay until it is well combined. This will create an even more malleable helping of clay that is perfect for sculpting.
Be sure to add the vinegar slowly and mix as you go. When you are done, the clay should be a uniform color. However, if it is still a bit crumbly, add a bit more vinegar. Make sure not to add too much, or it won’t dry properly.
Step 4: Add the Glycerin
Finally, add the glycerin to the clay mixture. Glycerin helps to keep the clay pliable and soft, even after it has dried. Mix the glycerin into the clay until it is well combined. Be sure not to add too much, as this can cause the clay to become too soft.
Allow the mixture to sit for 5-10 minutes before using, to allow the glycerin to properly mix with the clay. When the clay is ready to use, knead it until it is smooth and pliable.
Step 5: Knead the Clay
Once all of the ingredients are mixed together, turn the clay onto a clean work surface. Knead the clay for several minutes until it is smooth and pliable. The longer you knead the clay, the stronger it will be and the less likely it is to crack when dry.
You may want to put some cornstarch on your work surface if the clay is too sticky. If the clay is too dry, you can add a few drops of water to moisten it. Once the clay is kneaded, you are ready to start using it for your projects.
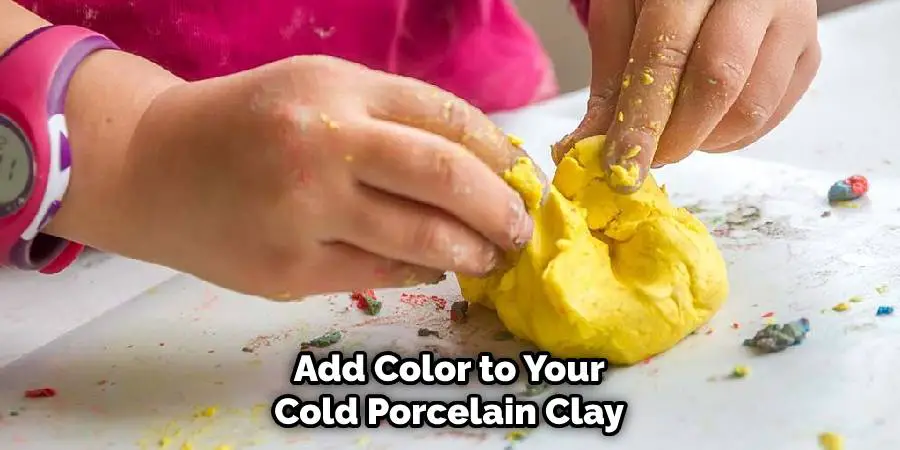
Step 6: Color the Clay (Optional)
If you want to add color to your cold porcelain clay, now is the time to do it. You can add food coloring or acrylic paint to the clay and knead it in until it is evenly distributed. Start with just a few drops and add more if needed. Be sure to wear gloves when handling colored clay, so you don’t stain your hands.
Step 7: Shape the Clay
Once your clay is colored (if desired), you can start shaping it. Roll it out into flat sheets, cut it into shapes, or mold it into 3D objects. If you’re having trouble making your desired shape, wet your hands or work surface before handling the clay.
This will help to give it more pliability. If the clay is too hard to work with, you may have added too much glue or cornstarch. Try adding a little water to make the dough softer.
Step 8: Let the Clay Dry
Once you have shaped your clay, you’ll need to let it dry. Cold porcelain clay can take up to 48 hours to dry completely, depending on the thickness of the clay and the humidity in your home.
To help speed up the process, you can place your clay in a warm, dry area and use a fan to circulate air over it. After the clay is dry, check it for cracks or other imperfections. If desired, you can lightly sand away any irregularities before you paint your masterpiece!
Step 9: Sand and Smooth the Clay (Optional)
If you want a smoother finish on your cold porcelain clay, you can sand it once it is dry. Use fine-grit sandpaper to gently sand the surface of the clay until it is smooth.
This will help to create a glossy finish and even out any bumps or irregularities in the clay. Be sure to sand lightly, as too much pressure can damage the clay.
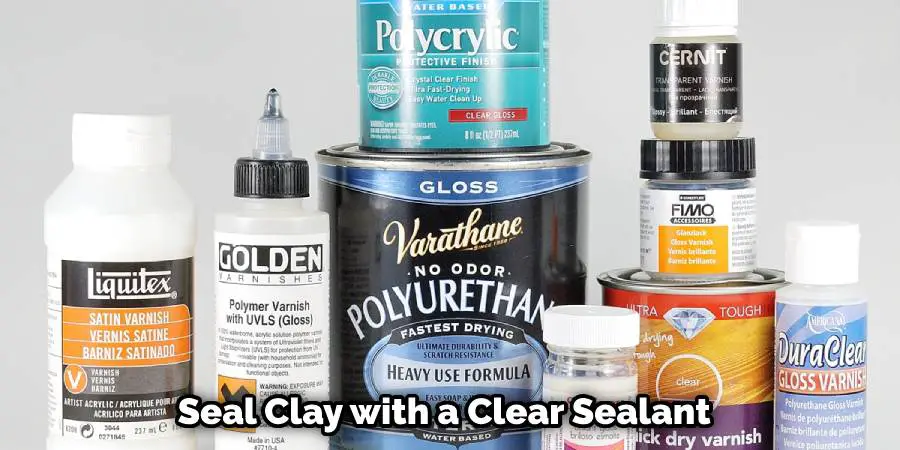
Step 10: Seal the Clay (Optional)
If you want to protect your cold porcelain clay from moisture, you can seal it with a clear sealant. Spray the sealant evenly over the surface of the clay and let it dry completely before handling.
This step is optional but can help to protect the clay and seal in any colors that you may have added. Once sealed, your cold porcelain clay is ready to be molded into whatever you desire! Enjoy your new craft material and get creative!
Tips for Working with Cold Porcelain Clay
Here are a few tips to keep in mind when working with cold porcelain clay:
- If the clay starts to dry out while you’re working with it, simply add a few drops of baby oil to keep it moist.
- To make your creations more durable, you can coat them with a layer of clear varnish once they’ve dried.
- If you want a glossy finish, you can apply a layer of clear nail polish to your creation once it’s dry.
- If you’re having trouble getting the clay to stick to itself, you can use a small amount of white glue as a bonding agent.
Conclusion
In conclusion, making cold porcelain clay at home is a fun and easy process that can be enjoyed by people of all ages and skill levels. With just a few ingredients, you can create a versatile and durable material that can be shaped and molded into a wide variety of forms, from intricate figurines to jewelry and home decor items.
Whether you’re a seasoned crafter or a beginner, working with cold porcelain clay is a great way to express your creativity and bring your ideas to life. Hopefully, this article gave you some helpful tips about how to make cold porcelain clay at home successfully, so now that you have the proper knowledge on how to get the job done, why not give it a try today?
FAQs
How long does it take for cold porcelain clay to dry?
It can take anywhere from 24 to 48 hours for cold porcelain clay to air-dry, depending on the size and thickness of your creation.
Can you reuse cold porcelain clay?
Yes, you can reuse cold porcelain clay by simply adding a few drops of baby oil to it to soften it up.
Is cold porcelain clay safe for children?
Yes, cold porcelain clay is safe for children to use, but as with any crafting material, adult supervision is recommended.
Can you use cold porcelain clay to make jewelry?
Yes, cold porcelain clay is a great material for making jewelry as it’s lightweight and durable.


