Crafting ceramic beads is an engaging and artistic endeavor that allows individuals to infuse their unique style into jewelry creations. In this detailed guide, we will explore the step-by-step process of how to make ceramic beads. From selecting the right clay and tools to shaping, decorating, and firing, each stage of bead-making is a fascinating journey into the world of ceramics.
Whether you’re a novice or an experienced potter, understanding the nuances of working with clay to produce intricately designed beads adds a personal touch to jewelry projects. Join us as we unravel the secrets of transforming raw clay into beautiful, custom-made ceramic beads, opening up a realm of possibilities for crafting distinctive and meaningful pieces of wearable art.
Table of Contents
Importance of Ceramic Beads in Jewelry and Crafts
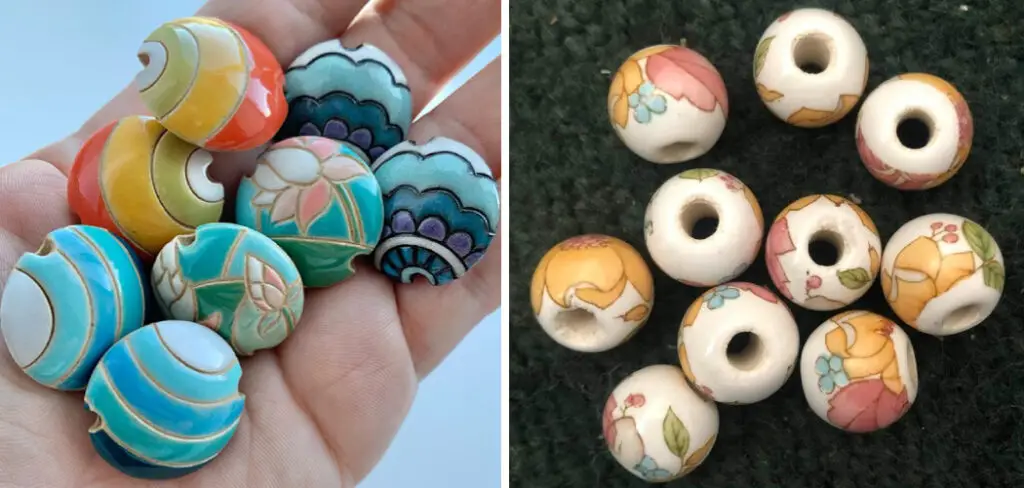
Ceramic beads are a popular choice in jewelry making and crafts due to their versatility, durability, and aesthetic appeal. These small decorative pieces have been used for centuries as adornments in many cultures around the world.
Versatility
One of the main reasons for the popularity of ceramic beads is their versatility. They come in various shapes, sizes, colors, and designs, making them suitable for a wide range of projects. Whether you are creating delicate earrings or statement necklaces, ceramic beads can add a unique touch to your design.
Furthermore, they can be easily combined with other materials like metals, gemstones, and fabrics. This versatility allows for endless possibilities and creativity in jewelry making and crafts.
Durability
Ceramic beads are known for their durability. They are made from clay that is fired at high temperatures, making them strong and resistant to wear and tear. This makes them ideal for jewelry pieces that will be worn frequently or crafts that may require handling.
Unlike other materials like plastic or glass beads, ceramic beads do not easily break or chip, ensuring your creations last longer. Additionally, they can withstand exposure to water or chemicals, making them suitable for outdoor projects like garden decorations.
Aesthetic Appeal
One of the most appealing qualities of ceramic beads is their aesthetic appeal. The firing process creates a smooth surface and allows for intricate designs and patterns to be added, giving each bead a unique look.
These beads also come in a variety of colors, from earthy tones to vibrant hues, allowing for endless design possibilities. They can also be glazed or painted, giving them a glossy finish and enhancing their appearance.
10 Steps How to Make Ceramic Beads
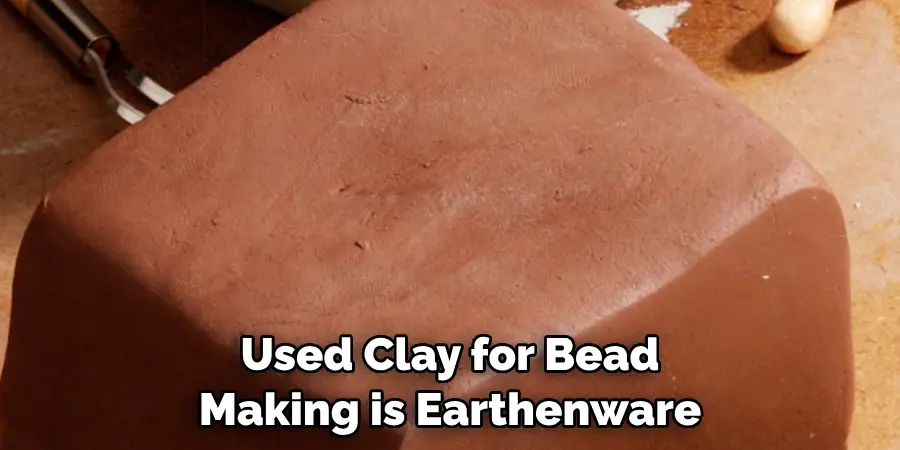
1. Choose the Right Clay
The first step in making ceramic beads is to choose the right type of clay. The most commonly used clay for bead making is earthenware, as it is easy to work with and has a low firing temperature. However, stoneware and porcelain can also be used for more durable beads.
2. Prepare the Clay
Before you can start shaping your beads, you need to prepare the clay. This involves kneading it to remove any air bubbles and rolling it into a smooth ball.
3. Use Molds or Hand Shape
This method is particularly useful when aiming for a cohesive collection or desiring uniformity across multiple pieces of jewelry. On the other hand, the hand shaping method invites a more intimate connection between the artist and the clay, allowing for the creation of beads with unique, organic designs. This approach celebrates the inherent irregularities and subtle nuances that emerge during the tactile process, contributing to the charm and authenticity of each hand-shaped ceramic bead.
4. Create Holes
Once your beads are shaped, you will need to create holes for stringing them onto jewelry. This can be done by poking a needle through the center of the bead or using specialized tools such as bead hole punches.
5. Let the Beads Dry
Once you’ve meticulously crafted the holes in your ceramic beads, exercise patience and allow them the necessary time to achieve complete dryness before advancing to the subsequent stages of the bead-making process. The drying period is a critical interval, typically spanning 24 to 48 hours, contingent upon the thickness and size of your beads.
This temporal investment is paramount to ensure that the moisture within the clay thoroughly evaporates, preventing potential structural vulnerabilities and cracks during subsequent firings. Placing the beads in a well-ventilated area aids in expediting the drying process, but it’s imperative to resist the temptation to rush this stage.
6. Sand and Smooth
After allowing your ceramic beads to thoroughly dry, it’s time to refine their surfaces for a polished finish. Employ sandpaper or a fine file to delicately smooth out any rough edges or imperfections that might have emerged during the drying process. Gently glide the sandpaper across the beads, ensuring a consistent and even texture. This step not only enhances the tactile appeal of the beads but also contributes to their overall aesthetic quality.
7. Bisque Firing
Bisque firing involves subjecting the beads to a carefully controlled kiln environment, where temperatures typically range between 1700 and 1900 degrees Fahrenheit. This prolonged exposure—spanning a duration of 8 to 12 hours—gradually drives out any remaining water content in the clay, rendering it more robust and less susceptible to breakage.
As the kiln orchestrates this intricate dance of heat, the beads undergo a structural metamorphosis, laying the groundwork for the expressive potential that awaits during the glazing stage of the ceramic bead-making journey.
8. Glaze Application
To apply the glaze, you have the option of employing a brush for precise detailing or utilizing the dipping method for more comprehensive coverage. The world of glazes unfolds in a kaleidoscope of hues and finishes, offering an extensive palette that opens the door to boundless creative expression. From earthy tones with a matte finish to glossy, vibrant shades, the array of glazes empowers you to tailor your beads according to your artistic vision.

9. Second Firing
After applying glaze, your beads will need to go through a second firing process at a higher temperature (around 2000 degrees Fahrenheit) to fuse the glaze onto the clay.
10. String and Enjoy
Once your beads have cooled, string them onto your desired jewelry piece and enjoy your handmade ceramic bead creations! You can also add additional embellishments such as paint or decals before or after firing for added customization.
Choosing a Stringing Material or Wire for Jewelry Assembly
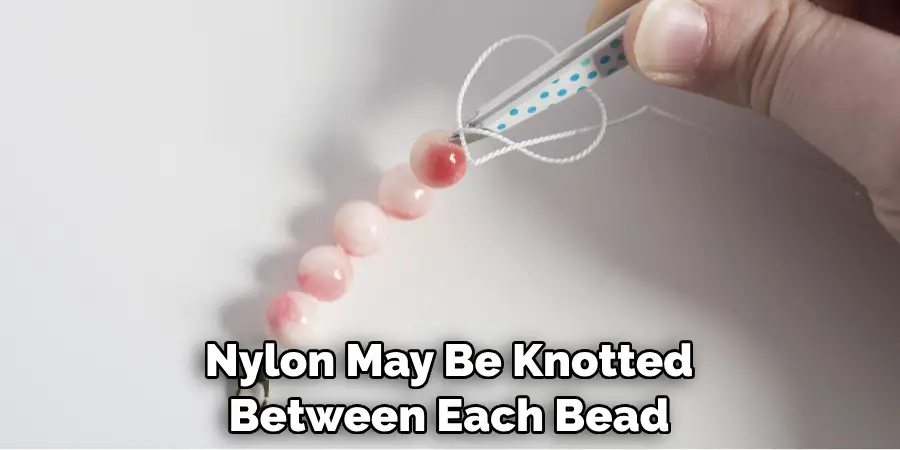
There are a wide variety of materials that can be used to string and assemble jewelry, depending on the type of beads and design aesthetic. Some popular choices include nylon, silk, cotton, leather, rubber, hemp, steel wire or chains. In this section we will explore some key factors to consider when choosing a stringing material for your ceramic bead jewelry.
Material Strength and Durability
When selecting a stringing material for your ceramic bead jewelry, it is important to consider the strength and durability of the material. Ceramic beads can be fragile and prone to cracking or chipping, so a strong and durable stringing material is essential to ensure the longevity of your jewelry piece. Materials such as steel wire or chains are ideal for heavier ceramic beads, while nylon or silk are better suited for lighter weight beads.
Aesthetic Considerations
The choice of stringing material can also greatly impact the overall aesthetic of your ceramic bead jewelry. For a more organic and natural look, hemp or leather may be preferred, while for a sleek and modern look, stainless steel wire would be a good option. It is important to choose a stringing material that complements the style and design of your ceramic beads.
Stringing Techniques
Different stringing materials may require different techniques for assembly. For example, nylon or silk may be knotted between each bead, while steel wire may require crimp beads to secure the ends. It is important to consider which techniques are best suited for your chosen stringing material and whether they align with your desired design aesthetic.
Personal Preference and Comfort
Lastly, personal preference and comfort should also be taken into consideration when choosing a stringing material for your ceramic bead jewelry. Some materials may be more comfortable to wear than others, depending on factors such as weight, texture or how the material interacts with the skin. It is important to choose a stringing material that not only looks great, but also feels comfortable to wear.
Conclusion
In conclusion, there are many factors to consider when choosing a stringing material for your ceramic bead jewelry. Material strength and durability, aesthetic considerations, stringing techniques, and personal preference should all be taken into account to ensure the best possible outcome for your jewelry piece.
Take the time to explore different options and experiment with different materials to find the perfect fit for your unique ceramic bead jewelry design. Hopefully, this article gave you some helpful tips about how to make ceramic beads successfully, so now that you have the proper knowledge on how to get the job done, why not give it a try today?


