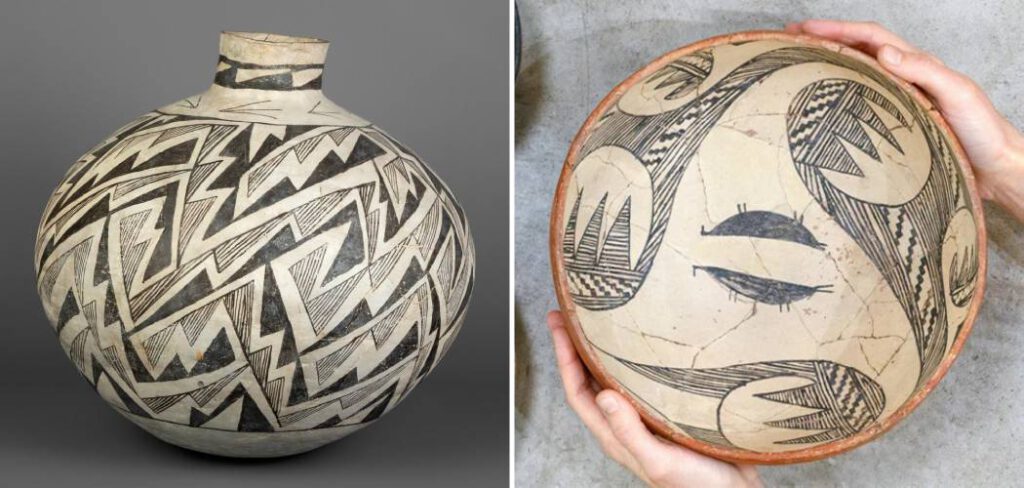
Anasazi pottery is a type of Native American pottery that originated in the southwestern United States over a thousand years ago. The pottery is characterized by intricate geometric designs and bold color contrasts.
Creating Anasazi pottery requires a deep understanding of the natural materials and traditional techniques used by the Ancestral Pueblo people. In this article, we will explore the step-by-step process of how to make Anasazi pottery. From gathering and processing clay to decorating and firing the finished piece, we will provide a comprehensive guide to help you create your own unique and beautiful Anasazi pottery.
Whether you are a seasoned ceramic artist or a beginner looking to explore new techniques, this guide will help you create stunning Anasazi pottery pieces that honor the rich cultural heritage of the Southwest.
Table of Contents
What Is Anasazi Pottery?
Anasazi pottery refers to a type of ancient clayware made by the ancestral Puebloans of the southwestern United States. They were called the Anasazis because they lived in the Four Corners region, where Arizona, Colorado, New Mexico and Utah meet. While there are many theories about why their pottery making techniques evolved the way they did, most experts agree that the pottery was used in everyday life and religious ceremonies.
Anasazi pottery is made by coiling, which involves rolling out a long strip of clay and then joining it into a spiral shape. The coils are then pressed together to form the vessel’s outer walls. Once dry, the exterior is often decorated with designs such as lines and geometric shapes. A paint slip may also be applied to create unique patterns or simple designs. Finally, the vessels are fired in an open pit kiln to harden them for use.
Anasazi pottery is highly valued for its durability and beauty, making it sought after by collectors all over the world. It has been used for hundreds of years and has become a symbol of the unique culture of the Anasazi people. Due to its value, there are now laws in place to protect it from being taken from sacred sites or sold illegally.
10 Methods How To Make Anasazi Pottery
1. Gathering and Preparing Clay
The first step in making Anasazi pottery is to gather and prepare the clay. The Ancestral Pueblo people used local clay sources, which were cleaned of debris and mixed with water to create a malleable clay mixture.
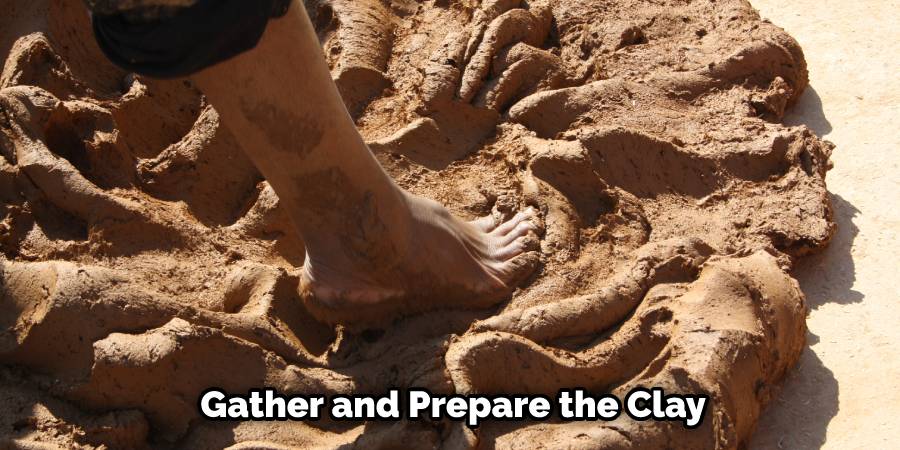
The clay was then kneaded by hand to remove air pockets and improve its consistency. To make a white or light pot, the clay would be heated and mixed with ash, sand, or straw. This process is known as “tempering” and prevents the pot from cracking or breaking during firing.
2. Shaping the Pot
Once the clay has been prepared, the potter will use traditional techniques to shape the pot. The potter will typically use a coiling technique, where long, thin ropes of clay are coiled on top of each other and smoothed together with a paddle and anvil. The potter will shape the pot with their hands and may use tools to add decorative elements.
3. Drying the Pot
After the pot has been shaped, it must be dried slowly to prevent cracking. The potter will typically leave the pot to dry in a shaded area for several days or weeks, depending on the size of the pot. During this time, the pot may be smoothed with a scraper to remove any rough spots. Once the pot is completely dry, it is ready to be fired.
4. Polishing the Pot
Once the pot is dry, the potter will use a smooth stone or piece of bone to polish the surface of the pot. This process gives the pot a smooth, shiny surface that is ideal for intricate designs that will be applied later. The potter will move the stone or bone in small circles, making sure to cover every surface of the pot. This step can take some time and requires a lot of patience.
5. Creating the Design
The designs on Anasazi pottery are typically geometric in nature, featuring intricate patterns and bold color contrasts. The designs are created by painting a thin layer of pigment onto the surface of the pot, using natural pigments such as red ochre, yellow ochre, and black manganese dioxide.
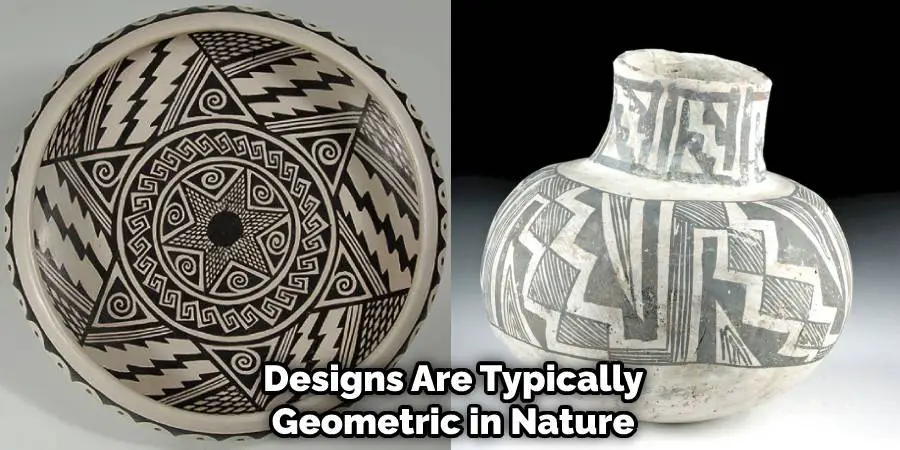
The paint is applied using a variety of tools, such as feathers, sticks, and yucca brushes. The traditional design motifs often used on Anasazi pottery have symbolic meanings and vary depending on the tribe or area in which they were created.
6. Firing the Pot
After the design has been applied, the pot must be fired to make it durable and waterproof. Anasazi pottery was traditionally fired in outdoor kilns, using wood or charcoal as fuel. The firing process typically took several hours, and the temperature was carefully controlled to ensure that the pot was not damaged.
Finally, the pot was cooled slowly to prevent any cracks. After firing, the pottery is ready for use! To prolong the life of the pot, it is important to store it in a cool, dry place.
7. Burnishing the Pot
After the initial firing, the potter may choose to burnish the surface of the pot to give it an even smoother, shinier surface. Burnishing is achieved by rubbing the surface of the pot with a smooth stone or piece of bone, compressing the clay particles, and creating a glossy finish.
The potter may also choose to use a stick, or any other hard object, to decorate the surface of the pot with designs. While burnishing is a traditional method, modern potters may choose to use a variety of other techniques to decorate the surface of their pots.
8. Applying a Glaze
Some Anasazi pottery pieces feature a glaze, which is applied to the surface of the pot after the initial firing. Glazes were traditionally made from natural materials such as ash, sand, and clay and were used to create a variety of colors and textures.
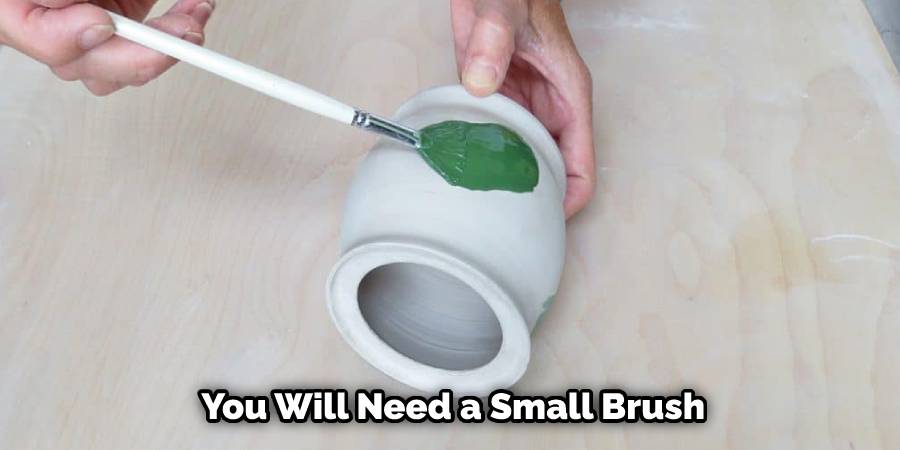
To apply the glaze, you will need a small brush. Dip the brush into the glaze and carefully paint the desired area of the pot. Allow it to dry before firing a second time. This is done at a lower temperature than the initial firing, usually between 1100 and 1200 degrees Celsius. The second firing will cause the glaze to adhere to the pot and give it a glossy finish.
9. Adding Handles and Feet
Many Anasazi pottery pieces feature handles or feet, which are added to the pot using the same coiling technique as the body of the pot. The handles and feet are typically decorated with intricate designs that complement the design on the rest of the pot.
After the handles and feet have been coiled, they are smoothed down with a stone to make them flush against the rest of the pot. Once the handles and feet have been added to the pot, it is ready for firing. 10. Firing The Pot is one of the most important steps in making Anasazi pottery.
10. Adding Additional Decoration
After the pot has been fired and cooled, the potter may add additional decorative touches, such as a layer of clear glaze to protect the design, or a woven or leather strap for carrying the pot. The potter could also carve or paint additional designs on the surface of the pot.
Finally, the pot is ready to be filled with food, water, or whatever the potter wishes to store inside. With some practice and creativity, anyone can make beautiful Anasazi pottery.
Some Common Mistakes When Making Anasazi Pottery:
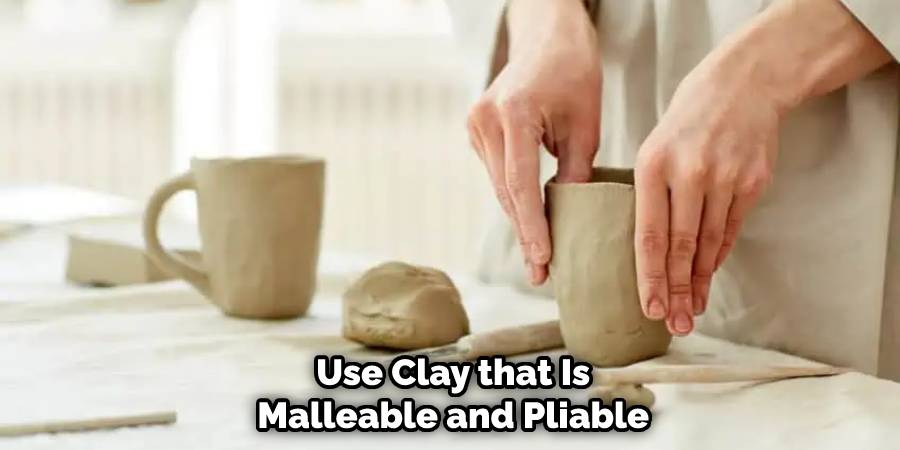
1. Using Too Thick Of Clay:
When molding and shaping clay, it is important to use clay that is malleable and pliable enough to be shaped without cracking. Anasazi pottery was traditionally made from clay that was very thin, so using clay that is too thick can cause it to crack when drying and baking.
2. Firing At Too High Of A Temperature:
Baking the pottery at too high of a temperature can cause it to warp or shatter during firing. It is important to start with a low temperature before gradually increasing the heat in order for the pottery to bake evenly and without damage.
3. Not Drying The Pottery Properly:
Before firing, it is important to make sure that the pottery has been thoroughly dried. This can take up to several days, depending on the size and thickness of the pottery. Firing a piece that is still damp can cause it to crack or explode due to trapped moisture inside of the clay.
Conclusion:
As you can see, Anasazi pottery is both beautiful and culturally significant. This ancient art form has been passed down from generation to generation, ensuring its continued existence in today’s world. Even though it takes time and skill to create true Anasazi pottery, knowing even the basics will give you a better appreciation for the craft and help ensure that this age-old tradition remains alive and well in modern times.
Hopefully, this blog post provided you with the necessary information to get you started on your journey toward learning how To Make Anasazi Pottery. So, what are you waiting for? Get out there and explore the world of Anasazi pottery-making today!


