Making a pottery tile can be a fun and rewarding project for those who enjoy working with clay. Whether you’re a seasoned potter or a beginner, creating a tile from scratch can be a great way to hone your skills and express your creativity.
Pottery tiles can be used for a variety of purposes, from decorative pieces to functional items such as coasters or trivets. In this guide, we’ll take you through the step-by-step process of making your own pottery tile, from preparing your clay and tools to adding your own unique design and glaze.
Whether you choose to make a single tile or a set, you’ll learn the techniques and skills necessary to create a beautiful and functional piece of pottery. So, let’s get started and learn how to make a pottery tile that you’ll be proud to display in your home or give as a gift to a friend or loved one.
Table of Contents
Materials and Tools Needed
Before we get started, let’s go over the materials and tools you will need to make a pottery tile:
Materials
- Clay
- Water
- Sandpaper
- Pottery glaze
Tools
- Rolling pin
- Pottery wheel (optional)
- Pottery tools (rib, scraper, needle tool, etc.)
- Kiln
10 EasyStep Guide How to Make a Pottery Tile
Step 1: Prepare the Clay
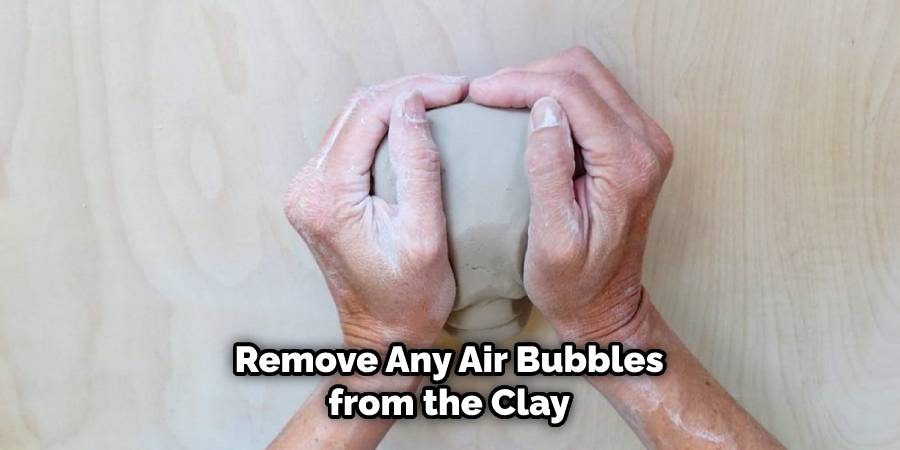
The first step in making a pottery tile is to prepare the clay. Start by kneading the clay to remove any air bubbles and make it easier to work with. If you are using a pottery wheel, center the clay on the wheel and begin to shape it.
If you are working by hand, roll out the clay with a rolling pin to the desired thickness. While you are working, make sure to add a little water to the clay as needed so that it remains pliable. Try to keep the clay as even in thickness as possible.
Step 2: Create the Tile
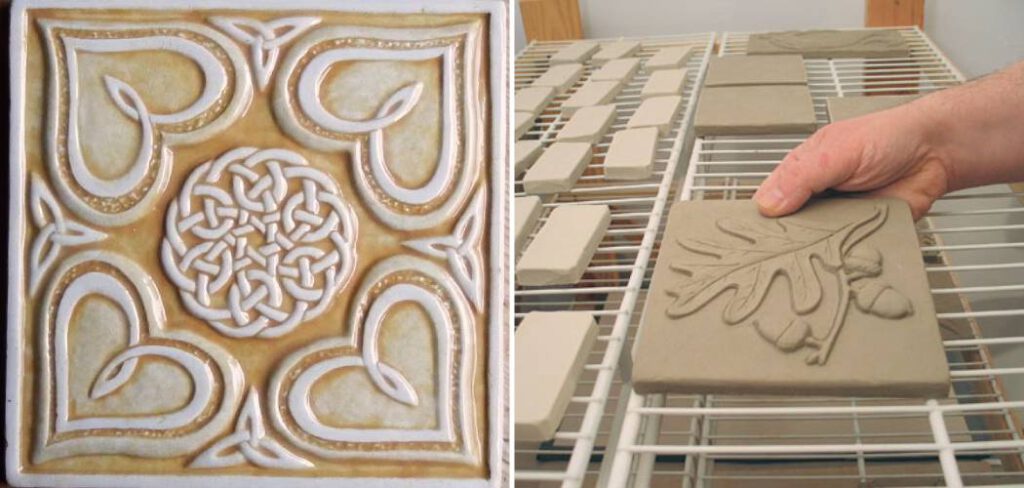
Once the clay is prepared, it’s time to create the tile. Use pottery tools to shape the clay into the desired shape and size. You can create a flat tile or add texture and design elements to make it more interesting. If you want to add a raised pattern, use tools like rubber stamps or carve the design into the clay with a needle tool.
When the tile is in shape, and you’re satisfied with the design, use a ruler to measure the thickness. Creating even-sized tiles helps them dry more evenly and achieve a nicer look when they’re fired. Allow the tile to dry completely before continuing.
Step 3: Dry the Tile
After the tile is shaped, allow it to dry completely. This can take anywhere from a few days to a few weeks depending on the size and thickness of the tile. To speed up the drying process, you can use a fan or place the tile in a warm, dry area. Make sure the tile is not exposed to any direct sunlight, as this can cause warping or other defects.
Once dry, the tile should be hard and ready for the next step. If you want to reduce risks of cracking or warping, you can slowly oven-dry the tile in a warm oven (around 200 degrees Fahrenheit). To do this, put the tile in the oven for a few minutes and then turn off the heat and allow the tile to cool in the oven.
Step 4: Sand the Tile

Once the tile is dry, use sandpaper to smooth out any rough edges or bumps. This will help to create a smooth surface for the glaze to adhere to. To get an even finish, use a sanding block and begin with coarse grit paper (80-120) before moving to the finer grits (220-400).
Work in small sections, and be sure to sand both sides of the tile. When you are finished, wipe away any dust with a damp cloth. Although you may be tempted to skip this step, sanding is an important part of creating a quality tile.
Step 5: Fire the Tile
After sanding, it’s time to fire the tile in a kiln. Follow the manufacturer’s instructions for firing the clay to ensure it is heated to the proper temperature. This will make the clay hard and durable. Once the tile has been fired, it is ready to be used for a variety of projects.
Use it as a decorative piece in the home or use it for functional items like coasters, trivets, and placemats. Whatever project you decide to do with your pottery tile, it will always be a beautiful and unique addition to your home. Try to have some fun and experiment with different color glazes to bring the tile to life!
Step 6: Glaze the Tile
Once the tile has been fired and cooled, it’s time to apply the pottery glaze. This will give the tile a glossy finish and help to protect it from damage. Use a brush to apply the glaze in even strokes, being careful not to leave any drips or smudges.
Allow the glaze to dry before applying a second layer. After two coats have been applied, allow the tile to sit for 24 hours before firing once more. The firing process will help the glaze bond to the tile and give it a beautiful finish. Your pottery tile is now finished and ready to be displayed.
Step 7: Fire the Tile Again
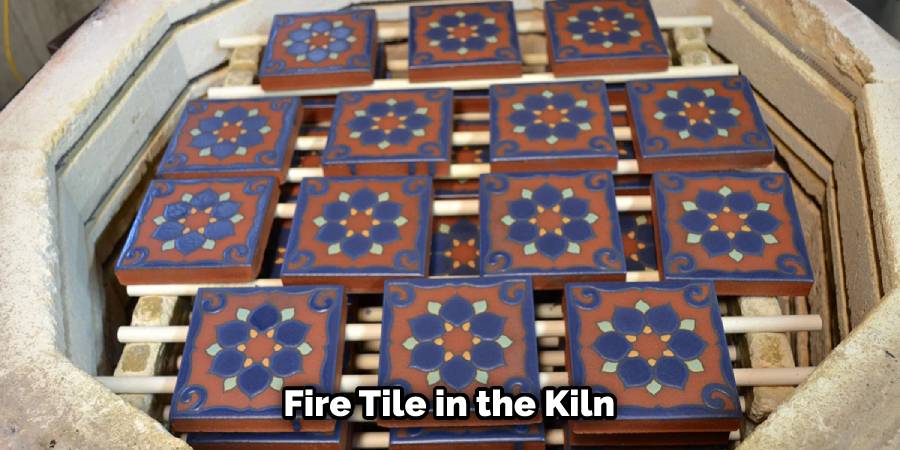
After the glaze has been applied, the tile will need to be fired in the kiln again. This will cause the glaze to melt and bond to the tile, creating a smooth, shiny finish. Once the tile has cooled, it’s ready to be displayed or used in a project.
When firing the tile, it is important to ensure that the temperature is even and consistent, otherwise, there may be inconsistencies in the finished product. Additionally, it is important to ensure that the glaze does not bubble or blister during firing.
This can lead to a piece with an uneven surface and detract from the overall aesthetics. With the right care and attention, a beautiful ceramic tile can be created.
Some Common Mistakes When Making Pottery Tile:
1. Not Allowing the Clay to Come up to Room Temperature and Working with It Cold
Clay should be warm when you start working on it, as cold clay can be difficult to shape and might crack when heated during the firing process. Make sure your clay has had time to warm up before handling it.
2. Overworking or Under-Working the Clay
If you work your clay too much or not enough, it can cause problems with the finished product. Too much kneading will make the tile weak and prone to breaking; under-kneading may result in uneven surfaces that could create air pockets underneath once fired. Always try to achieve an even consistency with your clay.
3. Using Incorrect Tools
Using tools that are not specific for pottery making on a tile can leave indentations or scratches that will be noticeable after firing. Certain tools are better suited for tile making, such as wooden pottery tools or metal sponges.
4. Not Removing Air Bubbles
Air bubbles will expand during the firing process and cause your tiles to crack if they are not taken care of beforehand. Make sure you lightly tap your tile on a level surface to release any air bubbles before it is fired.
Tips for Making a Pottery Tile
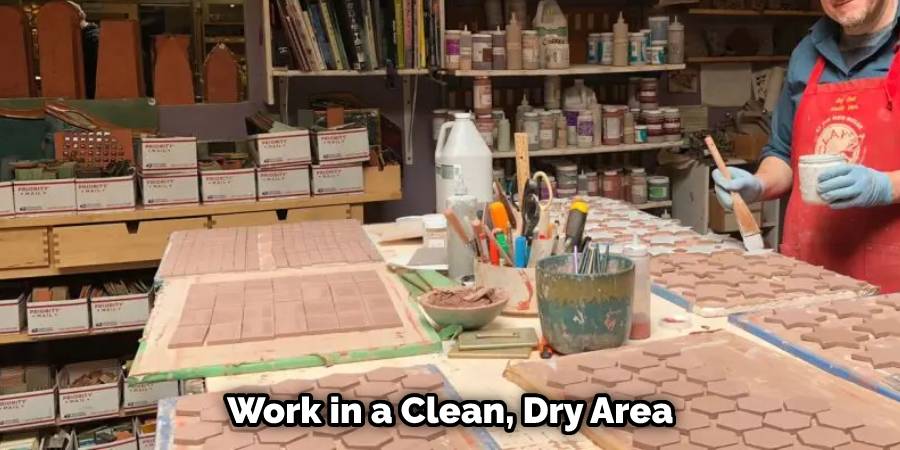
- Work in a clean, dry area to prevent dust and debris from getting into the clay.
- Experiment with different textures and designs to create a unique tile.
- Practice proper kiln safety to avoid injury or damage to the kiln.
- Don’t be afraid to make mistakes; pottery is a learning process, and each piece will be unique.
Conclusion
Making a pottery tile can be a fun and rewarding experience for both beginners and experienced potters. By following the step-by-step guide about how to make a pottery tile outlined in this article and practicing proper safety techniques, you can create a beautiful and unique piece of art that you can be proud of. Remember to take your time, experiment with different techniques, and enjoy the process of creating something by hand. With a little practice and patience, you can become a skilled potter and create beautiful pieces that will last a lifetime.
FAQs
Do I need a pottery wheel to make a tile?
A pottery wheel can make the process easier, but it’s not necessary. You can create a tile by hand using a rolling pin and pottery tools.
How long does it take to make a pottery tile?
The process can take anywhere from a few days to a few weeks, depending on the size and thickness of the tile and the drying and firing times.
Can I use any type of clay to make a tile?
There are many different types of clay available, but some are better suited for pottery than others. Check with your local pottery supply store to find the best type of clay for your project.
What should I do if my tile cracks during firing?
Cracks can occur if the clay is not dried properly or if the kiln temperature is too high. If your tile cracks, you can try to repair it with additional clay or start over with a new piece.
What should I do if my tile cracks during firing?
Cracks can occur if the clay is not dried properly or if the kiln temperature is too high. If your tile cracks, you can try to repair it with additional clay or start over with a new piece.
Can I use a regular oven to fire my tile?
No, you should never use a regular oven to fire pottery. Pottery requires very high temperatures that can only be achieved in a specialized kiln designed for pottery firing.


