Loading a kiln is an art as much as it is a science, requiring a thoughtful and strategic approach to achieve optimal firing results. Whether you are a pottery enthusiast, ceramic artist, or involved in industrial processes, knowing how to load a kiln correctly is paramount for the success of your firing project. In this guide, we delve into the intricacies of loading a kiln, exploring considerations such as stacking techniques, placement of items, and temperature distribution.
From maximizing kiln space to ensuring even heat exposure, the loading process significantly influences the final outcome of your ceramics. Whether you’re firing delicate porcelain or sturdy stoneware, mastering the art of kiln loading ensures that each piece emerges from the firing process with the desired strength, color, and texture, making your efforts in pottery or industrial applications truly rewarding.
Table of Contents
Ensuring the Kiln Is Clean and Free of Debris
One of the most crucial steps in loading a pottery kiln is making sure it is clean and free of debris. This not only helps with ensuring your ceramics come out looking their best, but also increases the lifespan of your kiln.
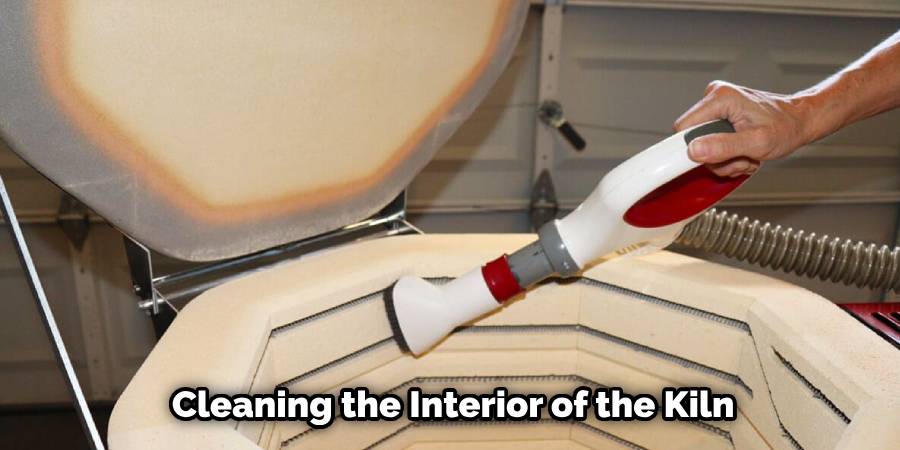
Prior to loading, make sure to remove any previous remnants from previous firings such as broken pieces or leftover glaze drips. Use a soft brush or vacuum to thoroughly clean the interior of the kiln, paying special attention to any corners or crevices where debris may accumulate.
Additionally, check for any cracks in the shelves or walls of the kiln. These can cause uneven heating and potentially damage your ceramics. If you do find any cracks, it is best to repair them before proceeding with loading.
Checking Kiln Shelves for Damage or Wear
When loading a pottery kiln, it is important to first check the shelves for any signs of damage or wear. Kiln shelves are an essential part of the firing process and can greatly affect the quality of your ceramics. Here are some tips on what to look out for when inspecting your kiln shelves:
- Cracks: One of the most common issues with kiln shelves is cracking. This can occur due to thermal shock, uneven loading of the kiln, or simply from wear and tear over time. It is important to check for any cracks on the surface of the shelf as well as along the edges. Cracked shelves should not be used as they can lead to further damage and affect the firing results.
- Warping: Kiln shelves can also warp, especially if they are not properly supported or have been exposed to extreme temperatures. Warped shelves can cause uneven heating and cooling of your ceramics, resulting in defects such as warping or cracking. If you notice any warping, it is best to replace the shelf before loading the kiln.
- Glaze build-up: Over time, glaze can build up on kiln shelves and create uneven surfaces. This can affect the placement of your ceramics and lead to potential damage during firing. Before loading, make sure to scrape off any excess glaze from the shelves using a metal scraper.
- Wear and tear: Kiln shelves are expected to withstand high temperatures and heavy loads, but they will eventually wear out. It is important to regularly check for any signs of wear and tear, such as chips or scratches on the surface of the shelves. If these issues are not addressed, they can worsen and impact the firing results.
10 Steps How to Load a Kiln
1. Prepare the Kiln
Before you can begin loading the kiln, you must first prepare it for firing. This includes cleaning the interior of the kiln and checking for any cracks or damage that may have occurred during storage or transport. You should also check the thermocouple to make sure it is in working order and calibrate the pyrometer if necessary. Finally, make sure all safety features are in place and functioning properly before beginning to load your kiln.
2. Place Firing Supports
Firing supports are essential for ensuring that your pieces do not sag or warp during firing. Depending on the type of piece you are firing, you may need to use a variety of different supports such as posts, shelves, or stilts. Make sure that these supports are placed correctly and securely before loading your pieces into the kiln.
3. Load Pieces
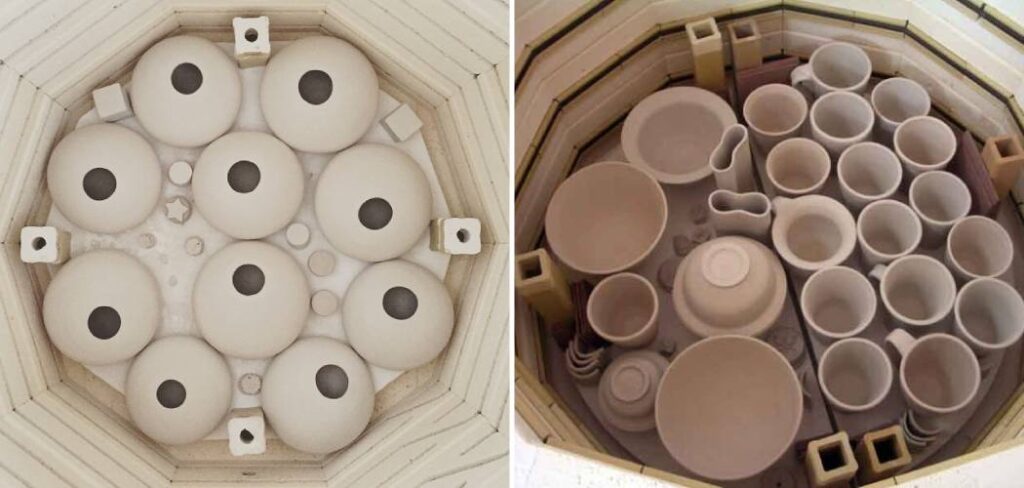
Once your firing supports are in place, you can begin to load your pieces into the kiln. Be sure to arrange them carefully so that they do not touch each other or any of the walls of the kiln as this could cause them to fuse together during firing. Additionally, be sure to leave enough space between each piece for air circulation and even heating during firing.
4. Place Kiln Furniture
Kiln furniture is used to separate pieces from each other and provide additional support during firing. This can include things like posts, shelves, props, or stilts which should be placed around your pieces before closing up the kiln door. Be sure that all furniture is firmly secured before continuing with loading the kiln.
5. Close Kiln Door
Once all of your pieces have been loaded and arranged correctly within the kiln, along with any necessary furniture, you can close up the door of your kiln tightly so that no heat escapes during firing. If possible, try to use a sealant around any gaps in order to ensure maximum efficiency when it comes time for firing later on down the line.
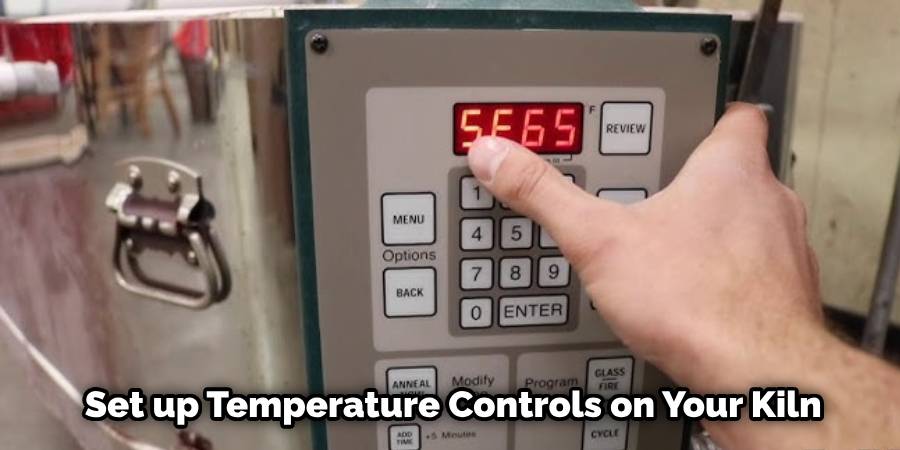
6. Set Temperature Controls
Now it’s time to set up temperature controls on your kiln in order to ensure an even heating throughout all stages of the firing process from start to finish. This will involve setting both a high-temperature limit as well as a low-temperature limit depending on what type of material you’re working with at this stage in the production process (earthenware clay vs porcelain vs glass etc).
7. Set Firing Schedule
The next step is setting up a firing schedule which will determine how long each stage of heating will last before moving onto another stage (ramp rate). This is important because different materials require different temperatures/times at certain stages in order for them to reach their optimal state without over-firing (which could lead to cracking/breaking).
8. Monitor Progress
Once everything has been set up correctly and programmed into your controller unit accordingly, it’s time to keep an eye on progress by periodically monitoring temperature readings throughout the entire process until desired results have been achieved (or point where further adjustments need to be made).
9. Open Kiln Door & Unload Pieces
When desired results have been achieved, it’s time to open up door of the Kiln and unload contents carefully onto the cooling rack/table etc, so they don’t come into contact with anything too hot while still allowing air to flow around them until they reach room temperature again (this usually takes several hours depending on size/weight).
10. Clean & Store Kiln
Once cooled down completely it’s then time to clean out interior & exterior surfaces using a damp cloth & appropriate cleaning solution then store away safely somewhere dry & away from direct sunlight until ready to use again next project!
Things to Consider When Loading a Pottery Kiln
When it comes to loading a pottery kiln, there are several factors that should be considered in order to ensure the best results. Properly loading a kiln not only affects the final outcome of your ceramics, but also plays a crucial role in the safety and efficiency of the firing process.
Here are some important things to keep in mind when loading a pottery kiln:
Placement of Pieces:
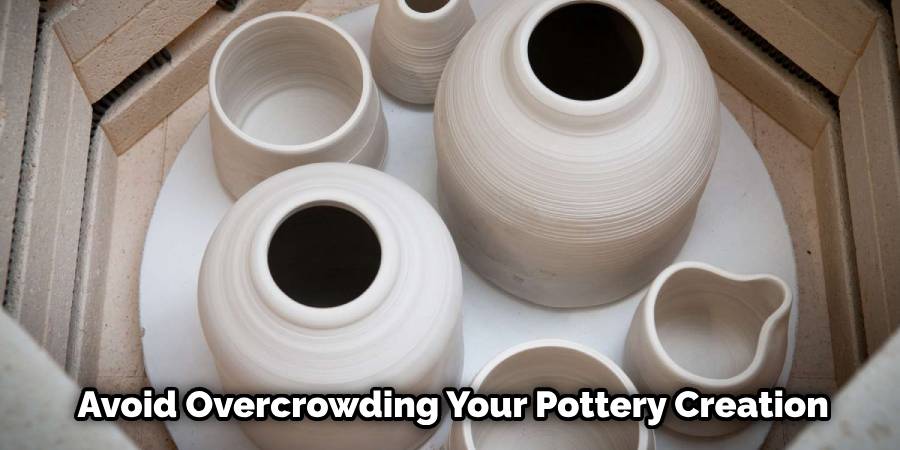
The placement of each piece inside the kiln can greatly affect how it is fired. When loading, make sure to arrange pieces in a way that allows for even heating and proper circulation of heat and air. Avoid overcrowding or placing pieces too close together, as this can lead to uneven firing or even breakage. Additionally, consider the size and weight of each piece in relation to its placement to prevent any potential damage.
Consider Firing Temperature:
Different types of clay and glazes require different firing temperatures. It is important to load pieces with similar temperature requirements together in order to achieve consistent results. Mixing pieces with vastly different firing temperatures can result in under or over-fired pieces.
Use Kiln Furniture:
Kiln furniture, such as shelves and stilts, are essential when loading a kiln. These allow for better circulation of heat and air and prevent pieces from sticking to the kiln floor. When using kiln furniture, make sure to leave enough space between each piece and the walls of the kiln to allow for adequate airflow.
Consider the Shape and Size of Pieces:
When loading a kiln, it is important to consider the shape and size of each piece. Flat pieces should be placed at the bottom or on shelves, while taller pieces should be placed near the top. This will help ensure even heating and prevent any potential collapse or warping.
Conclusion
Overall, loading a kiln is a vital task that should not be rushed. Taking the time to set up your environment and thinking through loading strategies can make for more successful firing cycles. Additionally, resist the temptation to open a hot kiln before it cools off to ensure that everything runs smoothly. Lastly, don’t forget to practice safety during each step of the way! Now that you have everything you need to know about how to load a kiln take some time and try it yourself!
It may be unintuitive at first but if followed with dedication and careful attention, anyone can master this craft – including you! Look for projects and items around your home or shop that could benefit from fired ceramic glazes or raw clay treatments in order to hone your skill sets as a dedicated kiln loader. Get out there, get creative, and start building the things of dreams right away – starting with how to properly load a kiln!


