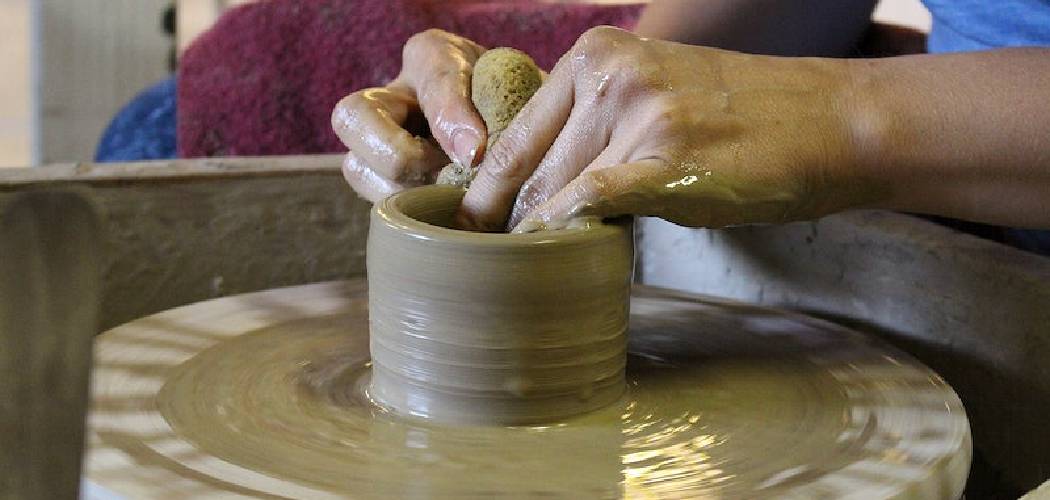
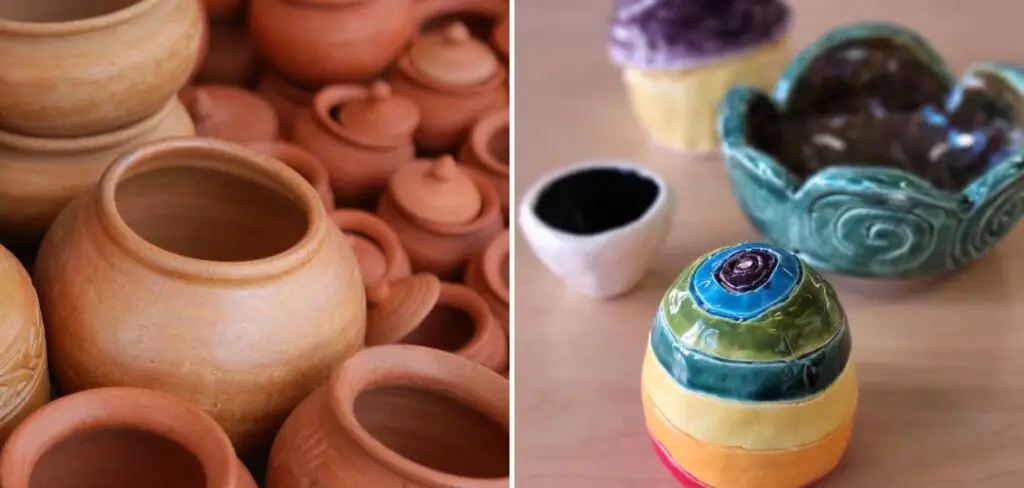
Glazing pottery is a creative and satisfying process that can bring life to your handmade pottery pieces. The glaze, a thin layer of glass-like coating, is applied to the surface of the pottery and fired at high temperatures to produce a durable and decorative finish.
Glazing can enhance the color, texture, and overall appearance of your pottery, and it also helps to protect it from water and other elements. Glazing pottery at home is a great way to unleash your creativity and experiment with different techniques and styles.

While it may seem intimidating at first, with some basic knowledge and practice, you can become proficient in glazing your own pottery. In this guide, we will take you through the step-by-step process of how to glaze pottery at home, from preparing your pottery for glazing to firing your finished piece.
Table of Contents
Can You Glaze Pottery in a Home Oven?
The answer to this question largely depends on the type of glaze used. Most commercial and studio glazes require temperatures in excess of 1,800 degrees Fahrenheit which can only be achieved with a kiln. However, some potters have had success with certain types of lead-based glazes or “low-fire” glazes that can be used in a home oven.
Before attempting to glaze pottery in an oven, it is important to understand the limitations of home ovens. Most conventional gas and electric ovens typically reach temperatures no higher than 550 degrees Fahrenheit. This temperature is not high enough for most traditional glazes, so it is necessary to use a low-fire glaze that has been specifically designed to work at this temperature.
It is also important to understand the risks associated with using lead-based glazes in your home oven. Lead is known to be toxic and can leach into food when used for cooking. Therefore, if you decide to use lead-based glazes in a home oven, always clearly mark the pieces as non-food-safe items and never use them for food storage or cooking.
Finally, remember that any glazing attempts done in a home oven may not produce the same results as those achieved with a high-firing kiln. Glazed pottery fired in an oven will have more limited color options and less predictable results and can often be less durable than pieces fired in a kiln.
10 Methods How to Glaze Pottery at Home
1. Choose your Glaze:

There are many types of glazes available, such as matte, glossy, and textured, so choose the type that will suit your pottery project best. Once you have selected an appropriate type of glaze, there are several ways to acquire it.
You can purchase a pre-made product or create a custom glaze with ingredients you can find in pottery supply stores. To mix your own glaze, you will need a base glaze (or bisque) and dry materials that can be added to it.
2. Prepare your Pottery:
Before glazing, ensure that your pottery is clean and dry. Use a damp sponge or cloth to remove any dust or debris from the surface. If you are working with bisque ware, brush off any loose particles from the surface.
You may need to sand down edges or areas where glaze can pool, such as the insides of vases or bowls. However, be careful not to over-sand your pottery, as this can compromise the finished product.
3. Apply the Glaze:
Use a brush or spray gun to apply the glaze to your pottery. Apply the first layer evenly, and allow it to dry before adding subsequent layers. After the first layer has dried, you can choose to add a second coat. If desired, you can use a dry brush or sponge technique to create interesting effects.
When glazing pottery, it is important to avoid overworking the piece and creating too thick of a layer, as this can cause your pottery to crack or become distorted.
4. Consider Layering:
For more complex and visually interesting effects, consider layering glazes. Apply one glaze layer, allow it to dry, and then add another glaze layer on top. Remember to let the pottery dry between layers.
Make sure that each glaze layer has a chance to set before layering with another one so that the layers will not mix together. This process can result in breathtaking effects, making your pottery a unique and original piece of art.

However, be mindful of the fact that certain glaze combinations may produce unexpected results, so it is best to test out different combinations on spare pieces or samples before committing to them.
5. Use Wax Resist:
Wax resistance is a technique used to create patterns or designs on the surface of the pottery. Apply wax resist to the areas you don’t want to glaze before applying the glaze.
The wax resists the glaze and will remain unglazed when fired. Use a brush to apply a thin, even layer of wax over the pottery. Let the wax dry before applying the glaze.
After glazing, fire it in a kiln at the recommended temperature for your type of clay and glaze. Once fired, the wax will have burned off and you’ll be left with a unique pattern on your pottery.
6. Clean Up:
Ensure that your workspace is clean and free of any leftover glaze or debris. Keep your tools and workspace organized for easy cleanup. Wipe your tools with a damp cloth to remove any glaze residue, and use an old toothbrush to get into the crevices. Rinse all surfaces with warm water and a mild soap or cleaner.
Allow everything to air dry before putting away. When the pottery is finished glazing, allow the pieces to dry for at least 24 hours before firing. This will ensure that all of the glazes is properly set in place and ready for firing.
7. Let it Dry:
Once you have applied the glaze, allow it to dry completely before firing it in a kiln. This could take anywhere from a few hours to several days, depending on the glaze and the thickness of the layers. Make sure that the pottery piece is placed in a safe, dry area to avoid any damage or accidents.

If you need to speed up the drying process, use a hair dryer on its lowest setting and make sure it is constantly moving over the glazed surface. After the piece is dry, it is ready for firing! To get the best results, you should fire the pottery according to the manufacturer’s instructions.
8. Firing:
Place your pottery in a kiln and fire it at the recommended temperature for the glaze you used. This is typically between 1200-1300 degrees Fahrenheit and can take several hours. Make sure the kiln is vented so that gases escape and air circulates properly.
Once the firing cycle has finished, you should wait a few hours before opening the kiln to avoid cracking or breaking your pottery. However, some glazes may require multiple firings.
9. Cooling:
After firing, allow your pottery to cool down slowly. This process is called “candling” and can take up to 12 hours. The gradual cooling process helps to prevent thermal shock, which can cause your piece to crack.
Once the pot is cool enough to handle, it’s ready to be enjoyed! Although your project is complete, if you wish to add further decoration or protection, you can consider applying a sealant or glossy glaze. This will help protect your piece from moisture and wear. Enjoy your masterpiece!
10. Finishing:
Once your pottery has cooled, it’s time to remove it from the kiln and give it a final inspection. Sand off any rough edges or spots, and enjoy your finished piece! If desired, you can apply a glaze to the piece for added shine and protection. Start by brushing a thin layer of your chosen glaze onto the pottery, taking care to apply it evenly.

Things to Consider When Glaze Pottery at Home:
1. Safety:
Safety should always be a top priority when glazing pottery at home. Make sure you are wearing gloves, protective eyewear, and a dust mask. Ensure that your workspace is well-ventilated, as some of the chemicals used in glazing can be toxic.
2. Type of Glaze:
The type of glaze you choose will depend on what type of effect you are looking to achieve with your pottery piece. If you need help deciding which glaze is best for your project, consult with a local pottery expert.
3. Temperature:
The temperature of the kiln is crucial when it comes to firing pottery. Most types of clay and glazes require temperatures between 1650°F and cone 6 (around 2000°F). Make sure your kiln is set to the correct temperature before loading your pieces.
Conclusion:
Glazing pottery at home can be a fulfilling yet intimidating endeavor. However, with some preparation, practice, and experimentation, you’ll have stunning works of art in no time.
Additionally, it is important to maintain safety when using glazes around the home. With this knowledge at hand, you’re well on your way to creating beautiful pottery from the comfort of your own home!
Start by slowly developing your skills and technique until you feel confident enough to accelerate your progress. From there, open yourself up to new techniques as you master them. Have fun as you learn how to glaze pottery at home!


