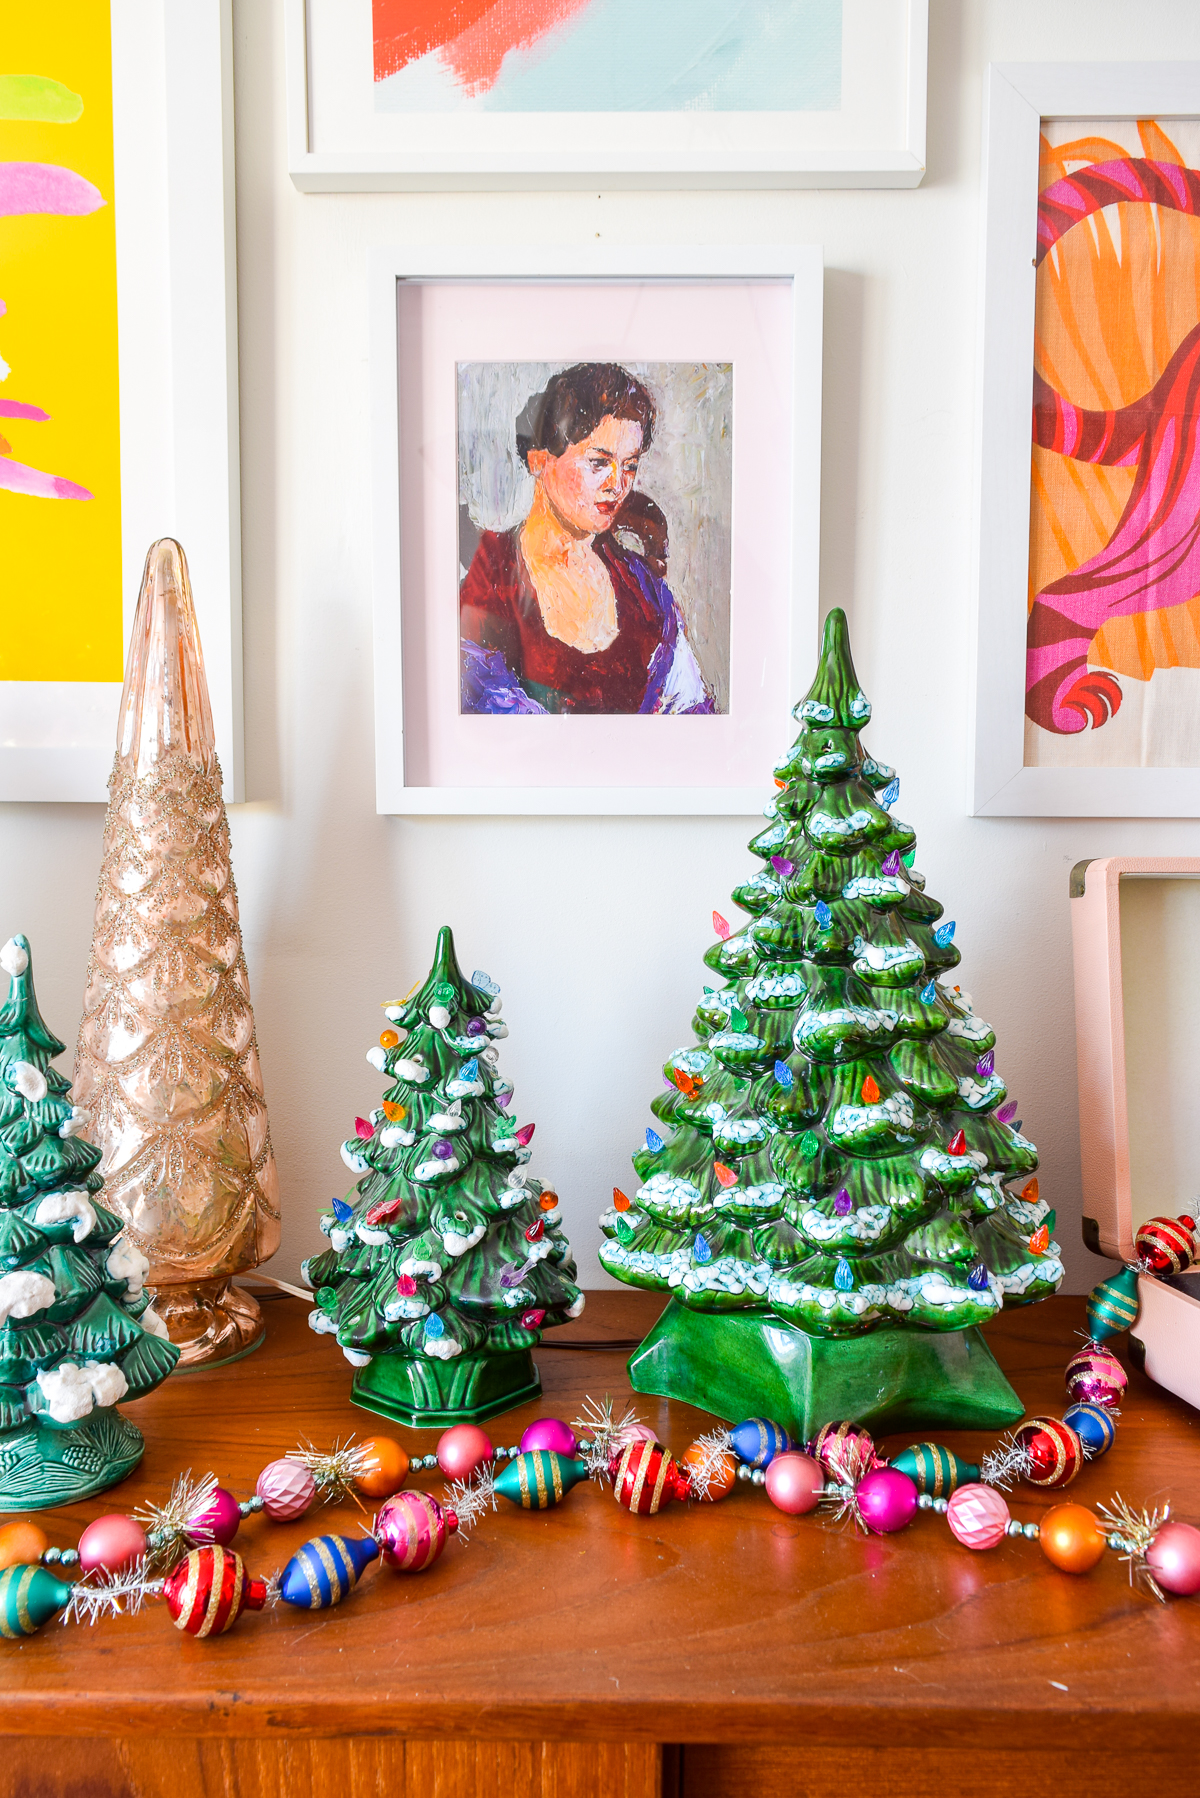
To decorate a ceramic Christmas tree, place miniature lights in the pre-drilled holes and add small ornaments for charm. Choose a color scheme to create a cohesive look.
Decorating a ceramic Christmas tree can be a delightful holiday activity. These charming trees often come with pre-drilled holes for miniature lights, which add a magical glow. Small ornaments, such as tiny bells or stars, can enhance the festive feel. This guide explores the key aspects of how to decorate a ceramic Christmas tree.
Opt for a color scheme that matches your holiday decor to ensure a harmonious appearance. Glitter or faux snow can add a touch of sparkle. Whether you prefer a traditional or modern look, a well-decorated ceramic Christmas tree can be a stunning centerpiece. With creativity and attention to detail, you can transform your ceramic tree into a holiday masterpiece.

Credit: www.pinterest.com
Table of Contents
Choosing Your Ceramic Tree
Decorating a ceramic Christmas tree starts with choosing the right tree. The tree’s size, shape, and color options are important. Let’s explore these factors to help you make the best choice.
Size And Shape
The size of your ceramic Christmas tree is crucial. Smaller trees are perfect for small spaces. They fit well on tables, shelves, or desktops. Larger trees stand out as centerpieces. They are great for living rooms or entryways.
Shapes vary from traditional to modern styles. Some trees have a classic cone shape. Others have more intricate designs. Choose a shape that matches your decor style. Simple shapes are easier to decorate. Complex shapes add visual interest.
Color Options
Ceramic Christmas trees come in many colors. The classic color is green. Green trees resemble real Christmas trees. White ceramic trees offer a modern twist. They create a snowy, winter wonderland feel.
Other colors include blue, red, and even pink. Bold colors can make a statement. Choose a color that complements your existing decor. Consider a multicolored tree for a festive look.
Some ceramic trees have built-in lights. The lights add a magical glow. They come in various colors too. Choose clear lights for a classic look. Colorful lights add a playful touch.
| Size | Shape | Color |
|---|---|---|
| Small | Classic Cone | Green |
| Medium | Modern | White |
| Large | Intricate | Multicolored |
Choosing the perfect ceramic tree makes decorating enjoyable. Consider the size, shape, and color. This ensures your tree fits perfectly in your space.
Credit: www.pmqfortwo.com
Gathering Supplies
Decorating a ceramic Christmas tree can be a fun activity. You need the right supplies to make it look festive and beautiful. Here’s a guide on gathering essential items for your project.
Paints And Brushes
Choosing the right paints and brushes is crucial. You need good-quality acrylic paints. They stick well to ceramic surfaces and dry quickly. Here’s a list of basic colors to start with:
- White
- Green
- Red
- Gold
- Silver
For brushes, select different sizes. Small brushes help with details. Larger brushes cover broad areas quickly. Here’s a simple table for brush sizes:
| Brush Size | Use |
|---|---|
| Small | Fine details |
| Medium | General painting |
| Large | Background |
Decorative Elements
Decorative elements add charm to your ceramic tree. These can be small ornaments, glitter, or tiny lights. You can find these items at craft stores.
Here are some ideas:
- Mini Ornaments: Use small, colorful ornaments.
- Glitter: Add a sparkle with different colors of glitter.
- Tiny Lights: String lights make the tree glow.
Ensure each element is proportional to your tree. Overloading can overwhelm the design. Use a hot glue gun for attaching ornaments. Be careful and use it under adult supervision.
These supplies will help you create a lovely ceramic Christmas tree. Gather everything before starting. This way, you won’t need to stop mid-project. Happy decorating!
Prepping The Tree
Before you start decorating, it’s essential to prepare your ceramic Christmas tree. Proper preparation ensures the paint and decorations adhere well. This step also makes your tree look professional and festive.
Cleaning And Sanding
Begin by cleaning the ceramic tree. Use a damp cloth to remove any dust or dirt. This helps the paint stick better and gives a smooth finish.
Next, inspect the tree for rough spots. Use fine-grit sandpaper to sand these areas gently. Sanding creates a smooth surface for painting. Make sure to wipe away any sanding dust with a clean, dry cloth.
Priming The Surface
Priming the ceramic tree is a crucial step. Choose a high-quality primer made for ceramics. Apply an even coat of primer over the entire tree. Allow the primer to dry completely. This usually takes a few hours.
Priming helps the paint adhere better and provides a uniform base color. Once the primer is dry, your tree is ready for the next steps in decorating.
Painting Techniques
Decorating a ceramic Christmas tree can be a fun and creative activity. Painting techniques play a crucial role in bringing your ceramic tree to life. Let’s explore some effective painting techniques that will make your tree stand out.
Base Coats
The first step is to apply a base coat. This sets the foundation for all other colors. Choose a light color like white or light green. It helps the other colors stand out. Use a wide brush for an even coat. Apply the paint evenly and let it dry completely.
Here is a simple table to help you pick a base coat color:
| Tree Color | Recommended Base Coat |
|---|---|
| Traditional Green | White or Light Green |
| Snowy White | Light Blue or Silver |
| Modern Colors | White or Light Gray |
Layering Colors
After applying the base coat, start layering colors. This adds depth and dimension to your tree. Use darker shades to highlight branches and lighter shades for the tips. A small brush works best for this detail work.
Follow these steps to layer colors effectively:
- Apply the base coat and let it dry.
- Select two to three complementary colors.
- Start with the darkest shade and paint the branches.
- Use a medium shade for the mid-sections.
- Finish with the lightest shade on the tips.
Using these painting techniques will make your ceramic Christmas tree look stunning and unique. Have fun and let your creativity shine!
Adding Details
Decorating a ceramic Christmas tree is a fun and creative activity. After painting the base color, adding details brings the tree to life. This section will guide you on how to add highlights, shadows, and special effects.
Highlights And Shadows
Adding highlights and shadows gives your tree depth and dimension. Use a lighter color to add highlights. Focus on areas where light would naturally hit, like the tips of branches.
For shadows, use a darker color. Apply this in crevices and undersides of branches. This will make your tree look more realistic. Use a small brush for precision.
Special Effects
Special effects can make your tree stand out. Add glitter to give a snowy effect. Use a clear glue and sprinkle glitter on top. This makes the tree sparkle.
Another idea is to use a metallic paint for ornaments. This adds a shiny, festive touch. You can also use a stencil to create patterns on the tree. This adds a unique flair.
| Effect | Materials | Steps |
|---|---|---|
| Snowy Look | Clear glue, Glitter | Apply glue, sprinkle glitter, let dry |
| Shiny Ornaments | Metallic paint, Small brush | Paint ornaments, let dry |
| Patterned Design | Stencil, Paint | Place stencil, paint, remove stencil |
Remember to let each layer dry before adding more details. This prevents smudging and keeps your design crisp. Have fun and be creative with your decorations!
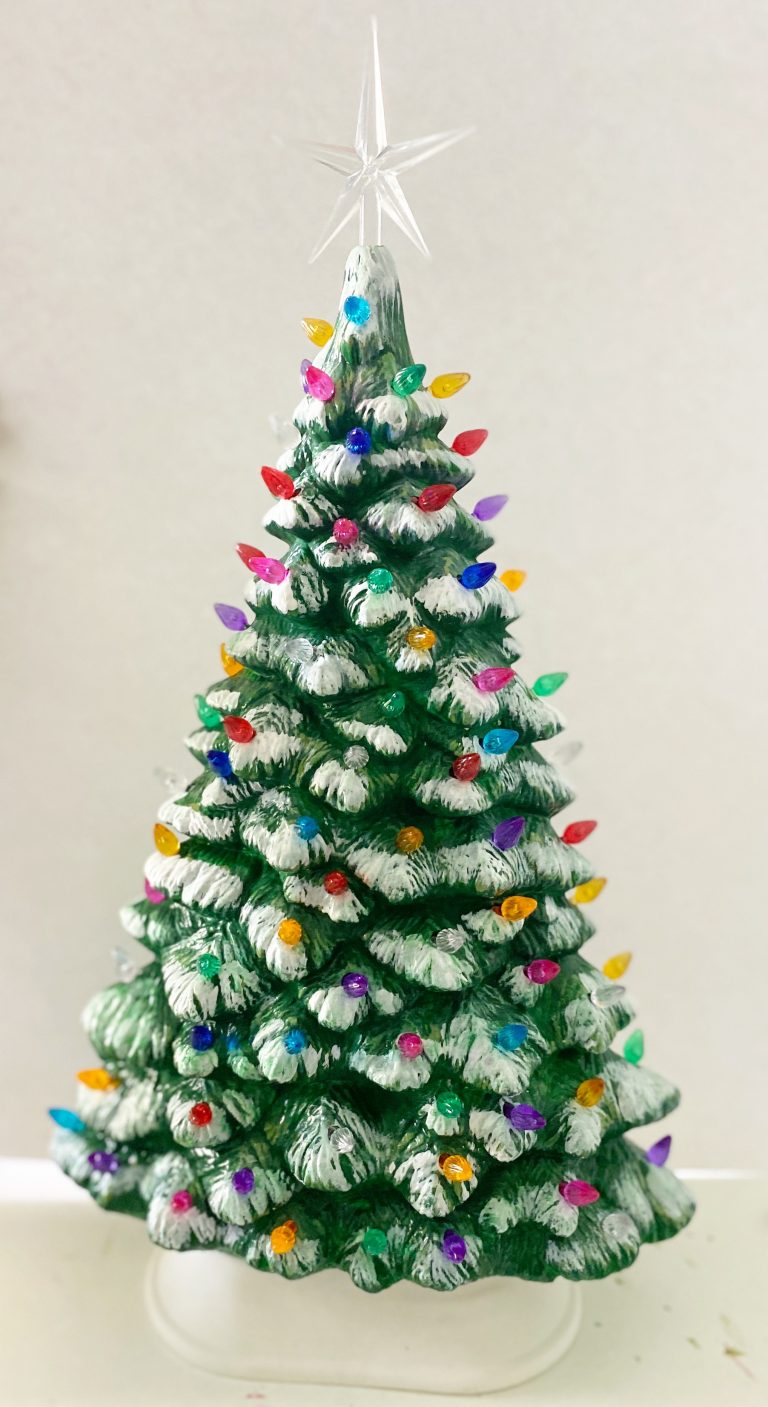
Credit: southernadoornmentsdecor.com
Decorating With Lights
Decorating your ceramic Christmas tree with lights can bring it to life. The right lights can transform your tree into a festive masterpiece.
Types Of Lights
Choosing the right lights is crucial. Here are some popular types:
- LED Lights: Energy-efficient and long-lasting.
- Mini String Lights: Perfect for a delicate touch.
- Battery-Operated Lights: No need for a nearby outlet.
- Colored Bulbs: Add vibrant hues to your tree.
Placement Tips
Placement of lights can make a big difference. Follow these tips:
- Start at the Top: Begin placing lights from the top of the tree.
- Even Spacing: Ensure lights are evenly spaced around the tree.
- Wrap Each Branch: Wrap lights around each branch for a fuller look.
- Test as You Go: Test the lights as you place them to ensure they work.
Here is a simple table for quick reference:
| Type of Light | Feature | Best Use |
|---|---|---|
| LED Lights | Energy-efficient | All-around lighting |
| Mini String Lights | Delicate touch | Small trees |
| Battery-Operated Lights | Portable | Areas without outlets |
| Colored Bulbs | Vibrant hues | Themed decor |
Finishing Touches
Once your ceramic Christmas tree has been painted, it’s time to add the finishing touches. These small details can bring your tree to life and make it shine. This section covers the final steps: glazing, sealing, and adding glitter.
Glazing And Sealing
Glazing your ceramic Christmas tree gives it a glossy, professional look. Choose a clear glaze that will enhance the colors of your paint. Apply the glaze evenly with a brush or spray. Let it dry completely before moving on to the next step.
Sealing is important to protect your artwork. It keeps the colors vibrant and makes the tree durable. Use a clear, non-yellowing sealant. Apply a thin coat over the entire tree. Allow it to dry for 24 hours. Your tree will be shiny and well-protected.
Adding Glitter
Adding glitter can give your ceramic Christmas tree a magical sparkle. Choose a fine glitter in colors that match your theme. Apply a thin layer of glue where you want the glitter to stick. Sprinkle the glitter over the glue and shake off the excess. Allow it to dry completely.
For a more controlled application, use a glitter pen. This lets you add sparkle to small areas and details. Once the glitter is dry, your tree will catch the light beautifully.
| Step | Description |
|---|---|
| 1 | Apply clear glaze evenly. Let it dry. |
| 2 | Apply clear sealant. Dry for 24 hours. |
| 3 | Apply glue for glitter. Sprinkle glitter. |
| 4 | Use glitter pen for small details. |
These finishing touches will make your ceramic Christmas tree stand out. Your tree will be a festive and eye-catching decoration for the holiday season.
Displaying Your Tree
Once you’ve decorated your ceramic Christmas tree, it’s time to display it. Finding the right place and incorporating it into your existing decor can make a big difference. Follow these tips to showcase your tree beautifully.
Choosing A Location
Selecting the perfect spot for your ceramic Christmas tree is crucial. Here are a few factors to consider:
- Visibility: Ensure the tree is visible to everyone. Place it in a central location.
- Lighting: Position it where it can catch natural light. This enhances its beauty.
- Safety: Keep it away from high-traffic areas to prevent accidents.
Ideal locations include living rooms, entryways, and dining tables. A well-chosen spot will make your tree the center of attention.
Incorporating Into Decor
Integrating your ceramic Christmas tree into your existing decor can create a cohesive look. Here are some tips:
- Color Scheme: Match the tree’s colors with your home’s color palette.
- Complementary Decorations: Add complementary decorations around the tree. This includes garlands, candles, and ornaments.
- Balance: Ensure the tree doesn’t overshadow other decorations. Maintain balance in your decor.
Use the table below for a quick reference on how to incorporate your ceramic Christmas tree into your decor:
| Element | Tip |
|---|---|
| Color Scheme | Match with existing colors |
| Complementary Decorations | Add garlands, candles, ornaments |
| Balance | Ensure no overshadowing |
By thoughtfully selecting a location and incorporating it into your decor, your ceramic Christmas tree will shine brightly in your home.
Conclusion
Creating a stunning ceramic Christmas tree is easy and fun. Use vibrant colors and unique ornaments to personalize it. Remember to balance your decorations for a harmonious look. With these tips, your tree will become a festive centerpiece. Enjoy the process and bring holiday cheer to your home. Thanks for reading, and we hope this has given you some inspiration on how to decorate a ceramic Christmas tree!


