Are you looking for an exciting craft project to tackle? If so, learning how to carve geometric cups and paint them with underglaze is a wonderful way to express your creativity. Mastering the basics can be intimidating at first – but don’t worry!

With this blog post guide, you will learn all there is to know about creating gorgeous designs with ceramic carving tools, materials, and glazes. From gathering your supplies and planning out the design of each cup to working hands-on with clay and finishing up with some simple yet effective painting techniques – by the end of it, you will have plenty of beautiful creations that are ready for display or even gifting!
Table of Contents
Can You Carve into Underglaze?
Underglaze is a type of ceramic glaze that can be painted onto the surface of a piece of pottery before it is fired in a kiln. It typically contains pigments, oxides, and fluxes that help create different colors and effects on the finished piece.
While firing underglaze will often change its color or appearance, it generally remains porous and brittle; therefore, carving directly into an underglaze piece may not be possible without damaging the material.
Some artists who work with underglazes opt to carve their pieces after they have been fired in order to maintain the integrity of the design. This involves first allowing the piece to cool down before lightly sanding any sharp edges or irregularities to prepare for carving.
Using a small, round loop tool with a sharp edge, you can carefully carve out desired shapes and details. Once the carving is complete, you can apply a new layer of underglaze to the piece or add additional decorative elements such as decals.
If you plan to use an existing design for your project, make sure that it has been tested for compatibility with underglaze before beginning any carving.
While this method may take more time than simply painting the design from scratch, it will help ensure that your finished product looks exactly how you envision it. With patience and practice, you can create beautiful geometric cups and other pottery pieces using underglaze and carved accents.
9 Methods How to Carve Geometric Cups and Paint Them with Underglaze
1. Choose the Right Type of Clay:

When carving cups, it is important to select a type of clay that is not too soft. Soft clays can make intricate designs difficult to achieve, so it’s best to use something like porcelain or stoneware. These clays have enough strength to be carved but can also be fired in a kiln.
Although they’re not as pliable as other types of clay, they are much easier to work with when creating intricate designs. Make sure the clay is soft enough to be manipulated yet firm enough to hold its shape.
2. Draw the Pattern onto the Clay:
Once you have chosen the right type of clay for your project, you will need to draw out your design. It should be as symmetrical and precise as possible. Use a ruler and protractor or compass to ensure accuracy when drawing on the clay.
You can use a pencil or another tool to draw out the lines. It is important the design does not go too close to or even beyond the edges of the clay, as this will be difficult to work with. However, you can use a slip to help attach two pieces of clay together if needed.
3. Cut Out Your Pattern:
After you have drawn out your pattern on the clay, use a craft knife or other sharp cutting instrument to cut along each line and create your cup shape. Make sure to take your time as you are cutting, and be careful not to make any mistakes. If you make any small errors, you can use clay tools to correct them.
Although it is possible to use a wheel to cut out your pattern, this can be difficult if you are not experienced with using a wheel. Though it takes more time, cutting out the pattern by hand can be easier and allow for more creative freedom.

4. Smooth Out the Edges:
Once you have cut out your pattern, use a small file or sandpaper to smooth out the edges and make sure everything is even. This will make sure the cup is symmetrical and free of any sharp edges. To finish off the carving process, use a damp sponge to clean up any errant dust or dirt.
While the clay is still wet, use a needle tool to make tiny indentations on the surface of your cup. This will add texture and design to your cup, giving it an artistic look. However, go easy on the indentations – too many will make your cup look cluttered and unappealing.
5. Apply Underglaze:
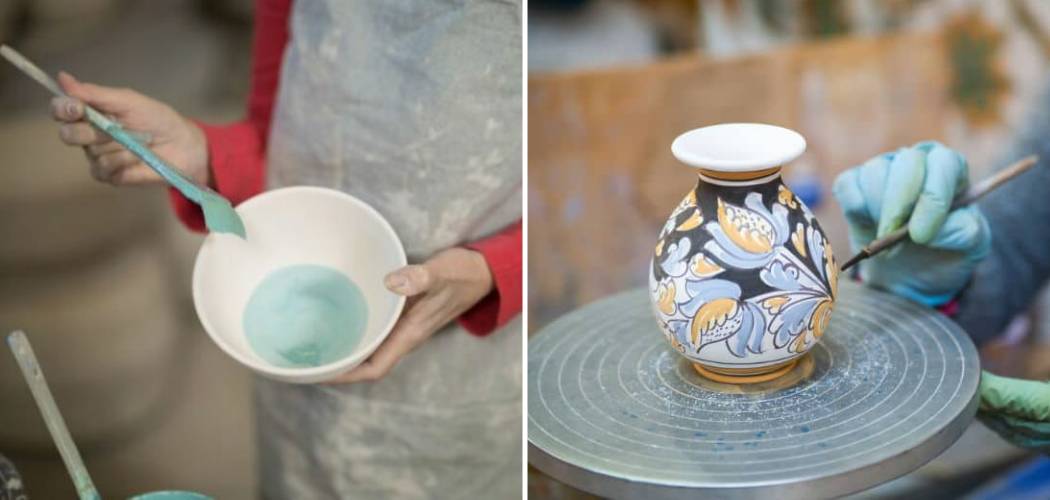
After your cup has been cut and smoothed, it’s time to apply the underglaze. This will give your cup a unique color or design that cannot be achieved with just paint alone. Before applying, make sure all dust particles have been removed from the cup surface. Then, use a brush or sponge to apply thin layers of underglaze to your cup until you are satisfied with the results.
Make sure you let each layer dry completely before adding another coat. While underglaze can be applied in multiple layers, too many coats can cause the piece to look muddy or dull. Once you have achieved your desired color and design, allow the cup to dry overnight.

6. Fire Your Cup:
After your underglaze is completely dry, it’s time to fire your cup in the kiln. Depending on the type of clay and the temperature you are firing at, this could take anywhere from a few hours to an entire day. Make sure you follow the manufacturer’s instructions for firing your cup in order to achieve the desired results. Once your cup is fired and cooled, you are ready to use it or give it as a gift.
Congratulations, you’ve successfully carved and painted your own unique cup! By taking the time to learn how to carve geometric cups and paint them with underglaze, you’ve created a one-of-a-kind piece of pottery that you can use or show off. Now that you know the basics, why not experiment with different shapes and colors? The possibilities are endless. Have fun creating your own pieces of art!
7. Glaze Your Cup:
Once your cup is fired and cooled, you can apply glaze to give it an additional protective layer. This will also add a glossy finish to the piece and make it look even more vibrant and beautiful. To glaze, you’ll need to mix your chosen glaze with water and brush it over the cup. Allow it to dry before adding a second coat. Once the glaze is dry, you’ll need to fire your cup once again in order to complete the process. Lastly, your glazed cup is ready to be displayed or used!
If you’re looking for an extra touch of creativity and color, you can also use underglaze to paint your cup. You can mix the underglazes with water and either brush or draw on the cup. Once painted, it should be fired again in order to make sure that the colors are set and permanent.
8. Paint Details with Brushes or Underglaze Pens:
If you want to add some extra detail or coloration to your cup, use either brushes or underglaze pens for finer details like stripes or decorative lines. Make sure to let the underglaze dry before you add any additional layers. If you prefer, you can also use a brush to blend the colors together for a smoother look.
When painting with underglaze pens, make sure to use light strokes and go slowly to create more intricate designs. To finish off your cup, lightly dust it with a dry brush before applying any additional glazes or decorations. With practice and patience, you can learn to carve and paint beautiful geometric cups that are perfect for any occasion.
9. Fire Again:

After you have added all of your details, it’s time to fire your piece for a second time. This will set everything into place and make sure that all of the colors are even and consistent. Place your cup in the kiln and fire it at a lower temperature than you did the first time.
This will keep the underglaze from melting and ruining the details. Try to maintain a steady temperature throughout the firing process. When your cup is done, it should be a beautiful work of art to add to your collection!
Conclusion:
Carving geometric cups and painting them with underglaze is an amazing way to create stunning pieces of art. This technique can give beautiful form, texture, color, and dimension to your work. There are many different approaches to carving and painting these types of cups, so be sure to experiment with the different options that work best for you! Thanks for reading our blog post on how to carve geometric cups and paint them with underglaze! We hope you found it helpful and informative.


