To carve clay pots, first mold the clay into the desired shape, then use carving tools to create designs. Finally, allow the pot to dry and fire it in a kiln.
Clay pot carving is an ancient art form that combines creativity with craftsmanship. It involves shaping clay into various forms and then intricately carving patterns and designs onto the surface. This process requires patience, precision, and a steady hand. Beginners can start with simple tools and basic designs, gradually advancing to more complex patterns as they gain confidence and skill.
Carving clay pots can be a rewarding hobby, providing a sense of accomplishment while producing beautiful, functional art pieces. With practice, anyone can master the basics and create stunning clay pots.
Table of Contents
Introduction To Carve Clay Pots
Clay pot carving is a timeless art form. It involves shaping and decorating clay pots. This craft has been practiced for centuries. Today, it continues to evolve with modern trends. In this blog post, we’ll explore the rich history and current styles of clay pot carving.
History And Tradition
Clay pot carving has ancient roots. Many early civilizations carved clay pots. These pots were used for storage and rituals. Carved pots often had intricate designs. They told stories and depicted daily life.
The Egyptians, Greeks, and Romans were masters of this art. They created stunning carved pots. These pots are still admired today. Traditional methods involve hand tools and simple techniques. Carvers used sticks, stones, and bones to create designs.
In many cultures, clay pot carving is a family tradition. Skills are passed down through generations. Each region has unique styles and patterns. These traditions keep the art alive and vibrant.
Modern Trends
Today, clay pot carving is experiencing a revival. Modern artists are experimenting with new techniques. They use electric tools and advanced methods. This allows for more intricate designs and faster production.
Contemporary designs often blend old and new styles. Artists incorporate traditional motifs with modern aesthetics. This creates unique and visually appealing pots.
Another trend is eco-friendly materials. Many carvers use sustainable clay sources. This reduces environmental impact and promotes responsible art practices.
Workshops and online tutorials are widely available. These resources help beginners learn the craft. They also connect experienced carvers with new audiences.
| Traditional Tools | Modern Tools |
|---|---|
| Wooden sticks | Electric carving tools |
| Stone chisels | Laser cutters |
| Animal bones | 3D printing |
Clay pot carving is both an ancient and modern craft. It bridges the past and present. Whether you are a beginner or an expert, this art form offers endless possibilities.

Credit: thelittlepotcompany.co.uk
Essential Tools And Materials
Carving clay pots is a fun and creative activity. The right tools make all the difference. Let’s explore the essential tools and materials you need.
Basic Tools
Start with these basic tools. They are easy to find and use.
- Clay: Choose a good-quality clay for your project.
- Potter’s Wheel: Helps in shaping the clay.
- Clay Cutter: Used to cut the clay into pieces.
- Sculpting Tools: Different shapes for detailed work.
- Water Container: Keeps the clay moist.
- Sponge: Smoothens the surface of the clay.
Specialized Equipment
For more intricate work, use specialized equipment. These tools help in detailed carving.
- Clay Extruder: Creates consistent shapes and designs.
- Carving Blades: Sharp blades for precision cuts.
- Texturing Tools: Adds texture and patterns to your pot.
- Loop Tools: Removes clay and creates grooves.
- Needle Tool: Used for fine details and lines.
- Banding Wheel: Rotates the pot for even carving.
| Tool | Purpose |
|---|---|
| Clay Extruder | Creates consistent shapes |
| Carving Blades | Precision cuts |
| Texturing Tools | Adds patterns |
| Loop Tools | Removes clay |
| Needle Tool | Fine details |
| Banding Wheel | Even carving |
Having these tools will make carving clay pots easier and more enjoyable. Invest in good-quality tools for the best results.
Choosing The Right Clay
Choosing the right clay is crucial for carving beautiful clay pots. The type and quality of clay will determine the final look and durability of your creation. In this section, we will guide you through types of clay and selecting quality clay to ensure your pot turns out perfect.
Types Of Clay
Different types of clay have unique properties. Here are the most common:
- Earthenware: Ideal for beginners. It’s soft and easy to shape.
- Stoneware: Tough and durable. Great for functional pots.
- Porcelain: Very fine and smooth. Best for detailed carvings.
Each type of clay has its own firing temperature and shrinkage rate. It’s important to choose the right one for your project.
Selecting Quality Clay
The quality of clay affects the final product. Here are some tips:
- Texture: Choose clay with a smooth, consistent texture.
- Moisture: Ensure the clay is moist but not too wet.
- Purity: High-quality clay should be free of impurities.
You can test the clay by rolling it into a coil. If it cracks easily, it’s too dry. If it feels sticky, it’s too wet.
For a quick reference, here’s a table with the key points:
| Type of Clay | Properties | Best for |
|---|---|---|
| Earthenware | Soft, easy to shape | Beginners |
| Stoneware | Tough, durable | Functional pots |
| Porcelain | Fine, smooth | Detailed carvings |
By understanding the different types and selecting quality clay, you set the foundation for a successful carving project.
Preparing Your Workspace
Before you start carving clay pots, it’s vital to prepare your workspace. A well-organized area helps you work efficiently and safely. This section will guide you through setting up your area and ensuring safety measures are in place.
Setting Up Your Area
Your workspace should be clean and organized. Find a table that is sturdy and large enough to hold your tools and clay. Ensure you have good lighting. Natural light is best, but a bright lamp works too.
Gather all your tools before you begin. You will need carving tools, a sponge, and water. Place them within easy reach. Use a tray or mat to keep your workspace tidy.
Avoid working near distractions. This helps you focus better on your carving. Keep kids and pets away from your area to prevent accidents.
Safety Measures
Safety is very important when carving clay pots. Wear an apron to protect your clothes. Use gloves if your skin is sensitive to clay.
Make sure your tools are in good condition. Sharp tools make clean cuts and reduce the risk of injury. Always cut away from your body to avoid accidents.
Keep a first aid kit nearby. Accidents can happen, and it’s best to be prepared. Make sure you know how to use it.
Ensure your workspace is well-ventilated. This helps in reducing dust and fumes. Open a window or use a fan if needed.
| Item | Purpose |
|---|---|
| Sturdy Table | Provides a stable work surface |
| Good Lighting | Helps you see details clearly |
| Carving Tools | Used for shaping the clay |
| Sponge and Water | Keeps the clay moist |
| Apron | Protects your clothes |
| Gloves | Protects your skin |
| First Aid Kit | For emergencies |
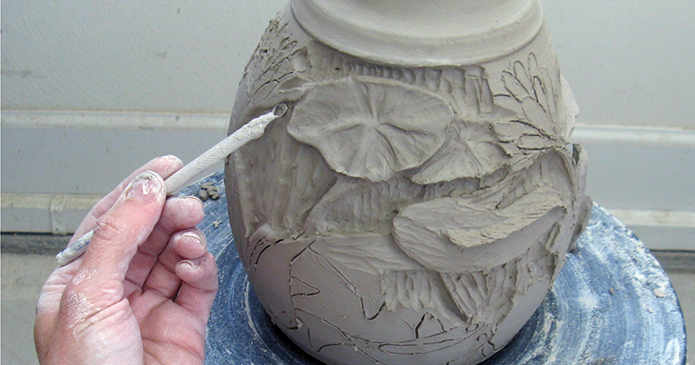
Basic Carving Techniques
Carving clay pots is a rewarding and creative activity. It allows you to add unique designs and personal touches to your pottery. Here, you will learn the fundamental techniques to get started. These basics will help you create beautiful patterns and avoid common mistakes.
Simple Patterns
Creating simple patterns can be a great starting point for beginners. Use tools like carving knives, needles, and wire loops. Begin with easy designs like lines, dots, and curves.
- Lines: Use a carving knife to etch straight lines.
- Dots: Create dots using a needle or pin tool.
- Curves: Draw gentle curves with a wire loop tool.
Repeat these patterns for a pleasing effect. Consistency is key to making your designs stand out.
Common Mistakes
Understanding common mistakes can save you time and frustration. Here are a few to watch out for:
- Too Much Pressure: Pressing too hard can crack the clay. Use gentle pressure.
- Uneven Carving: Inconsistent depth can ruin your design. Keep your hand steady.
- Rushing: Take your time to avoid sloppy work. Patience leads to better results.
By avoiding these mistakes, you can improve your carving skills. Practice will help you develop a steady hand and a keen eye for detail.
| Tool | Purpose |
|---|---|
| Carving Knife | Etching lines |
| Needle | Creating dots |
| Wire Loop | Drawing curves |
Using the right tools makes carving easier. Choose high-quality tools for the best results. Keep practicing these techniques to master the art of clay pot carving.
Credit: ceramicartsnetwork.org
Advanced Carving Methods
Advanced carving methods bring unique beauty to your clay pots. These techniques require precision and creativity. Let’s explore two advanced methods: detailed designs and layering techniques.
Detailed Designs
Creating detailed designs on clay pots can be very rewarding. You can use small carving tools to make intricate patterns. Here are some steps to follow:
- Choose your design: Decide on a pattern or image you want to carve.
- Trace your design: Use a pencil or stylus to outline the design on your clay pot.
- Carve carefully: Use fine carving tools to follow the traced lines. Make sure each line is neat and clean.
- Add texture: Create texture within your design by adding small dots or lines.
Detailed designs can transform a plain pot into a work of art. Patience and practice are key.
Layering Techniques
Layering techniques add depth and dimension to your clay pots. This method involves carving multiple layers into the clay. Follow these steps for a stunning effect:
- Prepare your clay: Make sure your clay is at the right consistency, not too wet or dry.
- Carve the first layer: Start by carving the topmost design lightly into the clay.
- Remove clay from the first layer: Carefully carve out the clay from the first layer to create depth.
- Carve deeper layers: Continue carving deeper into the clay, following your design.
- Smooth the edges: Use a soft tool to smooth the edges of each layer.
Layering techniques create a 3D effect on your pot. It makes the design pop out beautifully.
Adding Finishing Touches
After carving your clay pot, adding finishing touches is crucial. This ensures your pot looks polished and professional. The final steps include smoothing and polishing the surface and applying glaze for that perfect finish.
Smoothing And Polishing
Smoothing and polishing your clay pot makes it look neat. Use a wet sponge to gently rub the surface. This removes any rough spots and makes the pot feel smooth.
Next, use a soft cloth to polish the pot. Rub the pot in circular motions. This makes the pot shine and look beautiful.
Here are the steps in a table format:
| Step | Action |
|---|---|
| 1 | Use a wet sponge to smooth the surface |
| 2 | Polish with a soft cloth in circular motions |
Applying Glaze
Applying glaze adds color and protection to your clay pot. Choose a glaze color that you like. Use a brush to apply an even coat of glaze to the pot.
Let the glaze dry completely. After it dries, fire the pot in a kiln. This sets the glaze and makes your pot durable.
Here are the steps in an ordered list:
- Choose a glaze color
- Apply an even coat of glaze with a brush
- Let the glaze dry completely
- Fire the pot in a kiln
These steps ensure your clay pot has a beautiful finish.
Caring For Your Carved Pots
Carved clay pots are beautiful and delicate. Proper care keeps them looking new. Below are some tips for cleaning and storing your carved pots.
Cleaning Tips
Regular cleaning is vital for carved pots. Follow these steps:
- Use a soft brush to remove dust.
- Rinse with lukewarm water gently.
- Avoid using harsh chemicals or soaps.
- Pat dry with a soft cloth.
Storage Solutions
Proper storage prevents damage. Consider these options:
- Place pots on sturdy shelves.
- Use padding between pots to avoid scratches.
- Store in a cool, dry place.
- Avoid exposure to direct sunlight.
By following these steps, your carved clay pots will remain beautiful and intact for years.
Inspiration And Resources
Carving clay pots can be a fun and rewarding hobby. To get started, you need the right inspiration and resources. Here, you will find influential artists and helpful tutorials to guide you.
Influential Artists
Learning from the best can spark creativity and improve your skills. Here are a few artists known for their clay carving work:
- Grayson Perry: Known for his intricate and colorful designs.
- Betty Woodman: Famous for her abstract and vibrant pieces.
- Ken Price: Celebrated for his unique shapes and textures.
Explore their work to understand different styles and techniques. You can find their works in art galleries and online platforms.
Helpful Tutorials
Accessing quality tutorials can make the learning process easier. Here are some resources to get you started:
| Tutorial | Description | Link |
|---|---|---|
| Beginner’s Guide to Clay Carving | Step-by-step instructions for beginners. | Visit Tutorial |
| Advanced Carving Techniques | Learn advanced methods and tips. | Visit Tutorial |
| Clay Pot Design Ideas | Inspiration for unique and creative designs. | Visit Tutorial |
Follow these tutorials to improve your skills and create beautiful clay pots. Practice regularly to master the art of clay carving.

Credit: hildacarrpottery.com
Conclusion
Creating your own carved clay pots is both rewarding and therapeutic. With practice, your skills will improve. Remember to gather the right tools and follow each step carefully. Soon, you’ll have beautiful, unique pots to showcase. Happy carving and enjoy the creative process!


