Burning pottery is an ancient art form that transcends time and cultures, embodying both utility and aesthetic beauty. Among the myriad techniques employed in pottery making, burnishing stands out as a method to impart a smooth and lustrous finish to clay vessels. It’s a process that dates back thousands of years, utilized by civilizations across the globe from the Greeks to the Indigenous peoples of the Americas.
Burnishing not only enhances the visual appeal of pottery but also serves a practical purpose by sealing the surface, making vessels more durable and less porous. In this article, we delve into how to burnish pottery, exploring the techniques, tools, and traditions associated with this age-old practice. Whether you’re a seasoned ceramic artist or a curious beginner, understanding the nuances of burnishing can elevate your craft and deepen your appreciation for the rich history of pottery making.
Table of Contents
Embracing the Ancient Craft of Burnishing
To genuinely appreciate the significance of burnishing, it’s necessary to look back. This practice draws its roots from indigenous cultures across the globe, where potters would polish their wares using stones, shells, and other smooth implements. The Greeks and Romans were famed for their burnishing techniques, while pre-Columbian Mesoamerican cultures developed distinctive ways to achieve a high gloss without the use of fired glazes.
Today, modern techniques may have integrated with these ancient methods, yet the principles of burnishing remain much as they were centuries ago. The craft is a unifying thread linking potters across time and geography.
Understanding the Purpose of Pottery Burnishing
Burnishing pottery goes beyond aesthetics. When you burnish, you compact the clay particles, creating a highly dense structure. This enhances the pottery’s durability, making it less porous and more resistant to moisture — an important consideration for functional pottery that will hold water or food.
Furthermore, this process can accentuate the natural colors within the clay, turning mundane brown or red earth tones into vibrant hues that seem to radiate from within the pottery itself. With such benefits, it’s no wonder that burnishing has retained its position as a fundamental step in the pottery-making process.
The Tools of the Trade: What You Need to Burnish
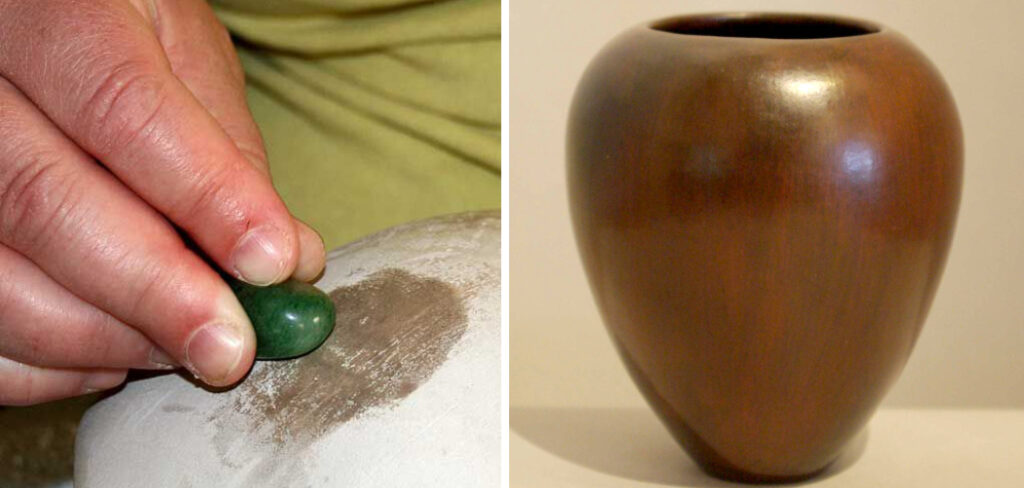
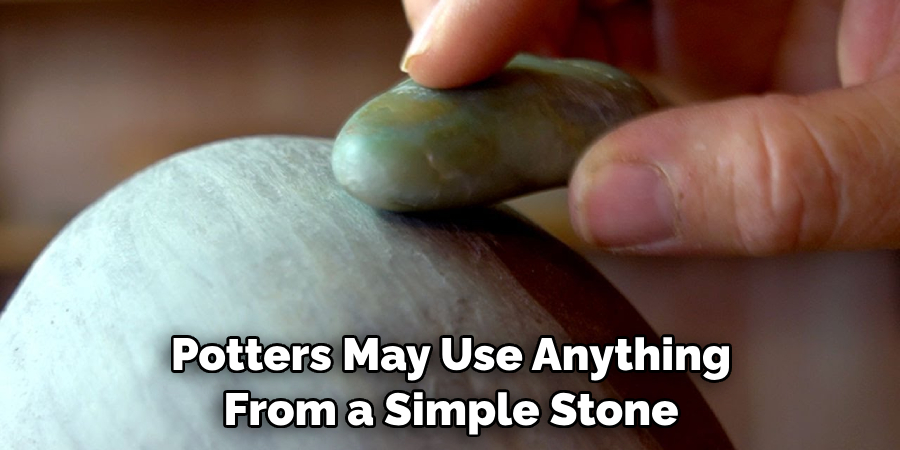
As with any craft, the right tools are crucial. Traditional burnishing requires little more than elbow grease, a smooth object for rubbing, and some form of lubrication. Potters may use anything from a simple stone or hard wood tool to a polished metal rib or even the back of a spoon. It’s not the tool itself that matters, but its ability to polish the surface of the clay without leaving any significant marks.
When selecting a tool, consider the size and shape of the pottery you’re working on. Larger pieces may require larger tools or multiple tools for even coverage. And remember, the lubricant used during burnishing can also affect the final outcome. Beeswax, water, or even vegetable oil can serve as effective mediums.
10 Steps How to Burnish Pottery
1. Preparing the Pottery:
Before beginning the burnishing process, ensure that your pottery piece is thoroughly dried to a leather-hard stage. This means that the clay is stiff but still slightly pliable. If the clay is too wet, it will be prone to distortion during burnishing, while if it’s too dry, it may crack or flake.
2. Selecting the Burnishing Tool:
Traditionally, pottery is burnished using smooth stones, pieces of glass, or polished metal tools. Choose a tool that fits comfortably in your hand and has a smooth, rounded surface. Some potters prefer to use their hands directly for burnishing, relying on the natural oils in their skin to achieve a smooth finish.
3. Applying Pressure:
Hold the burnishing tool firmly but not too tightly, and apply even pressure across the surface of the pottery. The goal is to compress the clay particles and smooth out any rough or uneven areas. Start with gentle pressure and gradually increase as needed, being careful not to apply too much force, which could cause the clay to deform.
4. Rotating the Pottery:
As you burnish, rotate the pottery piece regularly to ensure that you cover the entire surface evenly. Pay close attention to the edges and any intricate details, as these areas can be more challenging to burnish thoroughly. Take your time and work methodically, focusing on one section at a time to achieve a consistent finish.
5. Maintaining Moisture:
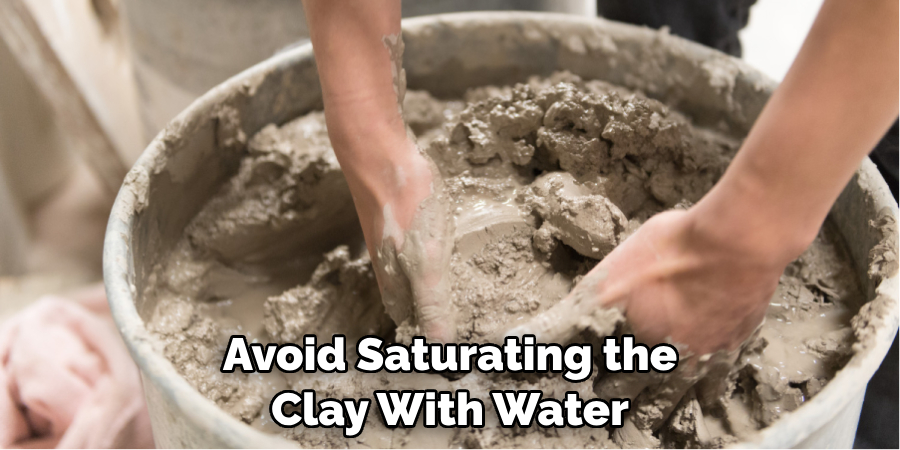
To prevent the clay from drying out too quickly during burnishing, lightly mist the surface with water as needed. This helps to keep the clay soft and pliable, making it easier to compress and smooth. Avoid saturating the clay with water, as excessive moisture can cause the surface to become slippery and difficult to work with.
6. Buffing the Surface:
Once you’ve completed the initial round of burnishing, take a soft cloth or chamois and gently buff the surface of the pottery. This helps to remove any excess clay particles and further smooth out the surface. Buffing also enhances the shine of the pottery, giving it a polished appearance.
7. Adding Decorative Elements:
If desired, you can incorporate decorative elements into your burnished pottery before it dries completely. This could include carving designs, adding texture, or applying slip for contrast. Be mindful of the timing, as the clay should still be slightly damp to allow for easy manipulation without distorting the shape.
8. Allowing for Drying Time:
After burnishing and any additional embellishments, allow the pottery piece to dry completely before proceeding with firing. This typically involves several days to a week, depending on the size and thickness of the clay. Keep the pottery in a cool, dry place away from direct sunlight to ensure even drying and minimize the risk of cracking.
9. Bisque Firing:
Once the pottery is fully dried, it’s ready for the bisque firing. This initial firing removes any remaining moisture from the clay and prepares it for glazing. Follow the recommended firing schedule for your specific type of clay and kiln, gradually increasing the temperature to the appropriate level for bisque firing.
10. Final Glazing and Firing:
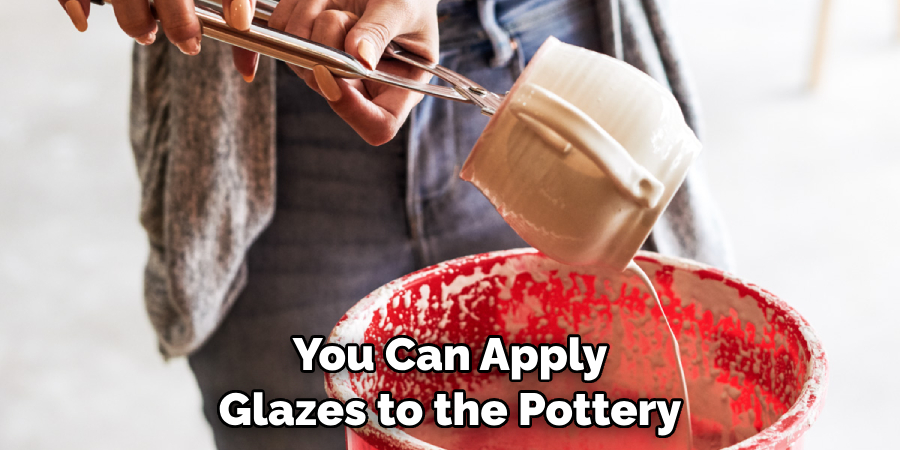
After the bisque firing, you can apply glazes to the pottery if desired. Be mindful of the compatibility between the glaze and the clay body to achieve the desired results. Once the glaze has been applied, the pottery is ready for its final firing. Follow the recommended firing schedule for the glaze type, ensuring that the temperature is sufficient to melt and fuse the glaze to the surface of the pottery.
Overcoming Burnishing Challenges
While burnishing can be a straightforward process, it’s not without its challenges. Maintaining even pressure and coverage can be difficult, especially on larger or more complex forms. Additionally, the type of clay used can affect the ease of burnishing; clays with grog or sand can cause more wear on the burnishing tool and may require additional burnishing to achieve the desired smoothness.
One way to overcome these challenges is through practice. By working with various clays and honing your technique, you’ll become more adept at achieving a consistent, lustrous finish. Additionally, don’t be afraid to experiment with different tools and lubricants to find what works best for you and your creations.
Aftercare and Finishing
After the final firing, your pottery has endured the transformative journey from clay to ceramic, and it’s now time for aftercare to ensure longevity and beauty of the finished piece. Handle the pottery with care; even though it’s now durable, sudden temperature changes and impacts can lead to cracks or chips.
Wash the pottery by hand instead of using a dishwasher. The harsh chemicals and temperatures of a dishwasher can degrade the glaze over time. Use a soft sponge and mild detergent for cleaning to maintain the integrity of your pottery’s surface.
Additionally, when storing or displaying your pottery, avoid stacking pieces directly on top of one another if they are not designed for this; the weight can cause scratches or damage. Instead, use felt pads or cloth in between to protect the pieces. For decorative pottery, keep it out of extensive direct sunlight to prevent any fading of the colors. Following these aftercare tips will ensure that the burnished shine and elegance persists, making every piece a timeless work of art in your collection.

The Implications of Burnishing in Contemporary Pottery
In the modern era, where technology often supersedes tradition, burnishing holds a particular allure. It reminds us of the simplicity and raw beauty present in the crafting process. Burnished pottery is a testament to the skill and dedication of the potter, preserving a connection to the past even as it finds a place in contemporary homes and galleries.
There’s a unique joy in using or displaying a piece of pottery that you’ve lovingly burnished by hand — the sense of accomplishment, the knowledge of its durability, and the simple pleasure of the light playing off its glossy surface.
Conclusion
As we’ve explored the intricacies of burnishing, it’s evident that this elemental craft offers more than meets the eye. From its historical significance to its functional and aesthetic benefits, burnished pottery stands as an emblem of artisanship and resilience.
For the pottery enthusiast or the novice just starting to turn clay, embracing the art of burnishing is a fulfilling journey that bridges the past with the present. It’s a reminder of the timeless human impulse to create, shape, and refine the world around us, one piece of polished pottery at a time. Follow these simple instructions outlined in this blog post about how to burnish pottery, and you’ll be able to get the job done with ease.


