Burning clay, a process also known as firing, is a transformative step in the creation of durable and finished ceramic pieces. Whether you’re a seasoned potter or an enthusiastic beginner, understanding how to burn clay is essential to bring your artistic visions to life. Firing clay involves subjecting it to high temperatures, causing physical and chemical changes that turn malleable clay into hardened ceramic forms.
In this comprehensive guide, we will explore the art of burning clay, covering the different types of kilns, firing techniques, and key considerations in the firing process. From bisque firing to glaze firing, we’ll unravel the nuances of achieving the desired results in your ceramics. Join us on this journey as we delve into the essential aspects of burning clay, providing you with the knowledge and skills needed to create beautiful, enduring pottery pieces through the fascinating process of firing.
Table of Contents
Types of Clay
Understanding the different types of clay is the first step before you delve into the process of burning clay. Each type of clay has distinct characteristics, making it suitable for specific tasks and firing temperatures.
- Earthenware: This is the most common form of clay. It’s highly malleable, making it ideal for beginners. After firing, earthenware remains porous and must be glazed if it’s to hold water.
- Stoneware: A denser type of clay that’s less porous than earthenware. It’s ideal for making sturdier items like mugs or plates and can be fired at a higher temperature.
- Porcelain: Known for its fine-grained and smooth texture, porcelain can be fired at a very high temperature, resulting in a strong and translucent finish.
- Ball Clay: A highly plastic variety of clay that fires to a white or near-white color. It’s often used in combination with other types of clay to increase their workability.
- Fire Clay: As the name suggests, this clay type can withstand very high temperatures, making it ideal for making bricks, tiles, and other refractory ceramic materials.
Remember, the type of clay you choose will determine the burning temperature and the end hardness of your ceramic piece.
Preparation of Clay
Before burning clay, it’s crucial to prepare it properly to ensure a successful firing process. Here is a step-by-step guide on how to prepare your clay:
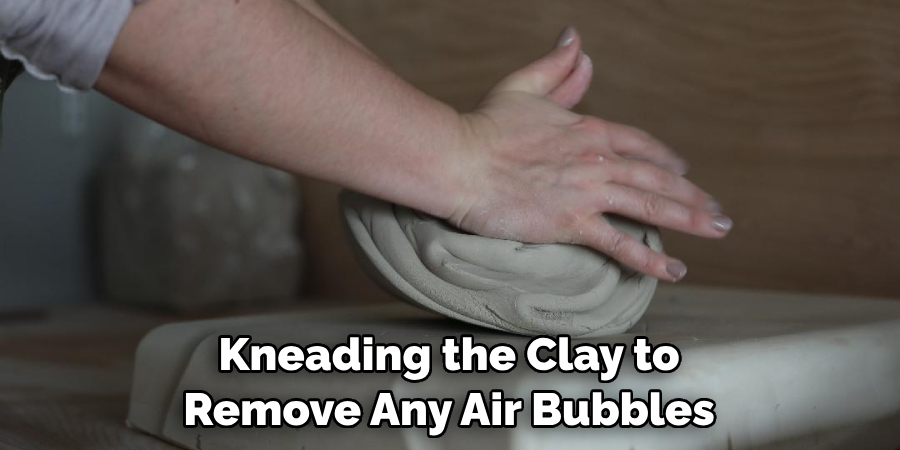
Step 1: Wedging: Start by kneading the clay to remove any air bubbles and create a uniform consistency. This process, known as wedging, also helps to align the clay particles for better workability.
Step 2: Shaping: Once your clay is well-wedged, you can start shaping it into your desired form. Use your hands or various shaping tools to mold the clay. Make sure to keep the thickness of your clay piece uniform to prevent cracking during the firing process.
Step 3: Drying: After shaping your piece, let it dry slowly and evenly. This can take several days depending on the size of your piece and the humidity in the air. The clay should turn from a dark, damp color to a lighter, dry color when it’s ready to be fired.
Step 4: Sanding: If needed, once the clay is bone dry, you can gently sand any rough edges with a fine-grit sandpaper. Be sure to wipe away any dust before firing.
This careful preparation is vital in the process of burning clay, as it significantly contributes to the overall success and quality of the final ceramic piece.
10 Ways How to Burn Clay
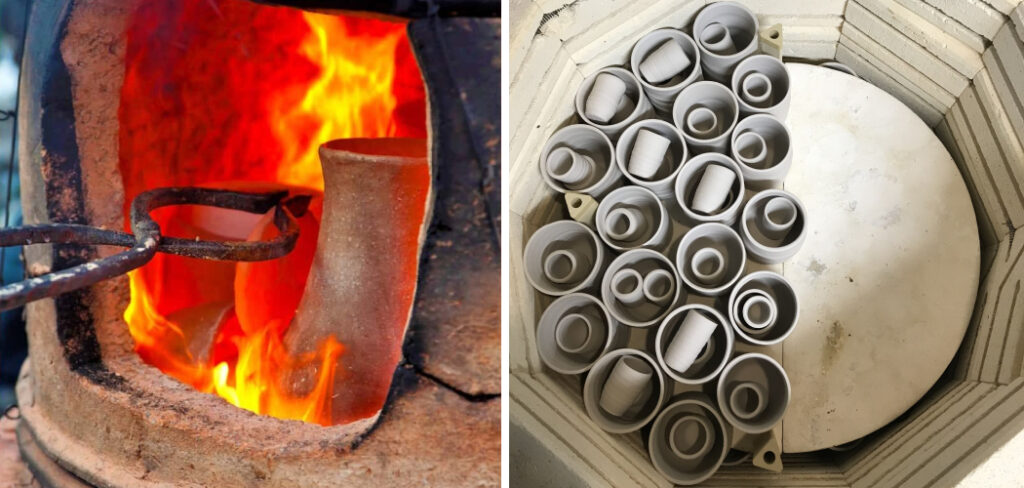
1. Kiln Firing
The most common and effective way to burn clay is by firing it in a kiln. A kiln is a special oven used for pottery and ceramics that can reach extremely high temperatures, allowing the clay to harden and become durable.
2. Pit Firing
Pit firing is a traditional method of burning clay that involves creating a fire pit and placing the clay pieces inside. The fire is then lit and allowed to burn for several hours, resulting in a unique and rustic finish on the clay.
3. Raku Firing
Raku firing is a Japanese technique that involves removing the clay from the kiln while it is still hot and placing it in a container with combustible materials such as sawdust or leaves. This creates an intense reduction atmosphere, resulting in unique patterns and colors on the clay.
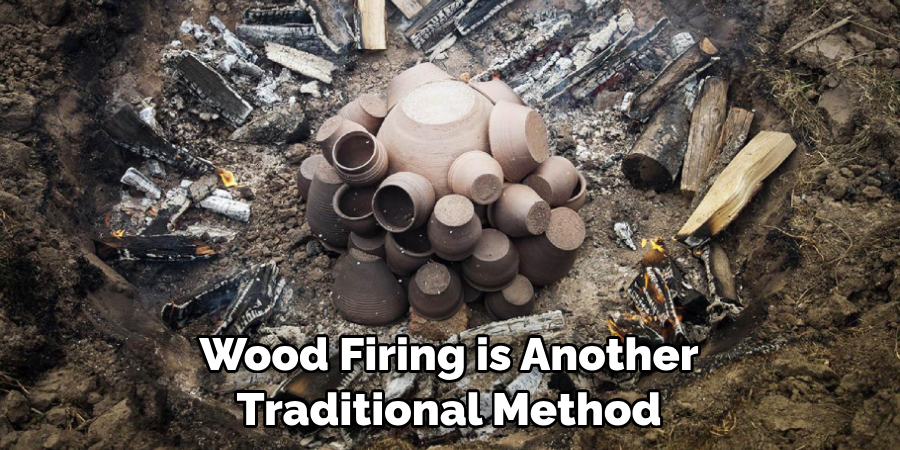
4. Wood Firing
Wood firing is another traditional method of burning clay that involves using wood as fuel in the kiln instead of gas or electricity. This process can take several days but results in rich, earthy tones on the finished pieces.
5. Salt Glazing
Salt glazing involves adding salt to the kiln during firing, which creates a chemical reaction with the clay surface, resulting in a glossy finish. This technique was popularized in Germany during the 15th century.
6. Oxidation Firing
Oxidation firing involves using an electric or gas kiln with plenty of oxygen present, resulting in bright colors on the finished pieces. This method is commonly used for commercial pottery production.
7. Reduction Firing
Reduction firing involves reducing oxygen levels in the kiln by adding specific materials such as sawdust or copper wire during firing. This results in darker, more muted colors on the finished pieces.
8. Sagger Firing
Sagger firing involves placing clay pieces inside protective containers called saggers before placing them into the kiln. This method is often used for delicate or fragile pieces to prevent damage during firing.
9. Naked Raku Firing
Naked raku firing involves removing the glazed pieces from the kiln while still hot and placing them in a container with combustible materials, similar to raku firing. However, in this technique, the glaze is removed before firing, resulting in a smoky, crackled finish on the clay.
10. Smoke Firing
Smoke firing involves placing clay pieces directly into a fire pit and allowing them to be exposed to smoke and flames. This results in unique patterns and colors on the finished pieces and is often used for decorative purposes rather than functional pottery.
Stages of Pottery Clay Burning
The process of burning clay, also known as firing, involves several stages that transform the clay from a soft, malleable substance into a hard, durable ceramic.
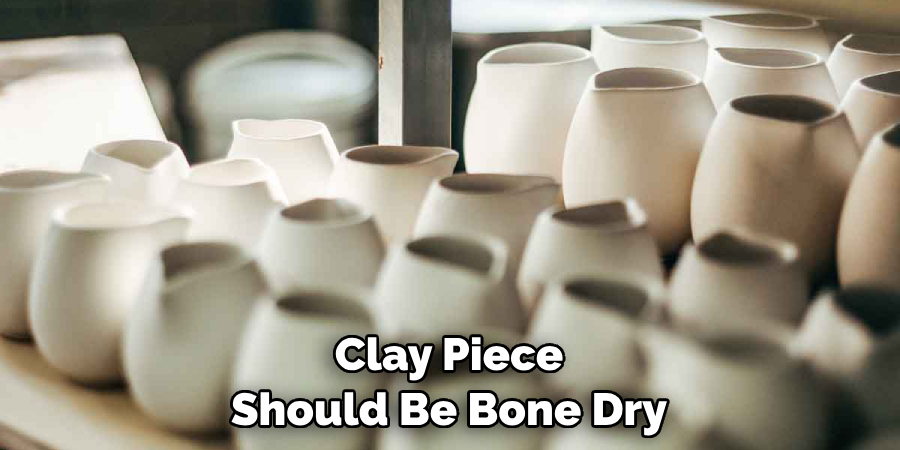
1. Drying Stage
The first stage of the firing process is drying. This happens at room temperature before the clay even enters the kiln. The clay piece should be bone dry with a light color and no dark, damp areas.
2. Water Smoking Stage
When the clay is first introduced to heat in the kiln, any remaining water in the clay will start to evaporate. This stage occurs at temperatures below 212°F (100°C), the boiling point of water.
3. Dehydration Stage
As the temperature continues to rise, the clay experiences dehydration, which occurs between 660°F and 930°F (350°C-500°C). During this stage, chemically bonded water is driven out of the clay.
4. Oxidation Stage
The oxidation stage happens between 1112°F and 1832°F (600°C-1000°C). Here, organic materials in the clay burn off and the clay changes chemically, making it unable to revert to its malleable form.
5. Quartz Inversion Stage
At around 1063°F (573°C), clay goes through a stage called quartz inversion. The clay structure changes and can cause the clay to crack if the temperature rises or falls too quickly.
6. Vitrification Stage
Vitrification occurs when the clay is heated to its maturation point, between 1832°F and 2372°F (1000°C-1300°C), depending on the type of clay. During this stage, the clay particles meld together and the clay becomes non-porous and glass-like.
7. Cooling Stage
The last stage of the firing process is cooling. The kiln is slowly cooled to prevent the finished pottery from cracking due to thermal shock.
These stages of clay burning are critical to creating successful, durable ceramic pieces. The precise temperatures and durations may vary depending on the type of clay and the specific kiln used.
Troubleshooting and Tips
When burning clay, you may encounter several challenges that could potentially affect the result of your ceramic pieces. Here are some troubleshooting tips to assist you.
- Cracking: If your clay pieces are cracking during the drying or firing process, it could be due to uneven drying or rapid temperature changes in the kiln. To prevent this, ensure that your piece dries evenly before firing and control the temperature change inside the kiln, especially during the quartz inversion stage.
- Discoloration: Discoloration can occur due to impurities in the clay or in the kiln atmosphere. To avoid this, ensure your clay is clean and clear of any foreign materials before firing. Also, control the atmosphere inside your kiln during firing, especially if you’re using oxidation or reduction firing.
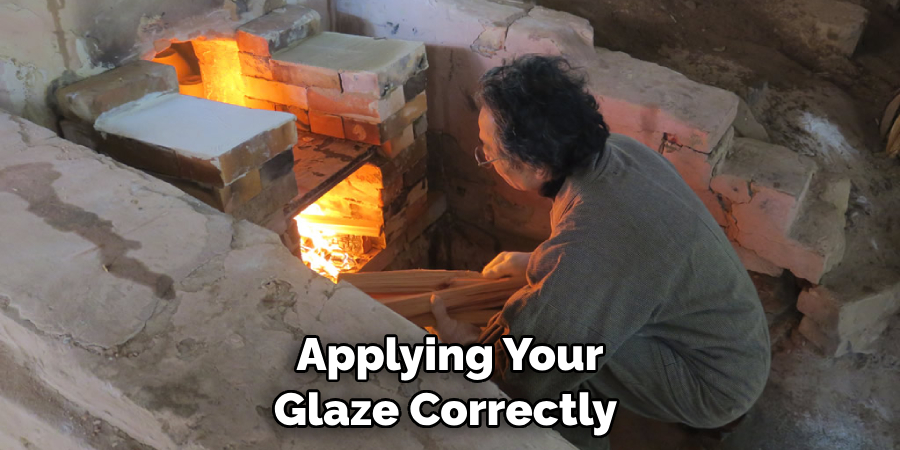
- Glaze Issues: If your glaze is not adhering properly or is coming out different than expected, it might be due to the wrong firing temperature or improper application of the glaze. Make sure you are applying your glaze correctly and firing it at the right temperature for that specific glaze.
- Under-Fired or Over-Fired Pottery: Under-fired pottery can be porous and brittle, while over-fired pottery can melt, warp, or become too dense. Understand the maturation point of your specific clay type and carefully control your kiln temperature to avoid under or over firing.
Remember, patience and practice are key in the process of burning clay. Don’t get disheartened if your first few pieces don’t turn out as expected. Keep experimenting with different techniques and temperatures until you find what works best for your specific clay type and the style of ceramic piece you are aiming to create.
Conclusion
In conclusion, learning how to burn clay is an ancient and traditional technique that has withstood the test of time. The process may seem simple, but it requires patience, skill, and a deep connection to the earth. By following these steps, you can successfully create beautiful and durable pieces of pottery or artwork that will last for generations to come.
Whether you are a beginner or an experienced potter, I hope this blog post has inspired you to try your hand at burning clay. So go ahead and gather your supplies, prepare your kiln, and let the flames do their magic. Who knows? You may discover a new passion or even uncover hidden talents within yourself. And don’t forget to share your creations with others – spread the joy of burning clay!


