How to Make a Cylinder on Pottery Wheel
To make a cylinder on a pottery wheel, start with 1–2 lb of clay, center it, open the middle while leaving a solid base, then pull the walls upward with supported hands. If you’ll leave the cylinder to dry on the bat, keep at least 1/4 in of clay on the bottom.
Quick answer
How do you make a cylinder on a pottery wheel?
Wedge the clay and shape it into a ball. Center the clay, open it while leaving a solid base, compress the floor, then pull and straighten the walls with coordinated pressure from inside and outside. Keep your hands wet enough to glide without flooding the clay, and use a slower, controlled speed for pulling than for centering.
- Secure a bat if you’re using one, wedge the clay, shape it into a ball, and press it tip down onto the wheel head.
- Center the clay with firm, steady pressure; sit close and brace your elbows against your body.
- Slow the wheel, open the center without cutting through the base, flatten and compress the floor.
- Raise the walls with one hand supporting the outside and the inside fingers lifting; work at a controlled speed, slower than centering, and let the clay co.
- Use a rib to even the walls, compress the rim, sponge out pooled water, trim excess clay, then wire-cut and transfer the cylinder when it can hold its shape.
What Does This Pottery Project Require?
For how to make a cylinder on pottery wheel, begin with 1–2 lb of clay for practice; that’s a manageable beginner amount, while one tutorial recommends 2 lb as a starting point. A short cylinder is useful practice for wall evenness, floor thickness, and rim control.
| Item | Beginner guide | Source |
|---|---|---|
| Difficulty | Beginner | lakesidepottery.com (1635) |
| Skills practiced | Wall evenness, floor thickness, rim control | claybook.studio |
How Do You Throw a Clay Cylinder?
Gather a pottery wheel, 1–2 lb of suitable throwing clay, a water container, sponge, needle tool, rib, wire cutter, and optional bat. A 2 lb clay ball is a manageable beginner amount.
- Secure the work surface. Attach the bat firmly to the wheel head if you’re using one, and keep your tools within reach.
- Prepare and attach the clay. Wedge the clay, shape it into a ball, then press it firmly onto the wheel head, tip down.
- Center the clay. Start slowly to tap it into place, then wet your hands and use firm, steady pressure as the wheel turns faster. Sit close and brace your elbows against your body.
- Open the center. Slow the wheel and press your thumbs into the clay, stopping above the wheel head to leave a solid base. Check the depth before widening the opening.
- Make and compress the floor. Flatten the inside floor with a finger, then press across it to compact the clay. Firm floor compression helps prevent cracks as the piece dries.
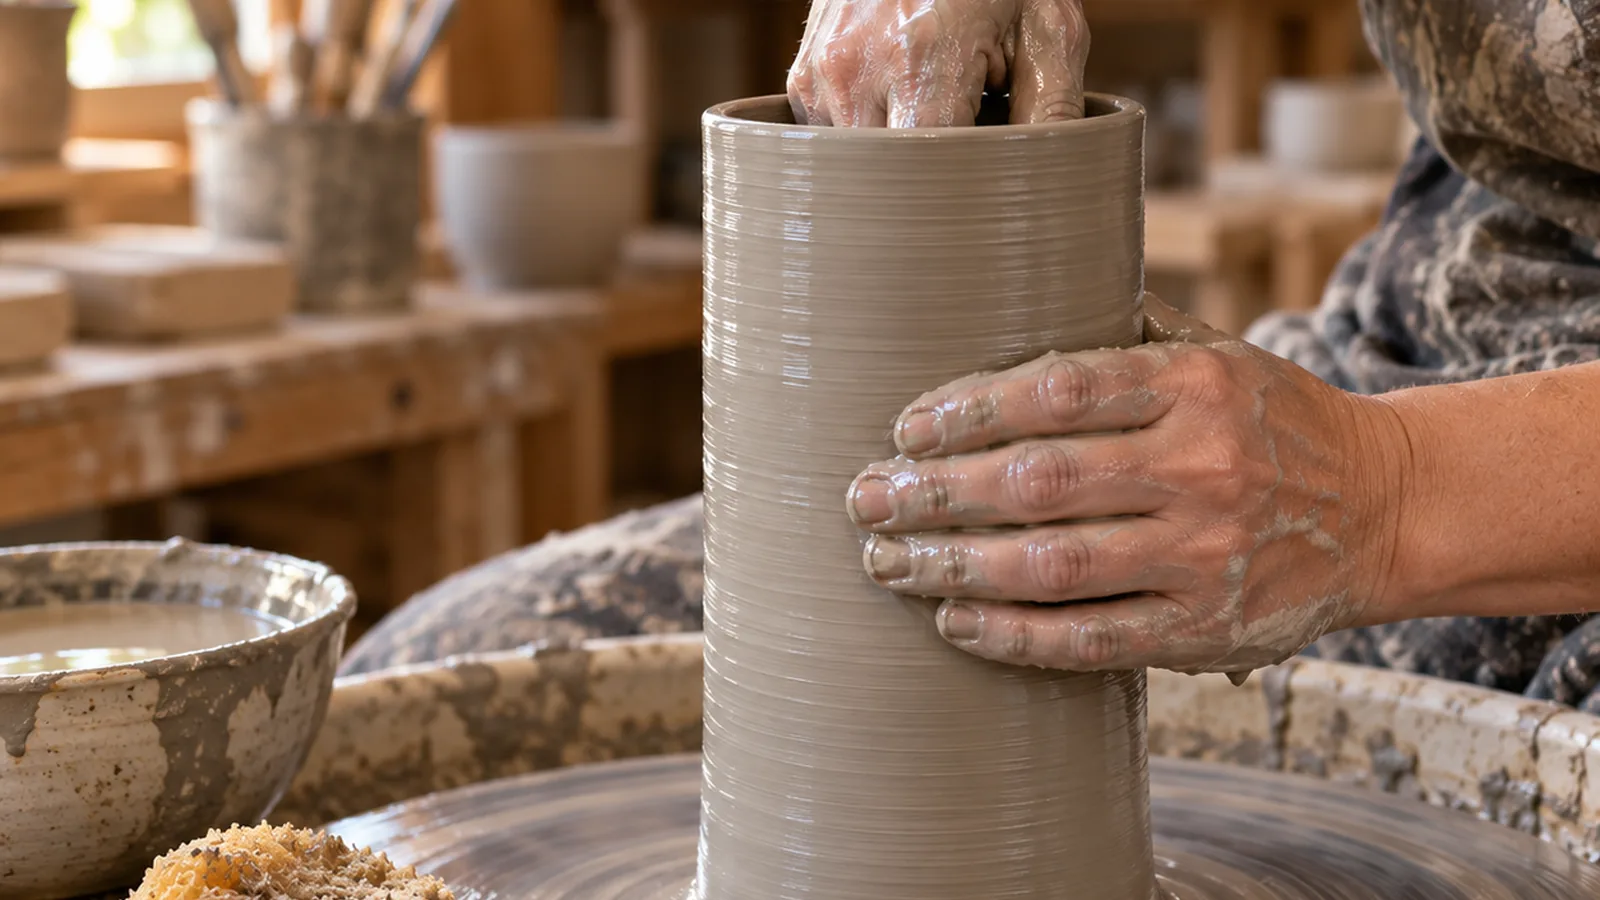
- Raise the walls. Wet your hands enough to glide, without flooding the clay. Support the outside with one hand while the inside fingers lift the wall; work at a controlled speed, slower than centering, and let the clay complete a rotation before each pull.
- Straighten and even the walls. Use a rib against the outside while supporting the inside, and slow the wheel as the cylinder grows taller. Keep the walls even; a class project uses about 1/4 in (6 mm) walls as a target.
- Finish the rim. Compress the rim between supported fingers to even it out.
- Remove pooled water and tidy the foot. Use a sponge to lift water from inside the cylinder, then use the needle tool to trim excess clay from the base.
- Wire-cut and transfer the cylinder. Pull the wire cutter taut across the bat or wheel head, then move the piece when it’s firm enough to hold its shape. If it will dry on the bat, leave at least 1/4 in (6 mm) of clay at the bottom.
Keep Clay Dust and Water Under Control
Keep your hands wet enough to glide, but don’t flood the clay, and keep your elbows anchored while you work.
- Control water: Wet your hands enough to move smoothly over the clay, without leaving them flooded.
- Set your posture: Sit close to the wheel and anchor your elbows against your body while centering.
- Control wheel speed: Use a controlled speed for pulling, usually slower than the speed you use to center. Slower wheel speed can also help reduce flaring and collapse.
- Work the walls carefully: Let the clay complete at least one full rotation before moving your fingers up the wall.
- Keep the clay workable: Clay that is too soft can collapse on the wheel, and faster wheel speeds increase the chance of flaring and collapse.
Why Does My Cylinder Wobble or Collapse?
Cylinder wobble and collapse usually come from poor centering, uneven pressure, excessive speed, or clay that’s too soft.
- Opening off-center: Recenter the clay before pulling. An opening that wanders points back to clay that wasn’t centered; continuing to pull can carry that wobble into the walls.
- Uneven walls: Use steady pressure from both hands and keep the wheel at a controlled speed. A second pull can even out thick rings, especially near the bottom; judge progress by wall evenness, not height.
- Spiraling or tearing: Stop the pull, wet your hands enough to glide, and let the clay rotate before moving your fingers upward. Avoid flooded hands, which leave excess water on the clay.
- Waterlogged, collapsing wall: Stop adding water and reduce wheel speed. A clay body that’s too soft can collapse, and faster wheel speeds raise that risk.
- Cutting through the base: Leave enough clay under the floor when opening. If the cylinder will dry on the bat, keep at least about 1/4 in (6 mm) of clay at the bottom.
If a wall is already collapsing, don’t keep pulling upward: further pressure and speed can worsen the flare or collapse.
How Do You Center Clay Before Pulling a Cylinder?
Center clay before opening it: wedge the clay, set a 1–2 lb ball on the wheel head, and use firm, braced hands to bring it into a symmetrical cone. Centering gives you a stable starting point for a cylinder, and skipping it can leave the clay wobbling.
Wedge the clay first to work out air bubbles, then press it firmly onto the wheel head, tip down. With the wheel turning slowly, tap the clay into place using dry hands; wet your hands once the clay is attached.
Raise the wheel speed for centering, then sit close and brace your elbows against your body. Press the clay forward with your hands, squeeze it inward, and guide it upward into a cone; use thumb pressure to level the top. Keep your hands firm and steady as the clay turns, rather than chasing it around the wheel.
Check the spin before moving on: the clay should turn without wobbling, and your hands should feel even resistance as they contact it. If one side pushes harder against your hands or the clay shifts with each rotation, keep centering until the spin is stable.
Practice centering until you can repeat that steady result before you start pulling the walls.
Frequently Asked Questions
Can I use air-dry clay on a pottery wheel?
The wheel-throwing steps here call for suitable throwing clay, so use clay intended for wheel work. Keep it wet enough to glide without flooding it, since overly soft clay can collapse on the wheel.
Which direction should a pottery wheel spin?
Use a controlled wheel speed for pulling, usually slower than your centering speed. The throwing guidance focuses on speed and coordinated hand pressure rather than specifying a spin direction.
Can I reuse clay after a cylinder collapses?
Stop pulling if the wall collapses, since extra pressure and speed can worsen the collapse.
Why do beginners practice cylinders before other pottery shapes?
Cylinders let you practice even walls, floor thickness, and rim control in one focused form. Beginners can start with a short cylinder, then work toward a taller one as they practice the pull.
Does a wheel-thrown cylinder need to be fired before use?
A wheel-thrown cylinder needs firing if you intend to use it as finished pottery; the throwing steps alone only shape the clay.
Conclusion
If you’re new to wheel throwing, start with a short cylinder and focus on a steady spin, an even floor, and controlled pulls. If the clay wobbles, return to centering before opening; if the walls soften, stop adding water and slow the wheel. Your next step is to wedge a manageable ball of clay and practice centering until it turns without wobbling.
Sources
- Throwing Basic Pot (lakesidepottery.com, 1635 days ago)
- Pottery Wheel for Beginners: How to Throw Your First Pot – ArtTools.com (arttools.com, 128 days ago)
- 21 Pottery Wheel Throwing Tips – Pottery Crafters (potterycrafters.com, 214 days ago)
- How to Throw a Consistent Cylinder: The Foundation of Wheel Pottery – Claybook (claybook.studio, 130 days ago)
- Ms. O'Connor – Project #1: Cylinder (moconnor.browndeerschools.com)
- Throwing a Clay Cylinder on the Potters Wheel : 22 Steps (with Pictures) – Instructables (instructables.com, 3164 days ago)