Are you interested in finding a creative outlet? Look no further than air dry clay! This versatile medium is great for both beginners and experienced crafters alike, as it offers limitless possibilities to create unique pieces of art. Whether you are looking to make sculptures, jewelry, or decorative items, air-dry clay can provide the perfect starting point.
In this blog post, we will discuss some tips and tricks on how to use air dry clay. We’ll go over the different types of materials available, suggestions for working with them successfully, and ideas on what kinds of creations you might want to pursue. So roll up your sleeves and join us in crafting homemade masterpieces out of air-dried clay!
Table of Contents
What is Air Dry Clay?
Air dry clay is a type of modeling material that hardens on its own when exposed to air—no baking required. It’s usually made from a combination of natural materials like clay, cellulose, and minerals. Unlike polymer or ceramic clay, air dry clay cures at room temperature, making it incredibly user-friendly for all age groups and skill levels.
This clay feels soft and pliable when you start working with it. After shaping your masterpiece, all you need to do is let it sit out for 24 to 72 hours, depending on the size and thickness. Once dry, it becomes solid and ready for painting, sealing, or even sanding.
Why Choose Air Dry Clay Over Other Types?
There are several reasons why air dry clay is a top pick for artists, hobbyists, and beginners alike:
- No Kiln Needed: Traditional ceramic clays require firing in a kiln at high temperatures, which isn’t practical for most home users. Air dry clay skips that hassle altogether.
- Beginner-Friendly: It’s forgiving and easy to shape, making it ideal for those just getting started with sculpting.
- Safe for Kids: Non-toxic varieties are widely available, so it’s a great choice for school projects or rainy day fun.
- Versatile: From intricate jewelry to chunky plant pots, you can craft nearly anything with it.
- Paintable & Customizable: Once dry, you can paint, varnish, or decorate it however you like.
Do You Need to Wet Air Dry Clay?
No, you do not need to wet air dry clay. Unlike traditional pottery clay, air dry clay is a pre-mixed material that does not require any additional water or other liquid for it to be used. The only thing you need for air dry clay is your hands and some tools as needed.
Air-dry clay is usually sold in a moist form, which makes it easier to shape and sculpt. It is important to note that the water content will decrease over time as the moisture evaporates from the clay. To keep your air dry clay from drying out too quickly, you can store it in an air-tight container or plastic bag when not in use.
10 Methods How to Use Air Dry Clay
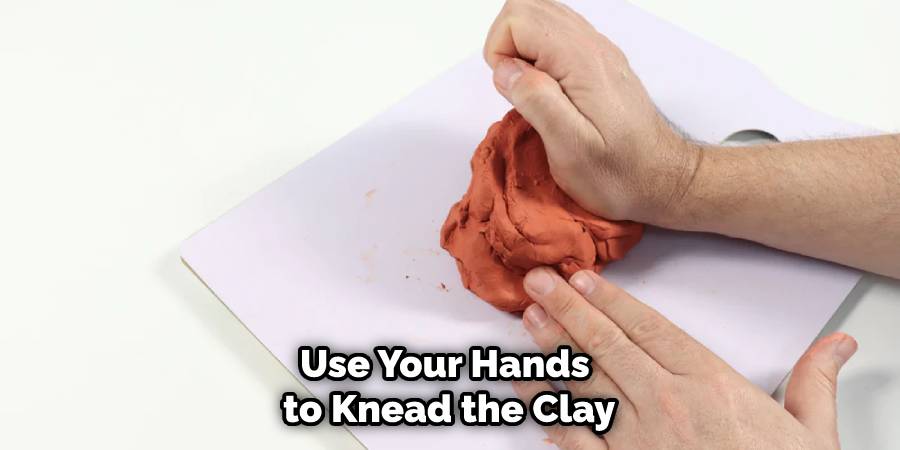
1. Conditioning the Clay
Before you start working with air dry clay, it’s important to condition it. This will make it softer and easier to work with. To condition the clay, simply knead it with your hands for a few minutes until it’s soft and pliable.
If the clay is particularly hard, you can also use a rolling pin to flatten it out and soften it. However, you should be careful not to over-work the clay – too much kneading or rolling will make it difficult to shape.
2. Rolling Out the Clay
Once you’ve conditioned the clay, you can start rolling it out. To do this, use a rolling pin to roll the clay out onto a flat surface. You can roll it out to whatever thickness you like, but keep in mind that thicker pieces will take longer to dry.
To keep the clay from sticking to the surface or rolling pin, sprinkle a little cornstarch over it. Once you’ve rolled out the clay, you can use cookie cutters or other tools to create shapes. You can also use the rolling pin to impress designs into the surface of the clay; just make sure not to press too hard!
3. Cutting Out Shapes
Once you’ve rolled out the clay, you can use cookie cutters or other sharp objects to cut out shapes. If you’re using cookie cutters, make sure to flour them first so that the clay doesn’t stick. Once you have the shapes cut out, make sure to remove any excess clay around the edges. You can use a small knife or even your fingers for this. You can then use these shapes to create whatever type of craft project you’d like.
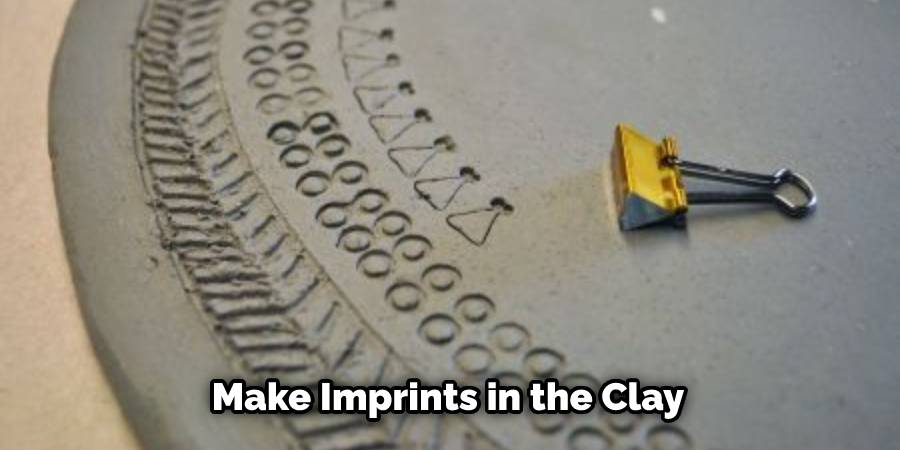
4. Making Imprints
You can also use stamps or other objects to make imprints in the clay. This is a great way to add texture and interest to your piece. Just press the object into the clay and lift it back up again. You can use a variety of objects, from playing cards to shells or leaves. Just make sure they are clean and dry before you press them into the clay.
5. Adding Details
Once you’ve got your basic shape cut out, you can start adding details. Use a toothpick or other sharp object to add lines, dots, or other small details. You can also use paintbrushes or other tools to add color or texture to your piece.
If you want to add texture, use something like sandpaper or an embossing tool. If you’re going for a more 3D look, you can use a clay extruder or paper mache. Be creative and have fun with the details!
6. Letting it Dry
Once you’re happy with your piece, let it dry for 24 hours or more before handling it further. If you live in a humid climate, it may take longer for the piece to dry fully. Once it’s dry, you can sand it down if there are any rough edges.
You can also paint or dye the clay if you’d like. To do so, use acrylic paint or special air-dry clay dyes. Once you’re done, your piece is ready to be displayed or used! However, keep in mind that air-dry clays are not waterproof, so it’s best to use them indoors and avoid getting them wet.
7. Painting your Piece
If you want, you can paint your air-dry clay piece once it’s dry. Acrylic paints work well for this purpose. Just make sure to seal your piece with a clear sealer before painting so that the paint doesn’t flake off later on.
You can use spray sealers or brush-on sealers, depending on what you have available. You can also mix water into your paint to create a wash or a thin layer of paint that looks like watercolor. When you are finished painting your piece, make sure it is fully dry before sealing it with a clear coat. This will help the paint last longer and make sure your piece looks great for years to come!
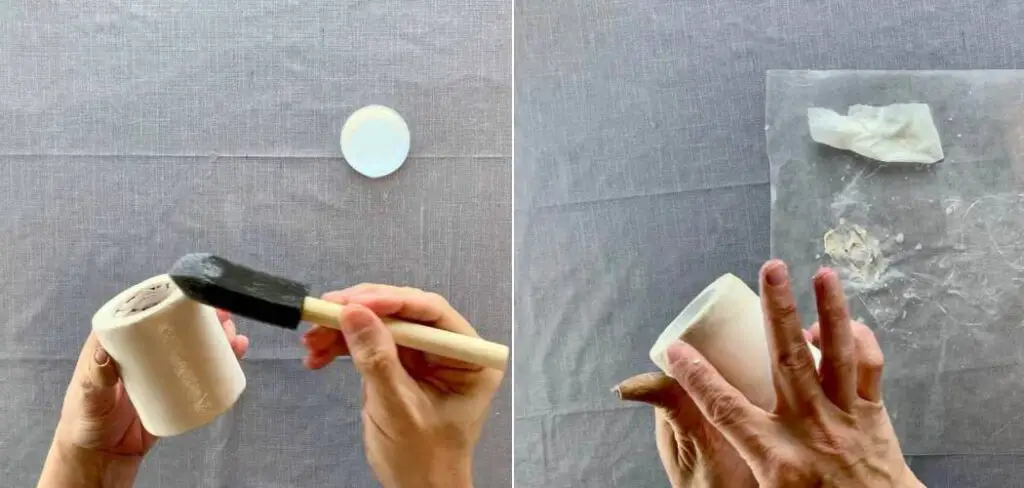
8. Varnishing your Piece
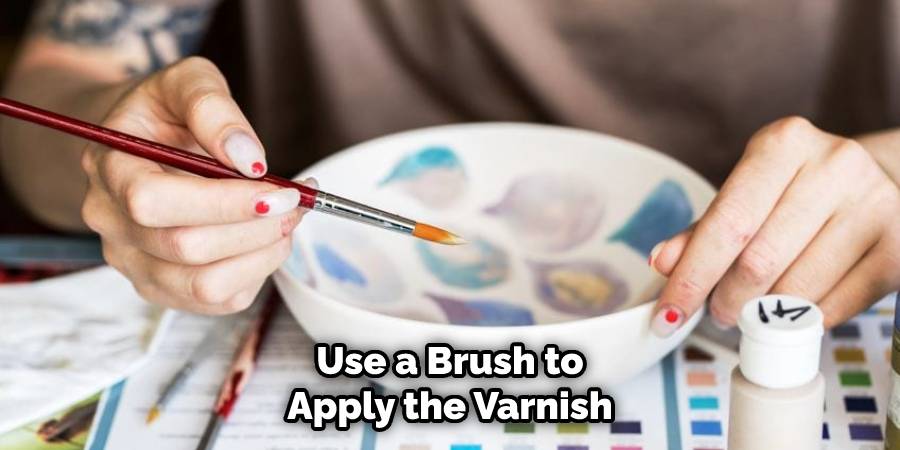
Another option is to varnish your piece instead of painting it. Varnish will give your piece a shiny finish and will help protect it from damage over time. You can use a brush to apply the varnish and make sure that you evenly cover all of the surfaces.
Once it’s dry, you can add any other details you want with paint or other materials. To make sure your piece is protected for years to come, it’s a good idea to reapply the varnish every couple of years.
9. Glazing your Piece
Glazes are a great way to add color and texture to your air dry clay pieces. They come in many different colors, so you can get creative with this step. Just make sure to let the glaze dry completely before adding any additional layers or finishing touches.
10. Finishing Your Piece
Once you’re done adding color and texture to your piece, you can finish it off with a clear sealer. This will help protect the clay from damage and will give it a beautiful glossy finish. You can also add charms or other small details to your finished piece if you’d like.
Overall, air dry clay is a great way to make unique and creative pieces of art without having to use an oven or kiln. By following these steps, you’ll be able to create beautiful projects that will last for years!
Smoothing and Detailing Techniques
Once your basic shape is done, it’s time to refine it. Smoothing and detailing is where the magic happens—this step turns a rough shape into a polished piece.
- Smoothing: Use a damp sponge, your fingertips, or even a soft brush to smooth out rough spots and seams. You can also use very fine sandpaper after the piece is dry.
- Texturing: Tools like toothpicks, skewers, or even stamps can add intricate patterns. Try pressing lace, leaves, or fabric into the surface for a unique finish.
- Carving: Wait until the clay is leather-hard (partially dry but still carvable), and use sculpting tools to etch lines or add dimension.
Take your time here—details can elevate your work from simple to stunning, and they’ll really pop once you paint or seal the finished piece.
Best Practices for Storing and Preserving Clay
Once opened, air dry clay starts losing moisture fast. Here’s how to store it so you can reuse it again and again:
- Airtight Containers: Tupperware or mason jars work great.
- Plastic Wrap: Wrap the clay in plastic wrap before storing.
- Zip-Lock Bags: Add a damp paper towel to maintain moisture.
- Avoid Heat & Sunlight: Store in a cool, dark place.
If your clay has dried out slightly, a few drops of water and a little kneading usually bring it back to life. But if it’s completely hardened, there’s no reviving it—use it as filler or texture for a new piece instead.
Things to Consider When Using Air Dry Clay
Air-dry clay is a great material for crafting, sculpting, and modeling in art projects. It can be used to create a variety of shapes and sizes, from small mugs to larger sculptures. It can also be used for making jewelry and accessories. To get the most out of your clay project, there are a few things you should consider when using air-dry clay.

1. Temperature:
Air-dry clay should be stored in a cool, dry place. Extreme temperatures can cause the clay to crack or harden too quickly. Make sure to keep your workspace at room temperature for best results.
2. Moisture:
Avoid getting air-dry clay wet as it will not only make it harder to work with but also ruin the finished product. Any moisture in the clay can cause it to crack and discolor when drying.
3. Safety:
Clay should always be used in an area where small particles won’t be inhaled or ingested, such as outside or in a well-ventilated room. Be sure to wear protective gloves while working with the clay.
4. Airflow:
When your project is complete, allow it to dry in an area with good airflow. Keeping the clay out of direct sunlight can also prevent discoloration and cracking. If possible, place a fan nearby to speed up the drying process.
Conclusion
Working with air dry clay is a fun and easy way to create beautiful pieces of art. Be sure to follow the instructions on how to use air dry clay before you begin working with it, and take your time shaping it into the desired form. Allow your piece to dry completely before adding any paint or varnish for the best results. Have fun experimenting with this versatile medium!


