Mastering the pottery wheel is a transformative journey for those eager to craft three-dimensional art with their hands. Whether you’re a beginner embarking on your first foray into ceramics or a seasoned artist honing your skills, understanding how to use a pottery wheel is essential to shaping clay into functional and artistic forms. In this comprehensive guide, we’ll explore the art and technique of pottery wheel usage, offering step-by-step instructions, practical tips, and insights to help you navigate the wheel’s rotations with finesse.
From centering the clay to creating intricate forms and vessels, this article aims to demystify the process, empowering you to turn a spinning wheel and a lump of clay into personalized, handcrafted masterpieces. Say goodbye to uncertainty and hello to the joy of sculpting on the pottery wheel, where creativity and craftsmanship collide.
Table of Contents
Understanding the Different Parts of the Wheel
A pottery wheel is an essential tool in making ceramics. It is a mechanical device that helps potters shape clay into various forms, such as bowls, cups, and plates. It consists of several parts that work together to create pottery.
The base or motor is the main part of the wheel. It provides the power needed to turn the wheel head, which holds the clay. The foot pedal controls the speed of the wheel, allowing the potter to adjust it according to their needs.
The splash pan is a circular tray that catches excess water and clay from the spinning wheel head. It helps keep the workspace clean and prevents excessive messes.
The wheelhead is where the clay is placed and shaped. It can be made of metal, plastic, or wood and typically has a bat attached to it. Bats are flat, round discs that can be removed from the wheelhead for easier removal of finished pottery.
The wheel head also has a centered hole where the clay is mounted. This centering helps potters shape symmetrical pieces and prevents wobbling during the throwing process.
The throwing ribs are small curved tools that help shape and smooth the surface of the clay as it spins on the wheel head. They come in various shapes and sizes for different purposes.
The splash pan, wheel head, and bat are usually made of materials that can be easily cleaned with water, such as plastic or metal. This allows potters to quickly clean off any excess clay residue before starting a new project.
7 Steps How to Use a Pottery Wheel
1. Prepare the Clay
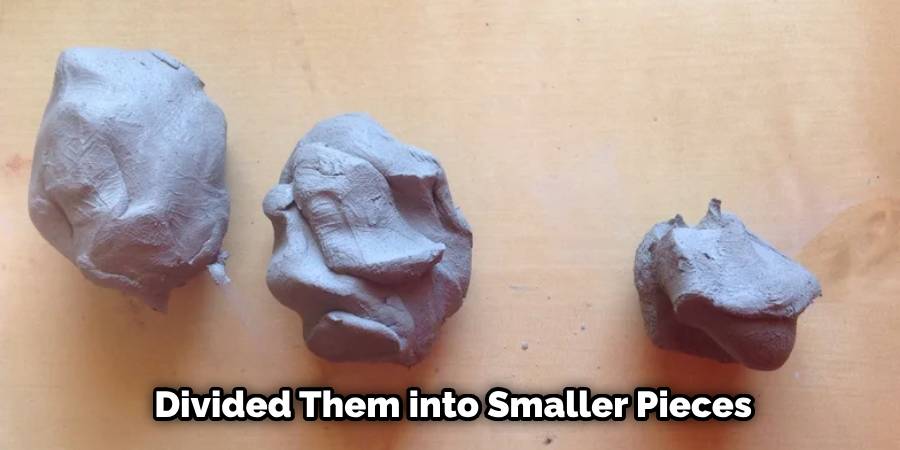
Before you begin using a pottery wheel, it is important to prepare your clay. Start by kneading the clay until it is soft and pliable. Once the clay has been kneaded, it should be divided into smaller pieces that are about the size of a tennis ball. These pieces can then be rolled into balls and placed on the pottery wheel for shaping.
2. Get Familiar with Your Pottery Wheel
The next step is to get familiar with your pottery wheel before you start using it. Make sure you understand how to turn it on and off, as well as how to adjust its speed. It is also important to ensure that your hands are properly positioned on the wheel before you begin spinning it.
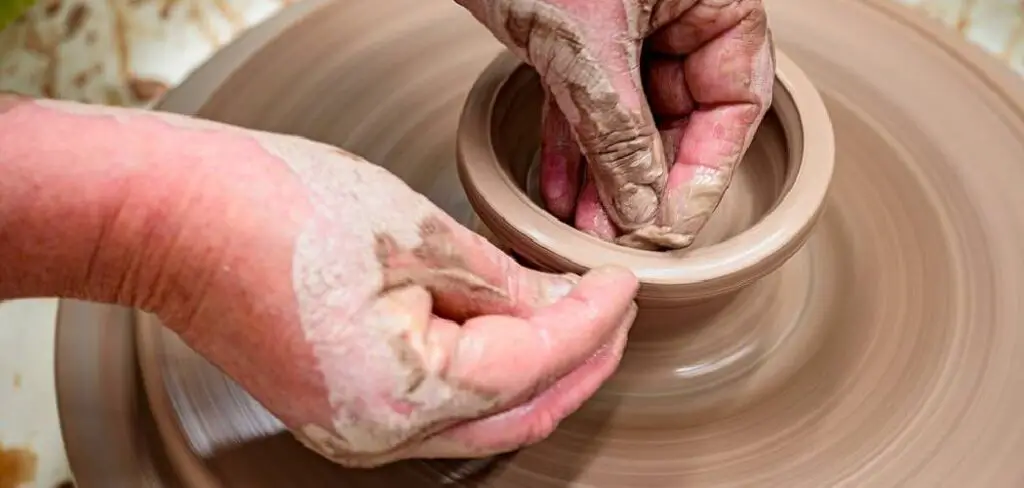
3. Centre the Clay
Once your clay has been placed on the wheel, you will need to center it in order for it to spin correctly. To do this, use your hands to press down lightly on either side of the clay until it starts spinning evenly and smoothly around its axis. If necessary, use a small amount of water or slip (clay mixed with water) to help center the clay more easily.
4. Create an Even Wall
Once your clay is centered on the pottery wheel, you can begin shaping it by creating an even wall around its circumference. To do this, use both hands to press down lightly on either side of the clay while slowly rotating the wheel in a clockwise direction with one hand and pressing against its surface with your other hand at regular intervals in order to create an even wall around its circumference.
5. Shape Your Piece
Now that you have created an even wall around your piece of clay, you can begin shaping it further by using various techniques such as trimming, cutting, coiling, or pinching depending on what type of piece you are making. Remember not to apply too much pressure when shaping your piece as this may cause cracks or unevenness in its surface, which could affect its final appearance once fired in a kiln.
6. Smooth Out Any Imperfections
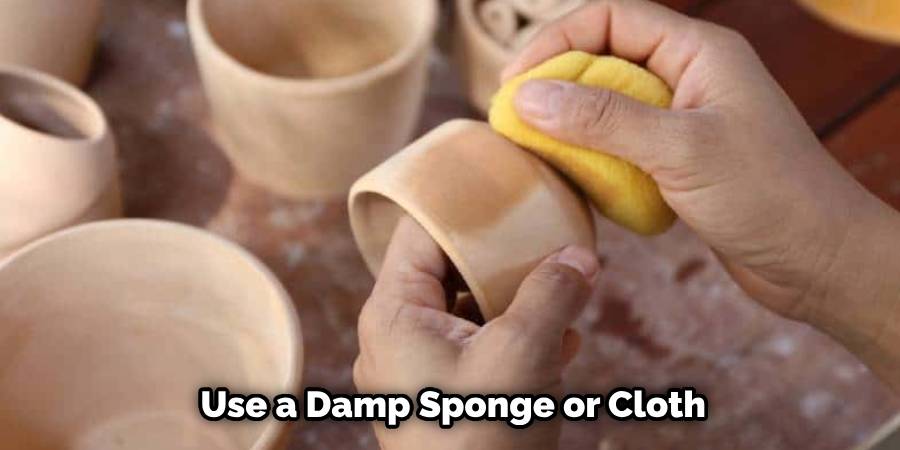
Once you have shaped your piece of pottery into its desired form, use a damp sponge or cloth to smooth out any imperfections on its surface before allowing it time to dry completely before firing in a kiln later on. This will help ensure that any irregularities or bumps will not be visible once fired and glazed later on down the line during production process stages like bisque firing and glazing firing respectively.
7. Add Decorative Elements
If desired, decorative elements such as handles or spouts can be added onto pieces after they have been shaped but before they have been allowed time for drying completely prior to their firing stage within production process stages such as bisque firing and glazing firing respectively. To do this, simply attach them onto their respective positions while still wet using either slip made from mixing together equal parts of water and clay or slurry made from mixing together equal parts of water and silica sand respectively.
Things to Consider When Using a Pottery Wheel
When it comes to pottery, using a pottery wheel is an essential skill that every potter must learn. This tool allows you to create beautiful and unique pieces of pottery with precision and control. However, mastering the art of using a pottery wheel takes time and practice. In this guide, we’ll discuss some important things to consider when using a pottery wheel.
Getting Familiar with the Pottery Wheel
Before using a pottery wheel, it’s crucial to get familiar with its different parts and functions. This includes understanding the pedal, wheelhead, splash pan, and bat pins. Take some time to explore each part and understand its purpose. This will help you use the pottery wheel more efficiently.
Proper Body Positioning
One of the most important things to consider when using a pottery wheel is your body positioning. Your position should be comfortable, stable, and allow for a full range of motion. Make sure your legs are shoulder-width apart and your back is straight. This will help you maintain control over the clay while spinning the wheel.
Speed Control
Controlling the speed of the pottery wheel is crucial in creating different shapes and designs. Typically, beginners tend to spin the wheel too fast, which can result in a mess. Start slow and gradually increase the speed as you get more comfortable with the wheel. Remember, it’s better to take your time than rush and ruin your piece.
Consistency is Key
Consistency is key when it comes to using a pottery wheel. This applies to both the amount of pressure applied and the moisture level of the clay. Keep your hands steady and apply consistent pressure to the clay as it spins on the wheel. This will help you create a symmetrical and well-formed piece.
Common Mistakes to Avoid when Using a Pottery Wheel
Using a pottery wheel can be an incredibly satisfying and enjoyable experience. But like any new skill, there are common mistakes that beginners often make. Here are some tips to help you avoid these mistakes and create beautiful pieces of pottery with ease.
Not Preparing the Clay Properly
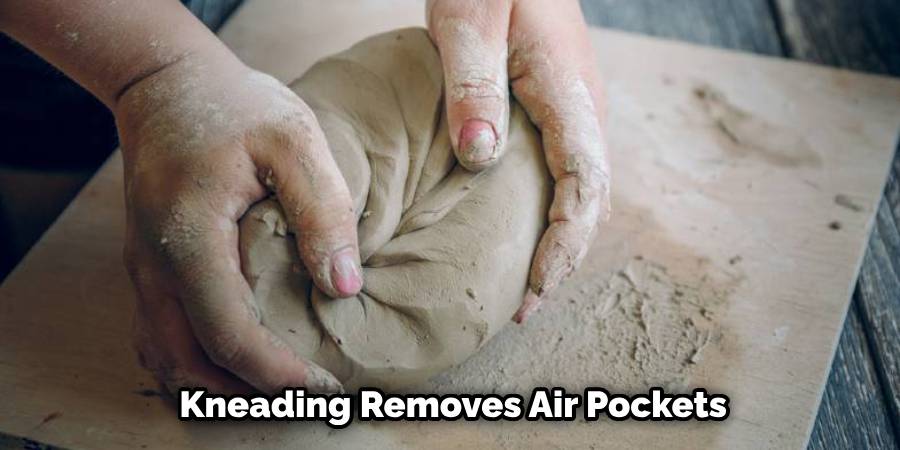
One of the most important steps when using a pottery wheel is preparing the clay. This includes wedging, or kneading, the clay to remove air pockets and create an even consistency. Skipping this step can cause your piece to collapse or crack during throwing.
To avoid this mistake, take the time to properly prepare your clay before starting on the wheel. This will ensure that your piece has a strong foundation and will be less likely to collapse or crack.
Not Centering the Clay
Centering the clay is essential for creating a balanced piece and preventing it from collapsing during throwing. It may seem like a simple task, but it takes practice to master.
To center your clay, use both hands to press down on the clay while the wheel is spinning. Make sure to keep your hands wet so that the clay doesn’t stick to them. Once your clay is centered, you can begin shaping it into your desired form.
Using Too Much or Too Little Water
The amount of water you use when throwing on a pottery wheel is crucial. Too much water can make the clay too wet and difficult to work with, while too little water can cause the clay to dry out and crack.
To avoid this mistake, start with a moderate amount of water and adjust as needed. Keep a spray bottle nearby to add small amounts of water if the clay starts to dry out.
Conclusion
It is clear to see that mastering the use of a pottery wheel can be a challenging but rewarding experience. As intimidating as the process may appear, with the right level of guidance and practice, even complete beginners can become competent at handling the equipment. With all this information in mind, it is time to take on the challenge of using a pottery wheel for yourself.
Put your newfound knowledge into action! Find an experienced mentor who can help teach you how to use a pottery wheel and before you know it, you’ll be creating beautiful pieces for all to enjoy! So go ahead and start your journey learning to use a pottery wheel – no matter where it leads you, we know you’ll find success in mastering this incredible skill.


