Achieving a smooth and flawless surface is a fundamental skill in working with clay, be it for pottery, sculpting, or other artistic endeavors. Knowing how to smooth out clay is crucial for creating refined and polished finished pieces. In this comprehensive guide, we’ll delve into the techniques and tools necessary to attain a perfectly smooth surface on your clay creations. From addressing common challenges like air bubbles and uneven textures to exploring methods such as scoring, slipping, and sanding, we’ll guide you through the step-by-step process.
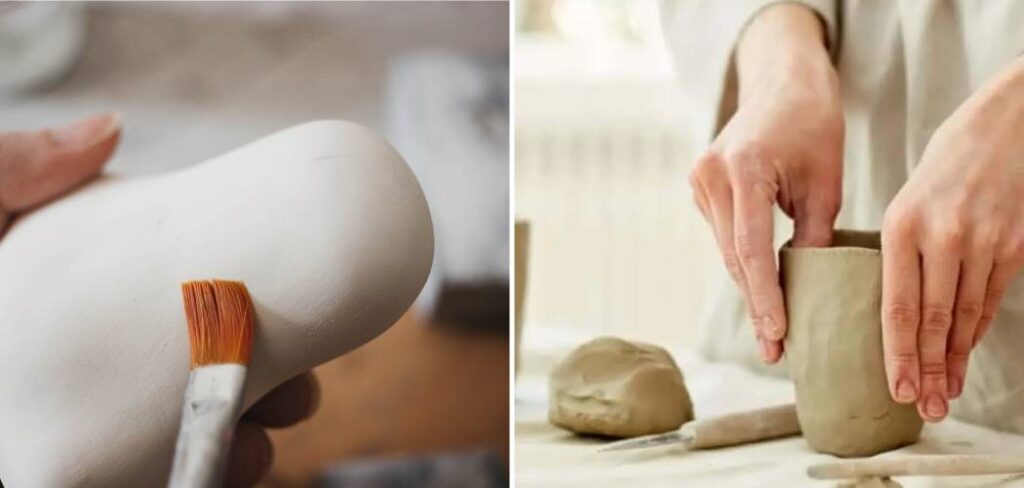
Whether you’re a seasoned ceramic artist or a beginner exploring the world of clay, mastering the art of smoothing is a transformative skill that elevates the quality and aesthetics of your work. Join us on this journey to discover the secrets of clay smoothing, unlocking the potential for creating stunning, professional-looking pieces with a tactile and visually appealing finish.
Table of Contents
The Importance of Smoothing Clay
It’s no secret that clay can be a difficult medium to work with. However, once you get the hang of it, the possibilities are endless. One important aspect of working with clay is smoothing it out to achieve a clean and polished finish.
Smoothing clay not only improves the overall appearance of your piece but also helps in strengthening its structure. Unsmoothed surfaces can cause weak spots and cracks, making your creation vulnerable to damage. Therefore, it is crucial to take the time to smooth out your clay properly.
Tools for Smoothing Clay
There are various tools available for smoothing out clay, each with its own unique purpose. Some common tools used for this purpose include a rib tool, a metal scraper, and sandpaper.
A rib tool is a versatile tool that can be used for both shaping and smoothing clay. The curved end of the tool allows you to gently scrape off excess clay and smooth out any bumps or imperfections on the surface.
A metal scraper, also known as a kidney-shaped scraper, is another essential tool for smoothing clay. Its sharp edge helps in removing rough edges and creating clean lines on your piece.
Sandpaper is another useful tool for achieving a smooth finish on clay. It comes in various grit sizes, and each size serves a different purpose. Coarse grit sandpaper is ideal for removing larger bumps and imperfections, while fine grit sandpaper can be used for finer detailing.
10 Methods How to Smooth Out Clay
1. Kneading
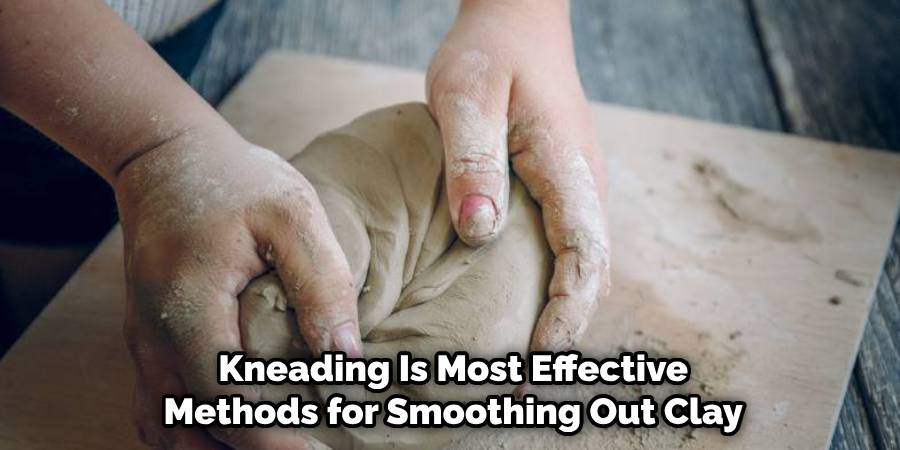
Kneading is one of the oldest and most effective methods for smoothing out clay. To knead clay, you should first wet your hands with water and then press the clay between your palms while rotating it in a circular motion. This helps to remove any air bubbles from the clay and makes it easier to work with. Kneading also helps to even out any lumps or bumps in the clay, resulting in a smoother surface.
2. Rolling
Rolling is another simple method for smoothing out clay. To roll clay, you should use a rolling pin or other cylindrical object to flatten the clay into an even sheet. You can then use a flat tool such as a ruler or knife to further smooth out any lumps or bumps in the clay. Rolling is especially useful for creating thin sheets of clay that are uniform in thickness and texture.
3. Slab Method
The slab method is another popular technique for smoothing out clay, especially when making large pieces such as plates or bowls. To use this method, you should first roll out a sheet of clay that is slightly thicker than the desired final thickness and then cut it into smaller pieces using a ruler or knife. You can then use your hands to press each piece into an even slab before joining them together with a slip (liquid clay).
4. Sanding
Sanding is another effective way to smooth out rough patches on finished pieces of pottery or sculpture made from clay. To sand your piece, you should start by using progressively finer grits of sandpaper until all rough edges have been removed and the surface has become smooth and even throughout. Sanding can also be used to create interesting textures on the surface of your piece if desired.
5. Slip Casting
Slip casting is a process where liquid slip (clay mixed with water) is poured into molds and allowed to harden before being removed from the mold and trimmed down to size if necessary. This method allows for precise replication of shapes without having to worry about uneven surfaces due to hand-building techniques such as coiling or pinching, resulting in much smoother pieces of pottery than would otherwise be possible with traditional methods alone.
6. Electric Wheel Throwing
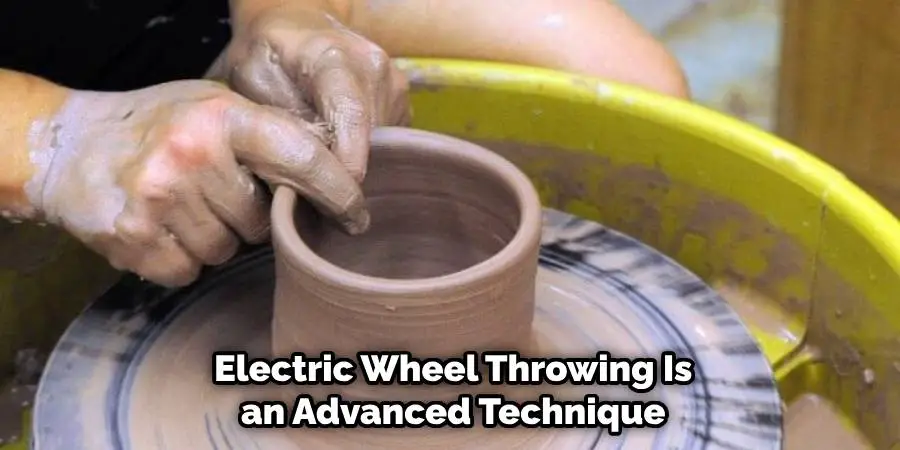
Electric wheel throwing is an advanced technique used by experienced potters who want to create perfectly symmetrical pieces quickly and efficiently without sacrificing quality or detailed workmanship. To use this method, you should attach an electric motor onto your wheel head, which will allow you to rotate it at higher speeds than possible by hand alone, resulting in smoother forms that require less finishing work afterward compared to those made with traditional hand-building techniques alone.
7. Vibrating Table Method
The vibrating table method is often used by professional potters who need high levels of accuracy when creating intricate designs on their pieces of pottery or sculpture made from clay. The table consists of two metal plates that are connected together by springs so that they vibrate at high frequencies when turned on. When a piece of wet, unfired pottery is placed on top, these vibrations help to evenly distribute the material inside, resulting in much smoother surfaces than those created through traditional methods.
8. Burnishing
Burnishing involves rubbing a hard object such as bone, wood, stone, antler, horn, shell, metal, or glass over a dried piece of unfired pottery in order to create a glossy finish. This technique helps fill any small cracks that may have formed during drying as well as giving the surface an attractive sheen. Burnishing also helps strengthen the walls of thin-walled vessels while making them more resistant to thermal shock when fired later on.
9. Polishing
Polishing involves using abrasive materials such as pumice powder, tripoli powder, sawdust, or cornstarch mixed with water in order to achieve an extremely smooth finish on dried, unfired pottery. This technique requires patience but produces excellent results if done properly – creating surfaces so smooth they almost look like glass! Polishing also helps make glazes adhere better when applied later on during the firing process.
10. Tumbling
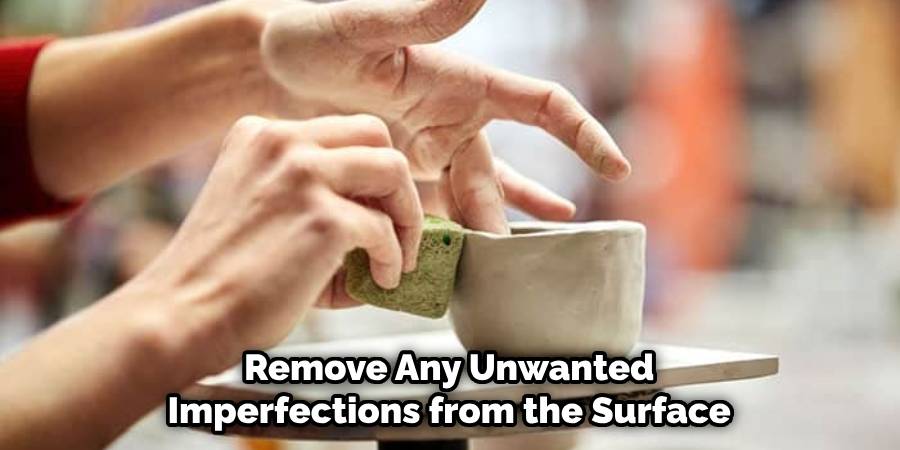
Tumbling involves placing wet, unfired pottery into a rotating drum filled with abrasive materials such as pebbles, ceramic chips, or steel shot, which act like tiny hammers hitting against each other while rotating at high speeds – helping remove any unwanted imperfections from the surface while simultaneously polishing it up at same time!
Things to Consider When Smoothing Out Clay
When working with clay, whether it’s for a pottery project or sculpting, one of the most important steps is smoothing out the surface. This not only improves the overall appearance of the piece, but it also helps to ensure that the clay is free from any imperfections or air bubbles.
Here are some things to keep in mind when smoothing out clay:
Start with the right tools
Having the appropriate tools for smoothing out clay is crucial. Some common options include a wooden or metal rib, a sponge, and a modeling tool. It’s helpful to have a variety of sizes and shapes to accommodate different areas of your piece.
Work on damp clay
It’s important to work on damp, but not wet, clay when smoothing. This helps the clay to hold its shape and prevents it from becoming too dry or sticky.
Use even pressure
When smoothing out clay, be sure to use even pressure with your tools. Pressing too hard in one area can create indentations or distort the shape of your piece.
Smooth in different directions
To avoid creating visible lines or ridges on your clay, try smoothing in different directions. This will help to blend the clay evenly and create a smoother surface.
Pay attention to details
Don’t overlook small details when smoothing out clay. Use smaller tools to smooth out harder-to-reach areas or delicate features of your piece.
Conclusion
Depending on how you are going to use your clay, be it for sculptures, pottery or other projects, there are a multitude of steps and techniques that can help you smooth out clay. With the proper time and effort, anyone taking on creative pursuits with clay can get the desired outcome they are looking for.
From using a wooden scraper to rolling pins, digital tools and more; we hope our guidance will have given you an array of options to explore. We always encourage experimentation – find out which technique works best for you as you dive into your projects! So grab a handful of clay and begin creating – but remember our tips on how to smooth out clay so that all your hard work truly shines through in the final product!


