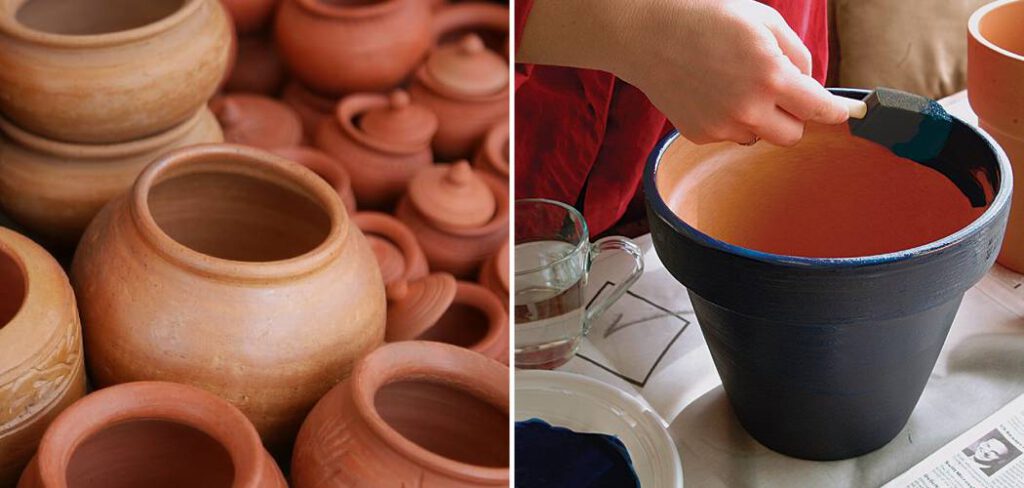
Terracotta pots are a popular choice for gardeners and plant lovers due to their natural and rustic appearance. However, many people also enjoy personalizing their terracotta pots by painting and decorating them with unique designs. Before painting your terracotta pots, it’s important to properly seal them to protect your artwork from moisture and damage.
Sealing also helps to ensure the longevity of the pot and protects it from the elements. In this article, we will provide you with how to seal terracotta pots for painting. By following these steps, you can create a beautiful and personalized painted terracotta pot that will add a special touch to your indoor or outdoor decor.
Table of Contents
Understanding Terracotta Pots
Terracotta is a type of clay that is fired at a low temperature, resulting in a porous material. This porosity is what makes terracotta ideal for plants, as it allows the roots to breathe. However, this also means that it can absorb water, making it vulnerable to cracking and breaking during freeze-thaw cycles.
Why Seal Terracotta Pots?
Sealing your terracotta pots before painting them has several benefits. Firstly, it will help to prevent water absorption, which can lead to cracking and breaking. Secondly, it will provide a smooth surface for painting, allowing the paint to adhere evenly. Finally, it will help to protect your painted pots from the elements, ensuring that they look great for years to come.
10 Steps How to Seal Terracotta Pots for Painting
Step 1: Clean the Pot
Before sealing the pot, it is important to clean it thoroughly. Use a mild detergent and a scrub brush to remove any dirt or debris. Rinse the pot thoroughly with water and let it dry completely.
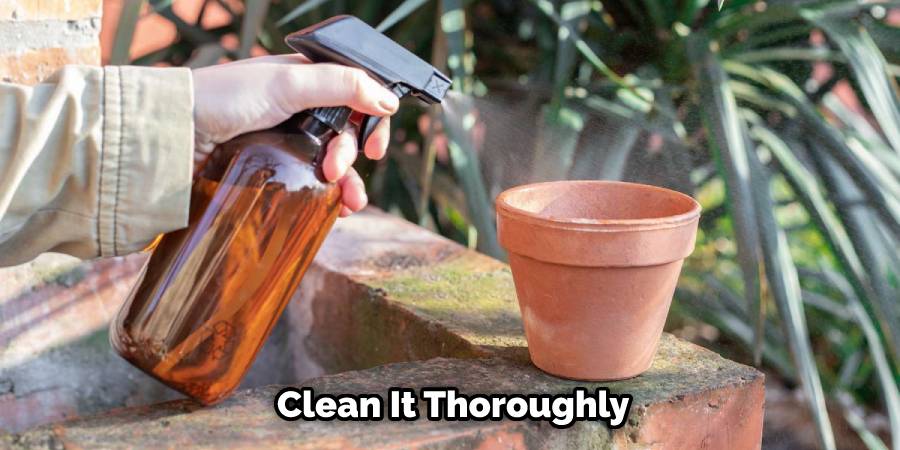
While it is drying, use a damp cloth to remove any water spots or streaks. If there are any stubborn stains, you can try scrubbing them with a paste of baking soda and water.
Step 2: Sand the Pot
Use fine-grit sandpaper to sand the surface of the pot. This will help remove any rough spots or imperfections and will also help the sealant adhere better. Sand in a circular motion and use a little bit of pressure to get a smooth finish. Once the pot is sanded, wipe it down with a damp cloth to remove any dust or dirt.
Step 3: Choose a Sealant
There are several types of sealants that can be used to seal terracotta pots. Some popular options include acrylic sealer, polyurethane sealant, and epoxy resin.
Choose a sealant that is appropriate for your project and follow the manufacturer’s instructions. When selecting a sealant, make sure it is compatible with the paint you will be using.
Step 4: Apply the Sealant
Using a brush, apply the sealant to the surface of the pot. Make sure to cover the entire surface, including the bottom of the pot. Apply a thin, even layer and let it dry completely.
Once dry, apply a second coat for an even better seal. For an extra layer of protection, you can apply a third coat. Make sure to let each coat dry before applying the next.
Step 5: Sand Again
Once the first layer of sealant has dried, use the fine-grit sandpaper again to lightly sand the surface of the pot. This will help ensure a smooth surface for painting. To make sure the pot is properly sealed, apply a second layer of sealant and let it dry. Once that is done, your terracotta pot is ready for painting!

Step 6: Apply a Second Coat
Apply a second coat of sealant to the surface of the pot using the same method as before. Make sure to cover the entire surface and let it dry completely. Depending on the type of sealant used, it may be necessary to apply a third coat.
If so, follow the instructions provided by the manufacturer. After the second coat has dried, it is time to begin painting. When using a terracotta pot for painting, two coats of sealant helps ensure your design will last.
Step 7: Sand Again
Once the second coat of sealant has dried, use the fine-grit sandpaper again to lightly sand the surface of the pot. This will help ensure a smooth surface for painting. If the sealant has left any bumps, ridges or lumps, sand them down to ensure a smooth finish. When you’re finished sanding, use a cloth or brush to remove any dust.
Step 8: Apply a Third Coat (Optional)
If desired, a third coat of sealant can be applied to the pot. This will provide extra protection and durability. Let the third coat dry completely. This might take several hours.
After the third coat has dried, it is time to add color with paint. Any type of acrylic craft paint can be used to paint terracotta pots. Before painting, make sure to stir the paint well and ensure that it is evenly mixed.
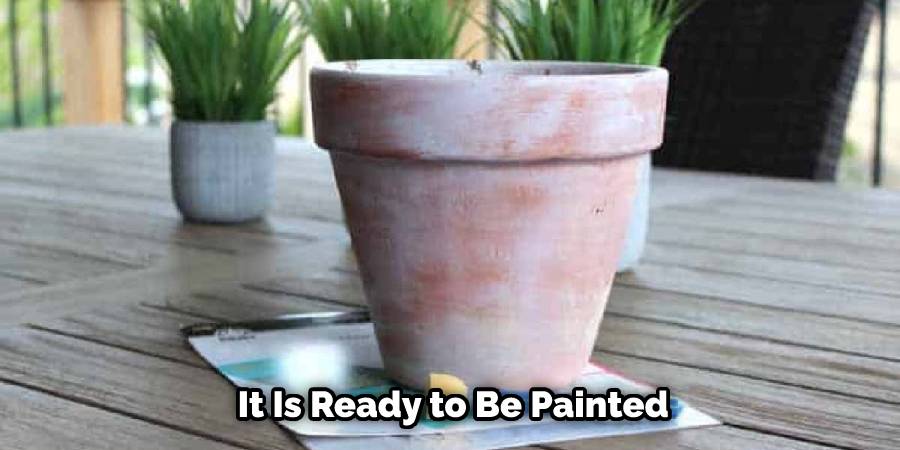
Step 9: Cure the Pot
After the final coat of sealant has dried, the pot should be cured before painting. Curing helps the sealant fully harden and bond to the surface of the pot. To cure the pot, place it in a warm, dry place for at least 24 hours.
Once the pot is cured, it will be ready for painting. While it is possible to paint a pot without curing, the sealant will be less durable and can chip or wear away more easily.
Step 10: Paint the Pot
Once the pot has been properly sealed and cured, it is ready to be painted. Use acrylic paint or other appropriate paint for terracotta pots. Be sure to let the paint dry completely before using the pot.
Additionally, look for paints that state they are weather-resistant and meant for outdoor use in order to make sure the pot can stand up to exposure to the elements. Once the painting is complete, the pot is ready for use. Enjoy!
Tips for Painting Terracotta Pots
When painting terracotta pots, there are a few things to keep in mind:
Use acrylic paint
Acrylic paint is ideal for terracotta pots as it adheres well and dries quickly. Acrylic paint is water-resistant, durable, and weather-proof. When using acrylic paint on terracotta pots, make sure the pot is clean and dry before you begin painting.
Apply thin layers
Apply thin layers of paint, allowing each layer to dry before adding the next. Applying too much paint at once can cause the terracotta pot to become brittle and crack. A light mist of paint is often sufficient for a pleasing finish. For a glossy look, you can use two to three layers of paint with a sealer or varnish in between each layer.
Use a sealant
Once the paint has dried, apply a clear sealant to protect the paint and help it last longer. A thin, even coat of sealant should be applied to the terracotta pot, followed by a second coat after the first has dried. Make sure to let each coat dry before applying the next.
Consider a design
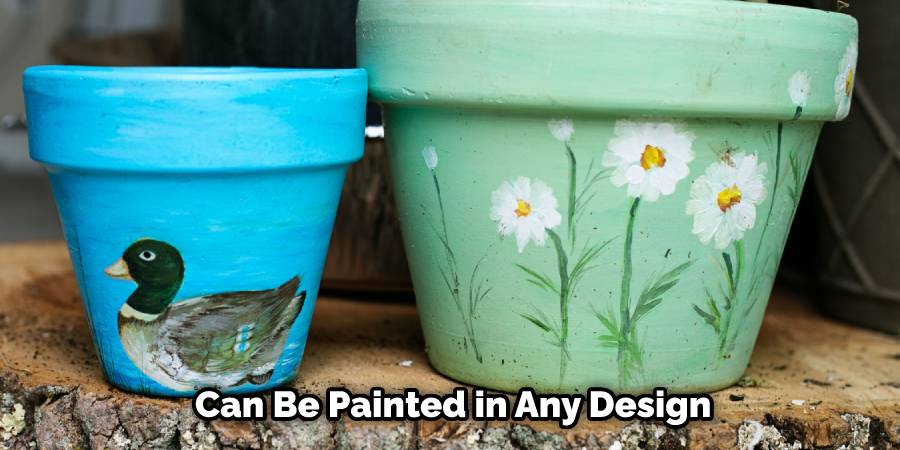
Terracotta pots can be painted in any design you like, from simple stripes to intricate designs. If you have an idea of what you’d like to paint on your pot, it’s best to sketch it out beforehand. This will help ensure that the painting process goes smoothly.
Conclusion
Sealing your terracotta pots before painting them is essential for ensuring that your painted pots look great for years to come. By following the steps outlined above, you can seal your pots effectively and enjoy painting them without worrying about water damage or other issues.
Remember to use acrylic paint, apply thin layers, and use a sealant to protect your painted pots from the elements. Hopefully, this article gave you some helpful tips about how to seal terracotta pots for painting successfully, so now that you have the proper knowledge on how to get the job done, why not give it a try today?
FAQs
Can I use any sealer to seal my terracotta pots?
No, it’s essential to use a sealer that is specifically designed for terracotta pots. Using the wrong sealer can result in poor adhesion or even damage to the pot.
How long does it take for the sealer to dry?
The drying time for the sealer will depend on the type of sealer used. Follow the manufacturer’s instructions for the recommended drying time.
Can I use regular paint on my terracotta pots?
You can use regular paint on your terracotta pots, but it may not adhere as well or last as long as acrylic paint. Acrylic paint is the recommended choice for painting terracotta pots.
Do I need to sand the pot before applying the sealer?
Yes, it’s essential to sand the pot lightly before applying the sealer. This will help the sealer adhere more effectively to the surface of the pot.
How long does it take for the sealer to cure?
The curing time for the sealer will depend on the type of sealer used. Follow the manufacturer’s instructions for the recommended curing time.


