Are you tired of struggling to remove epoxy from your ceramic surfaces? Whether it’s accidental spills or old epoxy that needs to go, fret not! In this guide, we’ll delve into simple yet effective methods on how to remove epoxy from ceramic. From household remedies to specialized techniques, we’ve got you covered. Say goodbye to sticky situations and hello to pristine ceramic surfaces in no time!
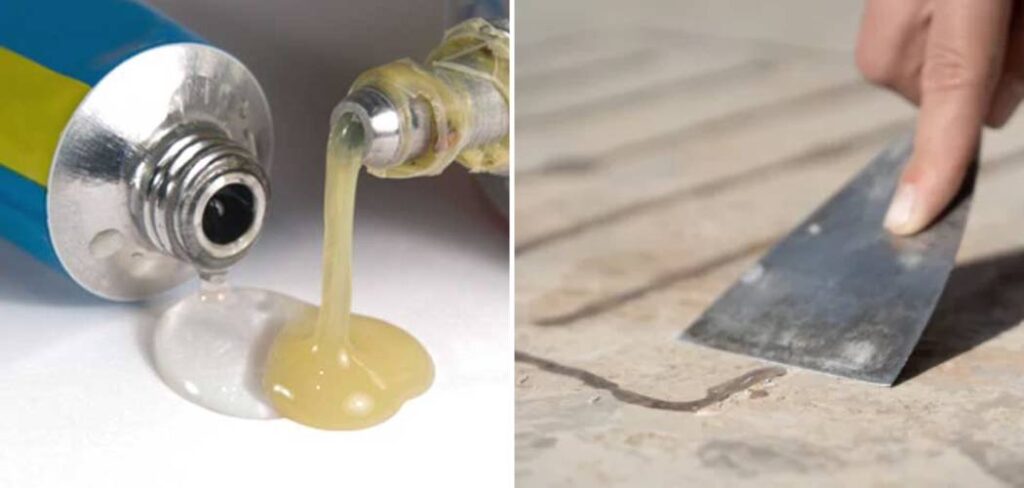
Table of Contents
Epoxy and Its Common Uses on Ceramic Surfaces
Epoxy resin is a versatile compound, often utilized on ceramic surfaces for its adhesive quality and durable finish. Commonly, it finds application in repairing broken ceramic pieces, filling cracks, or as a coating to add a protective, glossy layer to artworks and crafts.
Epoxy’s strong bond and resistance to heat and chemicals make it an ideal choice for both household and industrial repairs. Furthermore, it is used in the installation of ceramic tiles, ensuring they adhere securely to surfaces. However, its very permanence that makes it so valuable can also pose a challenge when removal is necessary.
What Epoxy Is and How It Bonds to Surfaces
Epoxy resin is a thermosetting polymer known for its strong adhesive properties, flexibility, and durability. At its core, epoxy is composed of two components: the resin and the hardener. When mixed, a chemical reaction occurs between these components, leading to the epoxy curing and hardening process.
This reaction not only causes the epoxy to solidify but also creates a powerful bond with the surface to which it is applied, including ceramic. The bond is formed as the epoxy seeps into the microscopic pores and irregularities of the ceramic surface, creating mechanical locks once cured.
This characteristic makes epoxy an exceedingly reliable adhesive, capable of withstanding significant stress, temperatures, and exposure to various chemicals. Its ability to form such a tenacious bond is what makes epoxy particularly challenging to remove from ceramic and other surfaces once fully cured.
Different Types of Epoxy and Their Properties
Epoxy resins can broadly be classified into several types, each possessing unique properties suited to specific applications. Understanding the differences between these types of epoxy can help in selecting the right one for a task and also in knowing how to effectively remove it from ceramic surfaces when needed.
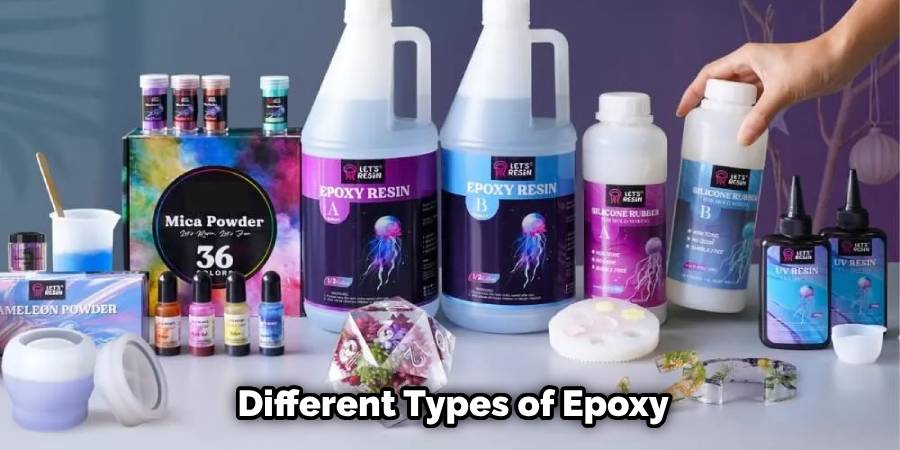
- Standard Epoxy Resin is the most common type used for household and craft projects. It offers a balance between strength and ease of use, making it suitable for general repairs and art projects. This resin has a moderate curing time, allowing for adjustments before it sets completely.
- Fast-Setting Epoxy Resin is designed for quick repairs where time is of the essence. It cures rapidly, often within minutes, providing a strong bond in emergency situations. However, its quick setting nature leaves little room for error or adjustment.
- High-Temperature Epoxy Resin is formulated to withstand extreme temperatures without degradation. This property makes it ideal for projects that will be exposed to high heat, such as cookware or industrial machinery parts.
- Waterproof Epoxy Resin is specifically engineered to resist water and moisture. It’s typically used in settings prone to water exposure, like bathrooms and kitchens, ensuring durability and longevity of the bond even in damp conditions.
Each type of epoxy resin has specific removal challenges due to their varied properties, such as curing time, temperature resistance, and moisture resistance. Knowing the type of epoxy you’re dealing with can significantly aid in determining the most effective removal method.
Gathering Necessary Materials and Tools
Before you commence the process of removing epoxy from ceramic, it’s imperative to gather all necessary materials and tools to ensure a smooth and safe procedure. Having everything at hand will not only save time but also prevent any unnecessary damage to your ceramic surfaces. Here is a list of essentials you’ll need:
- Protective Gear: Safety glasses and gloves are crucial to protect your eyes and skin from potential irritants.
- Plastic Scraper or Putty Knife: A plastic scraper is gentle on ceramic surfaces, reducing the risk of scratches. A putty knife can also be used for tougher jobs.
- Heat Gun or Hair Dryer: To soften the epoxy, making it easier to remove.
- Acetone or Rubbing Alcohol: These solvents can break down the epoxy. Ensure the room is well-ventilated when using these chemicals.
- Clean Cloths and Paper Towels: For applying solvents and cleaning up the area.
- Mild Detergent: For the final cleaning to remove any residual solvent.
- Soft Brush or Old Toothbrush: Helps in scrubbing off softened epoxy without damaging ceramic surfaces.
Remember, the key to a successful removal lies not just in the technique, but also in using the right materials and handling them with care. Ensuring you have all these items ready before starting the process will make the task of removing epoxy from ceramic much simpler and effective.
10 Steps How to Remove Epoxy from Ceramic
Assess the Situation:
Before diving into the removal process, assess the extent of the epoxy on the ceramic surface. Is it a fresh spill or a cured layer? Understanding this will help determine the best approach for removal. Fresh spills are easier to remove compared to cured epoxy, which may require harsher methods.
If the epoxy is a fresh spill, start by gently scraping off as much of the excess epoxy as possible using a plastic scraper or credit card. Be careful not to apply too much pressure as this can push the epoxy deeper into the surface and make it harder to remove.
Safety Precautions:
Epoxy removal often involves the use of chemicals and tools that can be hazardous if mishandled. Prioritize safety by wearing protective gloves, goggles, and a mask to prevent skin contact and inhalation of fumes. Also, make sure to work in a well-ventilated area to avoid exposure to harmful vapors.
In addition to personal protective equipment, it is important to follow proper procedures for disposing of any waste generated during the epoxy removal process. This includes chemicals, solvents, and any contaminated materials. Improper disposal can harm the environment and also lead to potential health hazards for others.
Ventilation:
Ensure proper ventilation in the removal area to disperse any fumes generated during the process. Open windows and doors, or use fans to improve airflow. This is especially important when using strong chemicals or working with materials that produce harmful particles, such as asbestos.
It is also important to have proper ventilation in the work area to prevent the buildup of dust or fumes. This can be achieved by installing an air filtration system or wearing a respirator. Regularly clean and maintain any ventilation systems to ensure they are functioning properly.
Scrape Off Excess Epoxy:
If the epoxy is still in its uncured state, use a plastic scraper or putty knife to gently scrape off as much excess epoxy as possible from the ceramic surface. Be careful not to scratch the ceramic while doing so. However, if the epoxy has already cured and hardened, it may be more difficult to remove. In this case, you can try using a heat gun on low heat to soften the epoxy first before scraping it off.
Heat Method:
Apply heat to the epoxy using a heat gun or hairdryer set on high heat. Heat softens epoxy, making it easier to scrape off. Hold the heat source a few inches away from the surface and move it in a circular motion until the epoxy begins to soften. Use a scraper or putty knife to gently remove the epoxy while it is still warm and pliable.
Chemical Solvents:
If the epoxy is cured or resistant to scraping, consider using chemical solvents specifically designed for epoxy removal. Acetone or nail polish remover containing acetone are commonly used solvents. Apply the solvent to a clean cloth and gently rub it onto the epoxy until it starts to dissolve. Avoid prolonged exposure to acetone as it can damage ceramic surfaces. Acetone should also not be used on painted or plastic surfaces as it can cause damage.
Other chemical solvents that can be effective in removing epoxy include methyl ethyl ketone (MEK), xylene, and toluene. These solvents are more powerful than acetone and may require extra caution when handling. It is important to wear protective gloves and work in a well-ventilated area when using these solvents.
Mechanical Abrasion:
For stubborn epoxy residues, mechanical abrasion techniques can be employed. Abrasive pads or sandpaper with a fine grit can be used to gently sand away the epoxy without damaging the ceramic surface. Use light pressure and circular motions to avoid creating scratches. It is important to wear protective gear and work in a well-ventilated area when using mechanical abrasion methods.
Polishing: After removing the majority of the epoxy residue, a polishing compound can be used to further smooth out the surface. This will help to remove any remaining residue and create a shiny finish on the ceramic surface. Use a soft cloth or buffing pad and apply the polishing compound in a circular motion. Be sure to follow the manufacturer’s instructions for optimal results.
Commercial Epoxy Removers:
Alternatively, you can opt for commercial epoxy removers available in hardware or home improvement stores. Follow the manufacturer’s instructions carefully when using these products, as they may contain potent chemicals that require proper handling and ventilation. It is also important to wear protective gear such as gloves, goggles, and a respirator mask when working with commercial epoxy removers.
One of the benefits of using commercial epoxy removers is their convenience. These products are formulated specifically for removing epoxy, meaning they are more effective than household solutions. They often come in spray or gel form, making application quick and easy.
Repeat as Necessary:
Depending on the thickness and type of epoxy, multiple rounds of removal may be required to completely eliminate it from the ceramic surface. Be patient and persistent, repeating the chosen removal method until the desired results are achieved. Remember to carefully follow all safety precautions, including wearing appropriate protective gear and working in a well-ventilated area. It is also important to properly dispose of any waste materials and clean up the work area thoroughly.
Additionally, it may be helpful to try using different tools or techniques for removing epoxy. For example, if scraping does not seem to be effective, try using a heat gun or chemical solvent. Experimenting with different methods can often lead to more successful results.
Clean and Polish:
Once the epoxy is removed, clean the ceramic surface thoroughly with soap and water to remove any remaining residue or solvent. Rinse with clean water and dry with a soft cloth. If necessary, polish the ceramic to restore its shine using a mild abrasive cleaner or ceramic polish.
If the ceramic is heavily stained or discolored, you may need to use a stronger chemical cleaner or even a professional stain remover. Be sure to follow the manufacturer’s instructions carefully and wear protective gloves and eyewear when working with these cleaners.
Restoration of Ceramic Surface:
After successfully removing the epoxy and thoroughly cleaning the ceramic surface, it’s time to focus on restoration and protection. Restoration is crucial to ensure the surface retains its aesthetic appeal and durability. Here are steps to effectively restore the ceramic surface:
- Inspect the Surface: Carefully inspect the ceramic for any damage or changes in texture or color. This step will help determine the extent of restoration needed.
- Apply Ceramic Filler if Necessary: If you’ve found any chips, cracks, or holes during the inspection, use a ceramic filler to repair these defects. Ensure the filler is compatible with your ceramic’s finish and color. Apply it according to the manufacturer’s instructions, and allow it to dry completely.
- Sand Smooth: Once the filler has dried, lightly sand the repaired areas with fine-grit sandpaper to ensure they are smooth and level with the rest of the surface. This step is essential for a uniform look.
- Clean Again: Wipe down the entire surface with a damp cloth to remove any dust or debris resulting from sanding. Ensure the surface is clean before proceeding to the next step.
- Apply Sealant: To protect the ceramic surface and maintain its gloss, apply a clear ceramic sealant. This sealant will create a protective barrier against future stains, scratches, and wear. Use a soft brush or a clean cloth to apply the sealant evenly, following the product’s instructions.
- Buff to Shine: After the sealant dries, buff the surface with a soft, dry cloth to enhance the shine and ensure an even finish.
Maintenance Tips for Ceramic Surfaces:
Maintaining the integrity and appearance of ceramic surfaces over time requires regular care. Here are some tips to keep your ceramic looking its best:
- Regular Cleaning: Regularly clean the ceramic with mild soap and water to prevent dirt buildup. Avoid using harsh chemicals or abrasive cleaners that can damage the surface.
- Immediate Spill Cleanup: Clean up spills immediately to prevent staining. Acidic substances like vinegar or lemon juice should be cleaned promptly, as they can etch the surface.
- Use Protective Mats: Use mats or trivets under hot dishes or cookware to prevent heat damage. Similarly, placing protective pads under heavy objects can avoid scratches.
- Periodic Re-Sealing: Depending on the usage and exposure to elements, periodically reapply the sealant to maintain the ceramic’s protective layer.
By following these restoration and maintenance guidelines, you can ensure your ceramic surfaces remain beautiful and functional for years to come.
Conclusion
In conclusion, successfully removing epoxy from ceramic surfaces requires a combination of patience, proper technique, and the right tools and materials. Whether opting for mechanical, chemical, or thermal removal methods, it’s crucial to prioritize safety and take necessary precautions to avoid damaging the ceramic.
Additionally, thorough preparation and careful execution are key to achieving optimal results without leaving behind residue or causing harm to the underlying surface. While the process may seem daunting at first, armed with the knowledge outlined in this guide, individuals can confidently tackle epoxy removal projects with ease.
Remember, each situation may vary, so adaptability and persistence are essential traits to possess when undertaking such tasks. Hopefully, this article gave you some helpful tips about how to remove epoxy from ceramic successfully, so now that you have the proper knowledge on how to get the job done, why not give it a try today?


