Clay, a versatile and essential material in various artistic and horticultural endeavors, can lose its moisture over time, rendering it brittle and challenging to work with. Whether you’re a potter shaping intricate ceramics or a gardener amending soil composition, knowing how to rehydrate clay is a valuable skill. This restorative process not only rejuvenates the clay’s plasticity but also ensures its malleability for creative projects or gardening needs.
Rehydrating clay involves a careful balance of moisture, time, and technique. In this comprehensive guide, we will delve into the art of reviving dry clay through a series of meticulously crafted steps. From gathering the necessary materials to determining the ideal consistency, we’ll explore every facet of the rehydration process.
“To rehydrate clay, start by breaking the dry clay into smaller pieces and placing them in a container. Then, add a small amount of water and allow it to soak into the clay for about 30 minutes. Knead the clay thoroughly, gradually adding more water as needed until you achieve the desired consistency for your specific project. Be cautious not to add too much water at once, as it can make the clay too wet and difficult to work with.”
Table of Contents
The Importance of Rehydrating Clay
Clay naturally dries out over time due to exposure to air and heat. When clay dries out, it becomes hard and brittle, making it difficult to work with. Rehydrating clay is essential to restore its moisture content and make it pliable again. This not only makes it easier to shape and mold, but it also helps to prevent cracking and breaking during the drying and firing process.
Rehydrating clay also helps to extend its lifespan. When clay dries out, it can become unusable and may need to be discarded. By rehydrating clay, you can revive it and continue to use it for your projects. This not only saves you money but also reduces waste.
10 Steps How to Rehydrate Clay
Step 1: Gather Your Materials
Before you begin the rehydration process, it’s essential to gather all the necessary materials. You’ll need:
- Dry clay that needs rehydrating.
- A plastic or glass container with a lid.
- Distilled water (tap water can contain impurities that affect the clay).
- A plastic bag or plastic wrap.
- A spray bottle with distilled water.
- A plastic or wooden spoon for stirring.
- A clean cloth or plastic wrap.
- Plastic bags or plastic wrap.
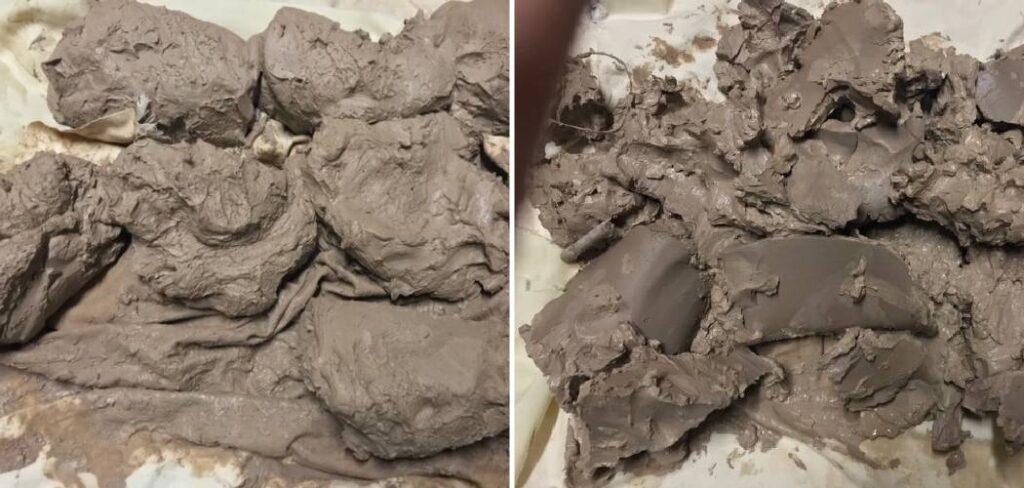
Step 2: Break the Clay into Small Pieces
Start by breaking the dry clay into small, manageable pieces. This will help speed up the rehydration process and make it easier to work with the clay later. Use your hands or a tool like a mallet to break the clay into smaller chunks.
Step 3: Place Clay in a Container
Next, place the broken clay pieces into a plastic or glass container. Make sure the container has a lid to keep the clay moist during the rehydration process. Arrange the clay pieces evenly in the container.
Step 4: Add Distilled Water
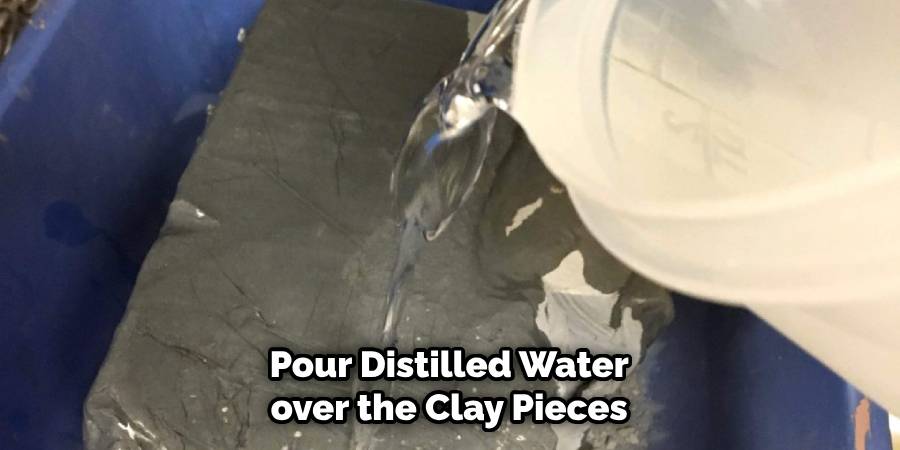
Pour distilled water over the clay pieces in the container. The amount of water you add depends on the amount of clay you have and its dryness. A general rule of thumb is to add enough water to cover the clay by about an inch. Be cautious not to add too much water initially; you can always add more later if needed.
Step 5: Allow the Clay to Soak
Once you’ve added the water, it’s time to let the clay soak. Seal the container with the lid and allow the clay to absorb the water for 12 to 24 hours. This soaking period will soften the clay and begin the rehydration process.
Step 6: Check the Clay
After the soaking period, check the clay’s consistency. It should be softer and more pliable than before. If it’s still too dry or has uneven moisture distribution, use a plastic or wooden spoon to stir the clay thoroughly, breaking up any dry spots.
Step 7: Spritz with Water
If the clay is still somewhat dry, use a spray bottle filled with distilled water to mist the surface of the clay. Gently spray a fine mist evenly across the clay’s surface, then reseal the container and let it sit for another 12 to 24 hours. Repeat this step as necessary until the clay reaches the desired consistency.
Step 8: Knead the Clay
Once the clay has absorbed enough moisture and reached the desired consistency, it’s time to knead it. Remove the clay from the container and place it on a clean, smooth surface. Use your hands to knead the clay thoroughly, just like you would with fresh clay. This process helps distribute the moisture evenly and eliminates any remaining dry spots.
Step 9: Store Properly
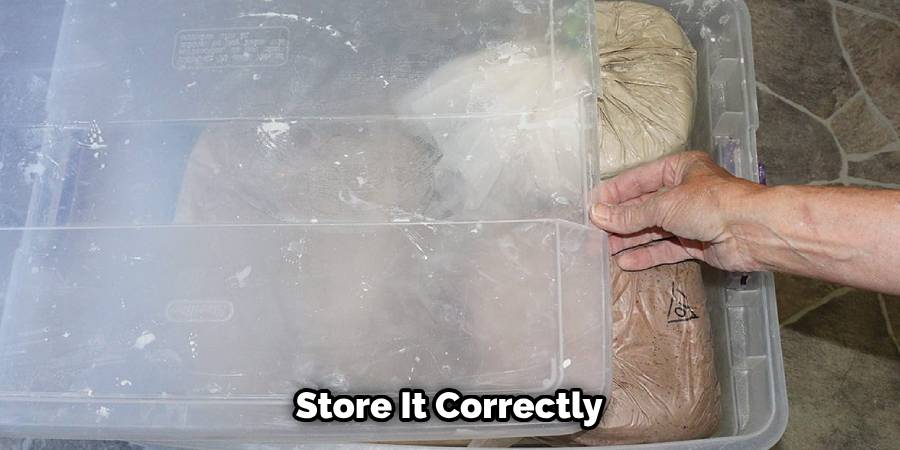
After rehydrating and kneading the clay, it’s essential to store it correctly to prevent it from drying out again. Wrap the clay in plastic wrap or place it in a plastic bag, ensuring there is no air exposure. You can also use airtight containers to store smaller portions of clay. Store the clay in a cool, dark place away from direct sunlight and extreme temperature fluctuations.
Step 10: Test and Adjust
Before using the rehydrated clay for your pottery or ceramics projects, it’s a good idea to test it first. Create a small sample piece to ensure that the clay has the right consistency and workability for your needs. If the clay feels too dry or too wet, you can make further adjustments by adding a bit of water or letting it air dry slightly.
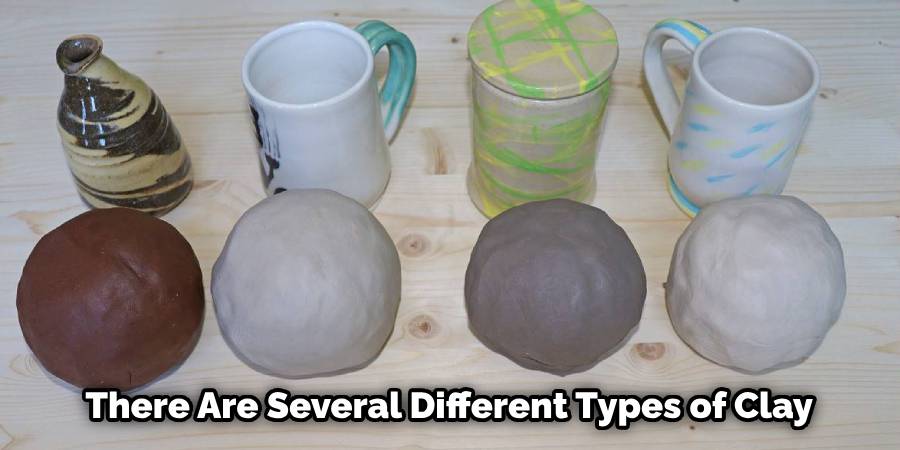
Identifying Different Types of Clay and Their Properties
There are several different types of clay, each with its own unique properties. The most common types of clay used in pottery and sculpture are earthenware, stoneware, and porcelain.
Earthenware clay is the most common type of clay used in pottery. It is relatively low-fired and has a high iron content, which gives it a reddish-brown color when fired. Earthenware clay is known for its workability and is often used for making functional pottery such as plates, bowls, and mugs.
Stoneware clay is a higher-fired clay that is known for its durability and strength. It has a higher silica content than earthenware clay, which gives it a gray or tan color when fired. Stoneware clay is often used for making dinnerware, vases, and other decorative items.
Porcelain clay is a high-fired clay that is known for its translucent and white appearance when fired. It has a high kaolin content, which gives it its unique properties. Porcelain clay is often used for making delicate and intricate pottery, such as fine china and porcelain dolls.
The properties of each type of clay can affect how it rehydrates. For example, earthenware clay tends to absorb water more quickly than stoneware or porcelain clay. Understanding the properties of the clay you are working with can help you determine the best method for rehydration.
Common Reasons for Clay Drying Out
There are several common reasons why clay may dry out. Exposure to air is one of the main culprits, as the moisture in the clay evaporates over time. Heat can also cause clay to dry out, as it speeds up the evaporation process. Improper storage can also lead to clay drying out, such as leaving it uncovered or in a dry environment.
It is important to store clay properly to prevent it from drying out. This includes keeping it in an airtight container or wrapping it in plastic to maintain its moisture content. If clay does dry out, it can be rehydrated using various methods.
Tips for Maintaining Moisture in Clay After Rehydration
After rehydrating clay, it is important to take steps to maintain its moisture content. This will help to prevent it from drying out again and ensure its workability and longevity. Here are some tips for maintaining moisture in clay after rehydration:
- Store clay in an airtight container or wrap it in plastic to prevent it from drying out.
- Keep clay away from direct sunlight and heat sources, as they can cause it to dry out.
- If clay starts to dry out again, you can rehydrate it using one of the methods mentioned earlier.
- Avoid overworking the clay, as this can cause it to dry out faster.
- If you are not using the clay for an extended period of time, you can mist it with water or cover it with a damp cloth to keep it moist.
Conclusion
In conclusion, mastering the art of rehydrating clay is a valuable skill for artists, potters, and gardeners alike. This transformative process breathes new life into dried-out clay, unlocking its potential for creativity and productivity. By following the carefully outlined steps on how to rehydrate clay, you can confidently restore clay’s pliability and workability, ensuring that your pottery and ceramic projects are marked by precision and finesse. Similarly, in the realm of gardening, rehydrated clay can contribute to healthier soil conditions and improved plant growth.
Remember that rehydration is not just about adding water; it’s a delicate balance that requires patience and attention to detail. With practice, you’ll become adept at assessing and adjusting clay’s moisture levels to meet your specific needs. So, whether you’re shaping intricate sculptures, crafting functional ceramics, or tending to your garden, the knowledge of how to rehydrate clay will empower you to turn dry, lifeless material into a medium filled with endless possibilities. Embrace this skill, and let your creativity flourish.


