Reviving tired or chipped pottery through reglazing is a rewarding and creative endeavor that allows you to breathe new life into cherished pieces or give a fresh look to thrift store finds. In this comprehensive guide, we’ll explore the art of how to reglaze pottery, providing step-by-step instructions and essential tips for transforming worn ceramics into vibrant, eye-catching treasures.
Whether you’re a seasoned potter looking to revitalize your own creations or someone seeking to rescue and revamp pre-loved pieces, this article will cover the fundamentals of reglazing, from surface preparation and choosing the right glazes to firing techniques. Unlock the potential of your pottery, as we guide you through the process of reglazing, enabling you to add a touch of artistry to your living space or share the joy of rejuvenated ceramics with others.
Importance of Reglazing Pottery
Reglazing pottery is an important process in the world of ceramics. It involves applying a new layer of glaze over existing pottery to restore its appearance and functionality. This technique has been used for centuries to revitalize pottery that may have lost its luster or developed cracks and chips.
One of the main benefits of reglazing pottery is that it allows for the preservation of historical and cultural artifacts. Many ancient pottery pieces have survived through the ages thanks to careful reglazing techniques. This helps to ensure that future generations can appreciate and study these valuable works of art.
Reglazing also plays a crucial role in the world of modern ceramics. It allows for damaged or flawed pieces to be salvaged, reducing waste and promoting sustainability in the industry. Additionally, reglazing can add new colors and textures to pottery, creating unique and visually stunning pieces.
Identifying the Type of Pottery and Its Glaze
There are several different types of pottery, each with its own unique glaze. The process of reglazing a piece depends on which type of pottery and glaze you have, so it’s important to identify both before proceeding.
Earthenware is one common type of pottery that has a porous clay body and is glazed with a low-fire glaze. This type of pottery is often used for decorative pieces and has a glossy finish. Stoneware, on the other hand, is made from non-porous clay and is glazed with a high-fire glaze. It’s known for its durability and is commonly used for functional items such as plates and bowls.
To determine the type of pottery you have, look at the color and texture of the clay body. Earthenware is typically a light color and has a rougher texture, while stoneware is darker in color and has a smoother texture.
10 Steps How to Reglaze Pottery
1. Clean the Pottery

The first step in reglazing pottery is to clean it thoroughly. Use a soft cloth or brush and warm, soapy water to remove dirt and grime. Be sure to rinse the pottery well and let it dry completely before beginning the reglazing process.
2. Sand the Surface
Once the pottery is clean and dry, use a fine-grit sandpaper to gently sand the surface of the pottery. This will help create a smooth surface that will allow for better adhesion of the glaze.
3. Apply Primer
Before applying glaze, it is important to apply a primer to ensure better adhesion of the glaze. Use a brush or roller to apply an even layer of primer over the entire surface of the pottery. Let it dry completely before moving on to the next step.
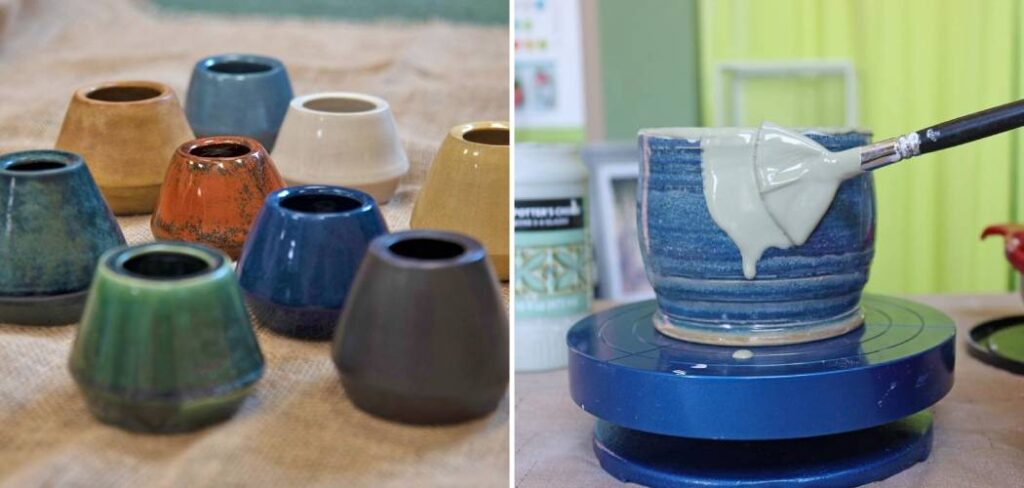
4. Apply Glaze
Once you have applied primer, you can begin applying glaze to your pottery piece. Use either a brush or sponge to apply an even layer of glaze over your piece, making sure that all areas are covered evenly with no gaps or streaks left behind. Allow your piece to dry before proceeding with any additional layers of glaze if desired.
5. Fire in Kiln
Once you have applied your final layer of glaze, it is time to fire your piece in a kiln at high temperatures in order for the glaze to adhere and cure correctly onto your piece of pottery. Follow all safety guidelines when using a kiln, as they can reach very high temperatures that can cause serious injury if not handled properly.
6. Cool Down
After firing your piece in a kiln, allow it time to cool down before handling or attempting any further modifications, such as adding additional layers of paint or other decorative elements such as decals or transfers. This will help ensure that any new additions do not crack due to thermal shock from sudden changes in temperature from hot to cold too quickly.
7. Add Decorative Elements

Once your piece has cooled down after firing, you can add any decorative elements such as decals, transfers, gold leaf, etc. If using paints, make sure they are formulated specifically for use on ceramics, as standard acrylics may not adhere correctly and could lead to cracking.
8. Seal Your Piece
In order for your finished pieces of pottery to be able to withstand regular wear and tear, it is important to seal them properly. This can be done by using either an aerosol sealant spray, brushing on multiple thin coats of clear sealer with a brush, or dipping them into the liquid sealer. Make sure you follow all directions carefully when using these products, as some require multiple steps, such as curing times between coats.
9. Polish Your Piece
Once you have sealed your pieces, you may want to give them extra shine by polishing them with either cloth specially made for polishing ceramics or buffing wheels attached to drills. Be careful when doing this so as not to scratch off any decorative elements added previously, such as gold leaf or decals.
10. Display Your Work!
Finally, once all steps have been completed and your pieces are fully dried and cured, they are ready to be displayed proudly! Whether it is placed inside glass cabinets at home, hung up on walls with special hooks designed for displaying ceramic works, or sold at craft fairs – enjoy seeing others admire creations!
Things to Consider When Reglazing Pottery
When it comes to reglazing pottery, there are a few key things to keep in mind. Whether you’re a beginner or an experienced potter, these tips can help ensure that your reglazing process yields the best results possible.
Choose the Right Glaze
The first step in reglazing pottery is choosing the right glaze. Glazes come in a variety of colors and finishes, so it’s important to choose one that will complement your piece and achieve the desired effect. Some glazes may also be more suitable for certain types of pottery, so do some research or consult with an expert to determine which glaze is best for your specific project.
Prepare Your Pottery
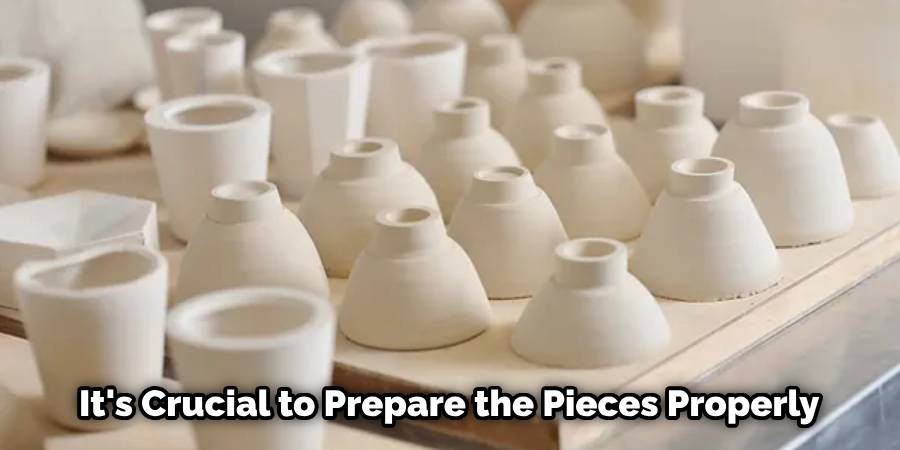
Before reglazing your pottery, it’s crucial to prepare the pieces properly. This includes cleaning off any dust or debris from previous firings, as well as smoothing out any imperfections on the surface. It’s also important to inspect the pottery for any cracks or chips that may need to be repaired before applying the glaze.
Apply Glaze with Care
When applying glaze, it’s important to do so with care and precision. This means using the right tools for the job, such as glazing brushes or sponges, and applying an even coat of glaze to all areas of the pottery. It’s also important to avoid getting any glaze on the bottom of the piece, as this can cause it to stick to the kiln shelf during firing.
Common Mistakes to Avoid When Reglazing Pottery
When it comes to reglazing pottery, there are some common mistakes that many beginners and even experienced potters make. These mistakes can lead to unsatisfactory results or even damage to your pottery. To help you avoid these mistakes, we have listed them below along with tips on how to prevent them.
Not Properly Preparing the Surface
Before reglazing pottery, it is important to make sure that the surface is properly prepared. This means removing any dust, dirt, or previous glaze from the surface of the pottery. If this step is skipped, your new glaze may not adhere properly and result in uneven coverage or flaking off.
To prevent this mistake, make sure to thoroughly clean the pottery before applying the new glaze. This can be done by gently wiping the surface with a damp cloth or using a soft brush to remove any debris.
Using Too Much Glaze
Another common mistake is using too much glaze on your pottery. While it may seem like more glaze will result in a brighter and more vibrant finish, this is not the case. Excessive glaze can lead to running, dripping, and even cracking during firing.
To avoid this mistake, make sure to apply a thin and even layer of glaze on your pottery. You can achieve this by using a soft brush or sponge and evenly distributing the glaze across the surface.
Not Letting the Glaze Dry Properly
After applying the glaze, it is crucial to let it dry completely before firing the pottery. This allows the glaze to properly adhere to the surface and prevents any running or dripping during firing.
To ensure that your glaze is fully dried, it is recommended to leave your pottery in a well-ventilated area for at least 24 hours. You can also use a hairdryer on low heat to speed up the drying process.
Conclusion
Reglazing pottery can bring new life to a piece of art or utilitarian item and give it the perfect finishing touch. Whether you are a proficient reglazer or a novice, as long as you follow the steps above and take your time with each step, you can achieve excellent results. Patience and attention to detail are key when dealing with pieces of pottery, so be sure to remain mindful throughout the process.
Now that you know how to reglaze pottery the challenge is up to you; get creative and see where it takes you! So what are you waiting for? Go ahead and try out this tutorial; have fun and if something goes wrong – don’t worry – mistakes will happen.


