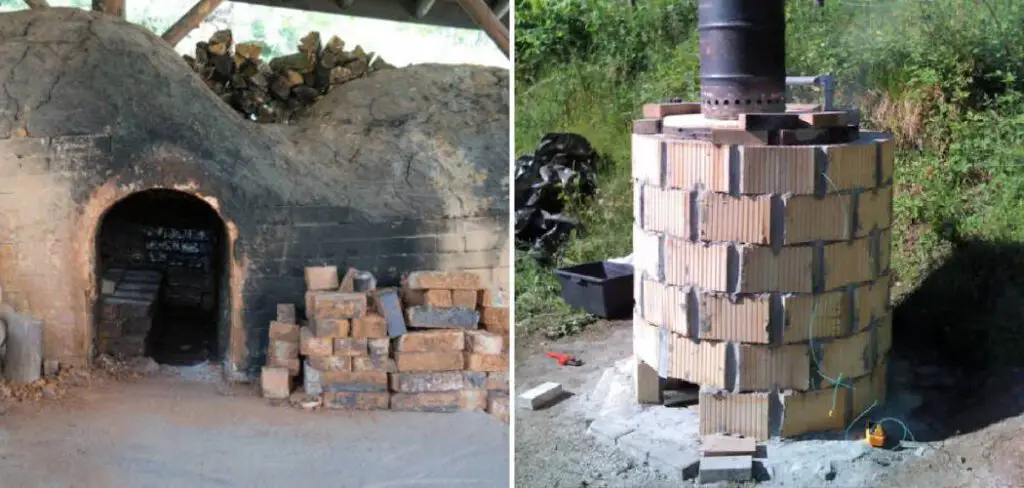
Building your own brick kiln is not only an exciting DIY project but also a practical step towards sustainable construction practices. A brick kiln serves as a crucial component in the process of making bricks, which are fundamental building blocks used in various construction projects. By constructing your own brick kiln, you gain the ability to produce high-quality bricks at your convenience while minimizing costs and environmental impact.
In this comprehensive guide, we will explore the step-by-step process of how to make your own brick kiln from readily available materials, empowering you to embark on your construction journey. From selecting the ideal location and gathering the necessary materials to constructing the kiln and efficiently firing your bricks, we will provide you with valuable insights and tips to ensure a successful project.
Whether you are a passionate DIY enthusiast, a homeowner looking to embark on a construction project, or an environmentally conscious individual seeking sustainable alternatives, this guide will equip you with the knowledge and skills to make your own brick kiln, enabling you to contribute to a greener future while fulfilling your construction needs.
Table of Contents
Benefits of Building a Brick Kiln at Home
Building a brick kiln at home can be a cost-effective and sustainable way to produce bricks for personal use or for sale. It is also customizable, allowing you to create bricks of different sizes and shapes to suit your needs. Additionally, a brick kiln can provide a source of income if you choose to sell the bricks you produce.
One of the main benefits of building a brick kiln at home is the cost savings. By producing your own bricks, you can avoid the high costs associated with purchasing bricks from a supplier. Additionally, you can customize the size and shape of the bricks to suit your specific needs, which can save you money on construction costs.
Another benefit of building a brick kiln at home is the sustainability factor. By using locally sourced materials and producing your own bricks, you can reduce your carbon footprint and contribute to a more sustainable future. Additionally, the process of firing bricks in a kiln is energy-efficient, as it requires less energy than other methods of producing bricks.
Finally, building a brick kiln at home can provide a source of income. If you choose to sell the bricks you produce, you can generate additional income for your household. This can be a great way to supplement your income and provide financial stability.
Materials Required for Building a Brick Kiln
To build a brick kiln, you will need a variety of materials, including bricks, cement, sand, gravel, steel bars, firebricks, chimney pipes, and a ventilation system. The specific materials you will need will depend on the size and design of your kiln.
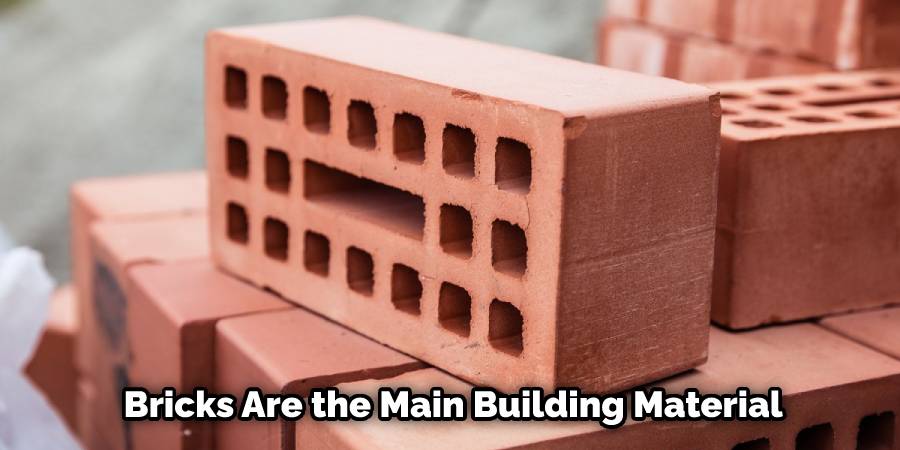
Bricks are the main building material for the kiln, and you will need a large quantity of them. Cement, sand, and gravel are used to create the foundation and walls of the kiln, while steel bars are used to reinforce the foundation. Firebricks are used to line the inside of the kiln, as they are able to withstand high temperatures. Chimney pipes and a ventilation system are also necessary to ensure proper air flow and temperature control.
Step-by-Step Guide How To Make Your Own Brick Kiln
Step 1: Planning and Preparation
Before diving into the construction process, it’s essential to plan and gather all the necessary materials. Consider the size and capacity of the kiln you intend to build, keeping in mind factors such as available space, the number of bricks you wish to produce, and your specific needs. Research local regulations and obtain any necessary permits or permissions.
Once the plans are in place, begin to source your materials. You will need a wide variety of building supplies such as lumber, concrete blocks, sand, and mortar. You may also need elements such as firebricks, insulation, steel plate, and refractory cement.
Step 2: Choosing the Location
Select a suitable location for your brick kiln. It should be easily accessible, well-ventilated, and away from any potential fire hazards. Ensure that the ground is level and stable to provide a solid foundation for your kiln.
Take into account the prevailing wind direction to optimize ventilation and minimize smoke and emissions. Once you have chosen the ideal location, it is time to take measurements and prepare your brick kiln design. Although you can purchase premade designs, it is best to make your own customized plan.

Step 3: Gathering Materials and Tools
Collect all the required materials and tools for constructing the brick kiln. These may include bricks, fire-resistant mortar, fire bricks, metal sheets, steel reinforcement bars, sand, gravel, clay, water, a shovel, a wheelbarrow, a level, measuring tape, and safety equipment such as gloves and goggles.
While the exact materials used will vary depending on the size and design of the kiln, it is important to make sure that all components are fire-resistant and able to withstand the high temperatures that will be generated.
Step 4: Designing the Kiln
Create a design or blueprint for your brick kiln. This will serve as a guide during construction and ensure that you have a clear vision of the final product. Consider factors such as the kiln’s shape (rectangular, circular, or oval), dimensions, and ventilation system.
Take into account the specific type of bricks you wish to produce and their size. Also, make sure to include a chimney and adequate insulation. While the design will require some trial and error, it is important to create a plan that you can follow precisely.
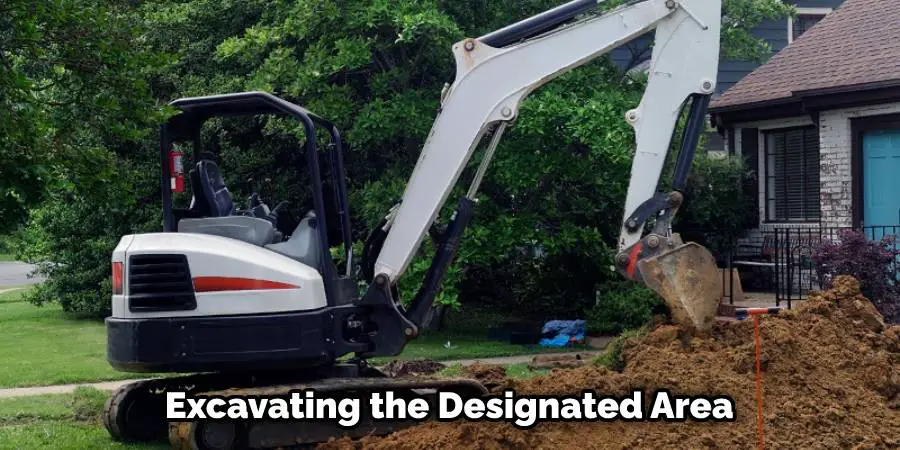
Step 5: Excavating the Foundation
Prepare the foundation for your brick kiln by excavating the designated area. Dig a trench to a suitable depth, ensuring it is level and wide enough to accommodate the dimensions of your kiln. The foundation should provide stability and support for the kiln structure.
Although your kiln will be able to withstand most weather conditions, using a slightly sloping foundation may help with rainwater drainage. Once the excavation is complete, fill the area with a layer of gravel or sand to ensure that the kiln is level and well-grounded.
Step 6: Constructing the Base
Lay the foundation of your kiln by creating a solid base using concrete or fire-resistant bricks and mortar. This will serve as the platform on which the kiln structure will be built. Ensure the base is level and secure, allowing for the even distribution of weight.
It is recommended to use 2-inch thick bricks to form the base so that it can withstand hot temperatures. Once your foundation is complete, you can move onto the next step.
Step 7: Building the Walls
Using fire bricks and fire-resistant mortar, construct the walls of the kiln. Follow your design or blueprint, ensuring that the walls are of the appropriate height, thickness, and shape. Leave openings for the doors, flues, and ventilation system.
Regularly check for levelness and stability during construction. Once the walls are complete, insert the fire door(s) and secure it in place. Place a layer of insulation around the entire kiln if desired.
Step 8: Installing Doors and Flues
Attach doors to the front and back of the kiln, allowing for easy access and control of airflow. Install flues or chimneys to facilitate the escape of smoke and heat. These can be made from metal sheets or fire-resistant bricks and mortar.
Ensure proper alignment and secure attachment to prevent any leaks. If possible, attach a small fan to the flues to increase their efficiency. Once complete, your brick kiln is ready for use! With proper
Step 9: Curing and Drying
Once the kiln structure is complete, allow it to cure and dry before firing it. This process allows the mortar to harden and strengthens the overall structure. Keep the kiln protected from rain and extreme weather conditions during this stage. Curing and drying times will vary depending on the environmental conditions.
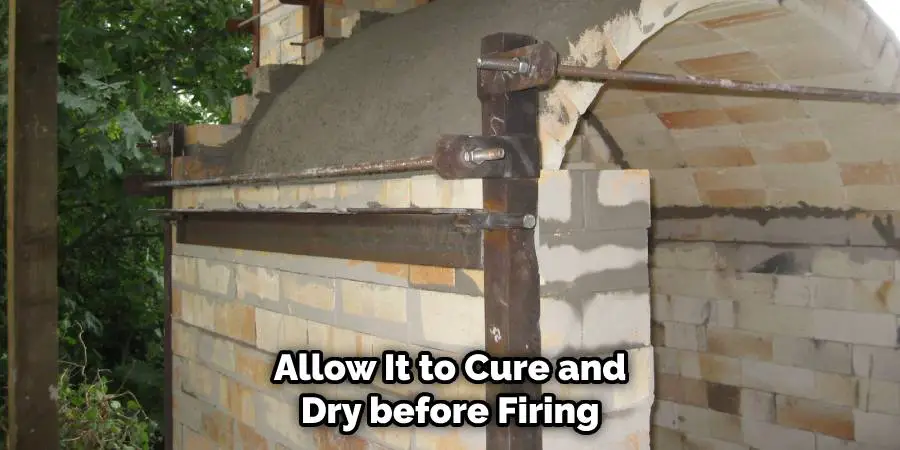
Check the kiln for any signs of cracks, which should be patched up before firing. While the kiln is drying, begin gathering and preparing any materials that will be needed for firing. This includes enough fuel sources to last the entire firing process and any materials that will need to be placed in the kiln for firing.
Step 10: Firing the Kiln
After the curing period, you’re ready to fire up your brick kiln. Gradually increase the temperature over several firings to avoid thermal shock and damage to the kiln. Monitor the temperature closely and make adjustments as necessary. Follow proper firing techniques to ensure the bricks are adequately hardened and cured.
When the kiln reaches its desired temperature, maintain it for several hours to make sure all of the bricks are hardened. Once you’ve reached this point, you can begin cooling down the kiln. This should be a gradual process to make sure that the bricks don’t experience any thermal shock.
Maintenance and Safety Tips for Your Brick Kiln
To ensure the longevity of your brick kiln, it is important to perform regular maintenance and follow safety precautions. This includes cleaning the kiln regularly, inspecting it for any damage, using protective gear when working with the kiln, and following fire safety precautions.
Conclusion
Constructing your own brick kiln requires careful planning, preparation, and execution. By following these ten steps, you can create a functional and efficient kiln that enables you to produce high-quality bricks while minimizing costs and environmental impact.
Remember to prioritize safety throughout the construction process and adhere to local regulations. With dedication and attention to detail, you’ll soon have a brick kiln that serves as a valuable asset for your construction needs. So, there you have it – a quick and easy guide on how to make your own brick kiln.


