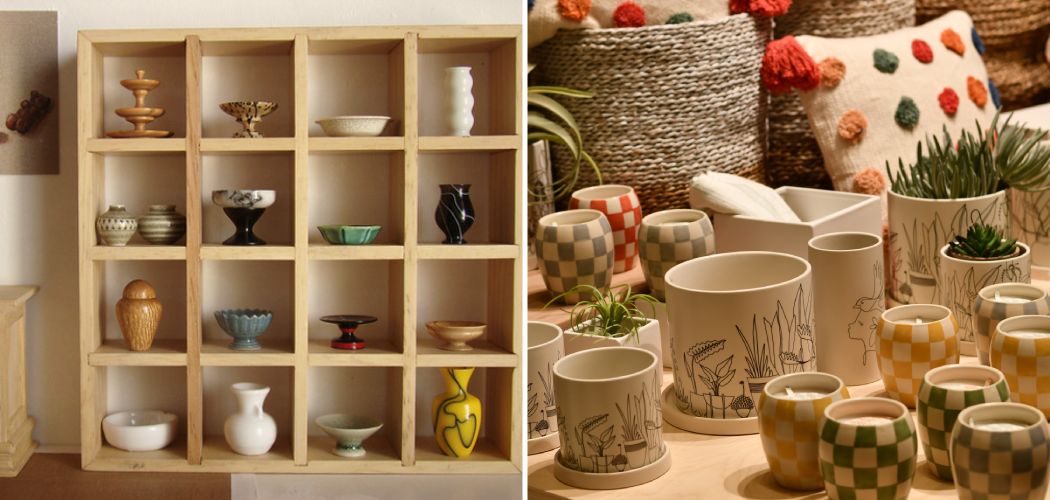
Ceramic vessels have become increasingly popular in home decor in recent years. These versatile and beautiful pieces can add a touch of elegance and sophistication to any space. Whether used as functional items or purely for decorative purposes, ceramic vessels have a timeless appeal that can enhance the overall aesthetic of a room. In this blog post, we will explore how to make ceramic candle vessels, the process of making them, and how to incorporate them into your home decor.

Table of Contents
The Art of Creating Ceramic Vessels
Creating ceramic vessels is not just a craft, but also an art form. It requires skill, creativity, and imagination to transform a lump of clay into a beautiful and functional piece. The process of creating ceramic vessels involves various techniques such as shaping, decorating, firing, and glazing.
Artists who create ceramic vessels often start with a vision or idea of what they want to create. They use their creativity and imagination to bring their vision to life through the manipulation of clay. The artistic aspect of creating ceramic vessels allows artists to express their individuality and unique style. Each piece is a reflection of the artist’s personality and artistic sensibilities.
The Process of Making Ceramic Vessels
The process of making ceramic vessels involves several stages, each requiring precision and attention to detail. The first step is preparing the clay by kneading and wedging it to remove air bubbles and ensure a smooth and even texture. Once the clay is ready, it can be shaped using various techniques such as hand-building, wheel-throwing, or slip-casting.
After shaping, the vessel is left to dry slowly to prevent cracking. Once dry, it is ready for the first firing, known as the bisque firing. This firing removes any remaining moisture from the clay and makes it hard and durable. After the bisque firing, the vessel can be decorated using techniques such as carving, painting, or glazing.
The final step in the process is the glaze firing, which gives the vessel its final finish and appearance. Glazes are applied to the surface of the vessel and then fired at high temperatures to create a glass-like finish. This firing process transforms the clay into a beautiful and functional ceramic vessel.
10 Steps How to Make Ceramic Candle Vessels
Step 1: Gather Your Materials and Tools
Before you embark on your ceramic candle vessel journey, ensure you have all the necessary materials and tools at hand. You’ll need clay, a pottery wheel, kiln, clay tools (such as carving tools, wire cutter, and ribs), brushes for glazing, a scale for measuring clay, water for moistening the clay, and a workspace equipped with a clean, flat surface.

Step 2: Select Your Clay
Choosing the right type of clay is crucial to the success of your ceramic candle vessels. Porcelain, stoneware, and earthenware are common choices. Each clay type has unique properties in terms of texture, color, and firing temperature. Consider the aesthetic you’re aiming for and the techniques you’ll be using as you select your clay.
Step 3: Wedge and Prepare the Clay
Before you start working with the clay, wedge it to remove air bubbles and ensure its consistency. Wedging involves kneading the clay to create a uniform texture. Then, weigh the clay to ensure consistency in your candle vessels’ sizes.
Step 4: Center the Clay on the Pottery Wheel
Place a piece of clay on the wheel head and use gentle pressure to center it. Centering is a fundamental skill in pottery, as it ensures that your vessel spins symmetrically on the wheel and prevents wobbling during shaping.
Step 5: Shape Your Candle Vessel
With the clay centered, use your hands to create an opening in the center. Gradually shape the clay using your fingers, palms, and pottery tools to form the desired vessel shape. Consider factors such as height, width, and the curvature of the walls. Experiment with various shapes to find what resonates with your vision.
Step 6: Add Texture and Details
This is where your creativity truly shines. Experiment with adding texture, patterns, or even intricate carvings to your vessel. You can use carving tools, stamps, or your fingers to create unique surface designs. These details will add character and depth to your finished candle vessels.
Step 7: Allow the Vessels to Dry
Once you’re satisfied with the shape and design, allow your vessels to air dry partially. This is a crucial step to prevent cracking during firing. Be patient and give your vessels enough time to dry evenly, which can take a few days to a week depending on the size and thickness of the vessels.

Step 8: Bisque Firing
When your vessels are thoroughly dry, it’s time for the first firing, known as bisque firing. Load your vessels into the kiln and gradually increase the temperature to around 1800°F (980°C). This firing removes any remaining moisture from the clay and makes it more porous, preparing it for glazing.
Step 9: Glazing
Glazing is where you can truly bring your ceramic candle vessels to life with color and shine. Choose glazes that complement your design and firing temperature. Apply glaze using brushes, dipping, or pouring techniques. Keep in mind that the way glazes appear before firing might differ from their final appearance after the glaze firing.
Step 10: Glaze Firing
Load your glazed vessels into the kiln for the final glaze firing. The firing temperature will depend on the type of glaze you’ve used. During this firing, the glaze will melt and fuse to the vessel’s surface, creating the glossy, vibrant finish you envisioned. Once the kiln cools down, you can finally admire your stunning ceramic candle vessels.
Choosing the Right Clay for Your Ceramic Vessels
Choosing the right clay for your ceramic vessels is crucial to achieving the desired result. There are several types of clay available, each with its own unique properties and characteristics. Some common types of clay used for ceramic vessels include earthenware, stoneware, and porcelain.
Earthenware clay is a low-fire clay that is easy to work with and has a warm and rustic appearance. It is often used for decorative pieces or items that do not require high durability. Stoneware clay is a mid-fire clay that is known for its strength and durability. It is suitable for functional items such as bowls and plates. Porcelain clay is a high-fire clay that is known for its delicate and translucent appearance. It is often used for fine and delicate pieces such as vases or figurines.
When choosing clay for your ceramic vessels, consider the intended use of the piece, the desired appearance, and your skill level as a ceramic artist. Experimenting with different types of clay can also be a fun and educational experience.
Techniques for Shaping and Decorating Ceramic Vessels
There are various techniques that can be used to shape and decorate ceramic vessels. Hand-building is a technique that involves shaping the clay by hand using tools such as coils, slabs, or pinch pots. This technique allows for more organic and free-form shapes.
Wheel-throwing is another popular technique that involves shaping the clay on a pottery wheel. This technique allows for more precise and symmetrical shapes. Slip-casting is a technique that involves pouring liquid clay into a mold and allowing it to set. This technique is often used for creating multiples of the same shape.
When it comes to decorating ceramic vessels, the possibilities are endless. Carving, painting, and glazing are some common techniques used to add texture, color, and pattern to the surface of the vessel. Artists can also experiment with different materials such as glass, metal, or wood to create unique and interesting effects.
Firing and glazing are important steps in the process of creating ceramic vessels. Firing refers to the process of heating the clay to high temperatures to transform it into a durable and non-porous material. Glazing refers to the application of a glass-like coating to the surface of the vessel.

There are different types of firing methods, including electric kilns, gas kilns, and wood-fired kilns. Each method has its own advantages and produces different effects on the finished piece. Electric kilns are commonly used by ceramic artists due to their convenience and ease of use. Gas kilns and wood-fired kilns are often used by more experienced artists who want to achieve unique and dramatic effects.
Firing and Glazing Your Ceramic Vessels
Glazes are applied to the surface of the vessel before the final firing. Glazes are made from a mixture of minerals and chemicals that melt and fuse together during the firing process, creating a glass-like finish. There are various types of glazes available, including matte, glossy, and textured. Each type of glaze produces a different effect on the finished piece.
Tips for Caring for Your Ceramic Vessels
Caring for your ceramic vessels is important to ensure their longevity and beauty. Here are some tips to help you care for your ceramic vessels:
1. Handle with care: Ceramic vessels are often delicate and can easily break or crack if not handled with care. Therefore, it is crucial to take necessary precautions while handling them. One should avoid dropping or banging them against hard surfaces, as this can cause irreparable damage. It is also advisable to hold them with both hands to distribute the weight evenly and prevent any accidental slips.
2. Clean gently: When cleaning your ceramic vessels, it is important to use a soft cloth or sponge to avoid damaging the surface. Abrasive cleaners or scrub brushes can scratch the ceramic and leave permanent marks. Instead, opt for a gentle cleaning solution such as mild dish soap and warm water. If there are stubborn stains or buildup, try soaking the vessel in a mixture of vinegar and water for a few hours before gently scrubbing with a soft cloth.
3. Avoid extreme temperatures: Ceramic vessels can be sensitive to extreme temperatures. Avoid exposing them to sudden changes in temperature, such as placing a hot vessel in cold water.
4. Store properly: When not in use, store your ceramic vessels in a safe place where they will not be at risk of being knocked over or damaged.
5. Avoid direct sunlight: Prolonged exposure to direct sunlight can cause the colors of your ceramic vessels to fade. Display them in a location where they are not exposed to direct sunlight.
Conclusion
Ceramic vessels have a timeless beauty and appeal that can enhance any home decor. Whether you choose to create your own ceramic vessels or support local artists, incorporating these versatile pieces into your space can add a touch of elegance and sophistication. The art of creating ceramic vessels requires skill, creativity, and imagination, making each piece a unique reflection of the artist’s vision.
By understanding how to make ceramic candle vessels, choosing the right clay, and experimenting with different techniques, you can create your own beautiful and functional pieces. Alternatively, you can explore the wide range of handmade ceramic vessels available from local artists and artisans. Whichever path you choose, incorporating ceramic vessels into your home decor is sure to bring beauty and joy for years to come.


