Crafting a ceramic plate is an art form that merges creativity with craftsmanship, yielding both functional and aesthetic value. In the realm of pottery, the process of handcrafting a ceramic plate involves a delicate dance of skillful hands, imagination, and patience. From the initial shaping of the clay to the final firing in the kiln, each step requires attention to detail and a deep understanding of the medium.
Artists and hobbyists alike embark on this journey, transforming raw materials into objects of beauty that serve as both utilitarian items and pieces of art. Whether you’re a seasoned potter or a novice enthusiast, the journey of creating a ceramic plate offers a profound connection to tradition, history, and self-expression. This introductory guide will explore the essential steps and techniques involved in the captivating process of making a ceramic plate, inviting you to embark on how to make a ceramic plate.
Table of Contents
Materials and Tools
To begin creating your ceramic plate, you’ll need to gather the following materials and tools:
Materials:
- Clay: A wedge of earthenware, stoneware, or porcelain clay, depending on your preference for the end result.
- Glaze: Ceramic glazes of your choice for coating and decorating your plate.
- Water: A small bowl of water to keep the clay workable during shaping.
Tools:
- Potter’s Wheel: For throwing and shaping the plate (optional depending on technique).
- Rolling Pin: For flattening the clay, if you’re using a slab technique.
- Wire Clay Cutter: To cut and remove excess clay.
- Ribs and Scrapers: For smoothing and shaping the clay.
- Sponges and Brushes: For cleaning and applying water or slip to the clay.
- Needle Tool: For trimming and adding fine details.
- Kiln: For firing the clay, making it durable and permanent.
- Pottery Tools Kit: Typically includes various shaping tools suited for detail work.
Each tool serves a unique purpose in the creation process, from the initial preparation of clay to the final touches before the piece is fired in the kiln. Now, let’s delve into the steps of crafting your ceramic masterpiece.
Choosing the Type of Clay
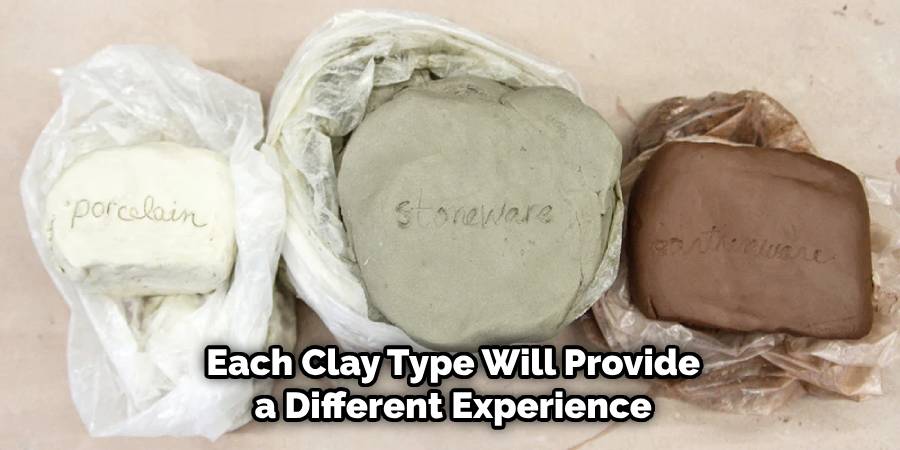
Selecting the proper type of clay is critical as it influences the workability, firing temperature, and the final appearance of your ceramic plate. There are three main types of clay to consider:
- Earthenware: This is a popular choice for beginners due to its forgiving nature. It’s easier to shape but is less durable than other types, firing at a lower temperature, which often results in a more porous final product.
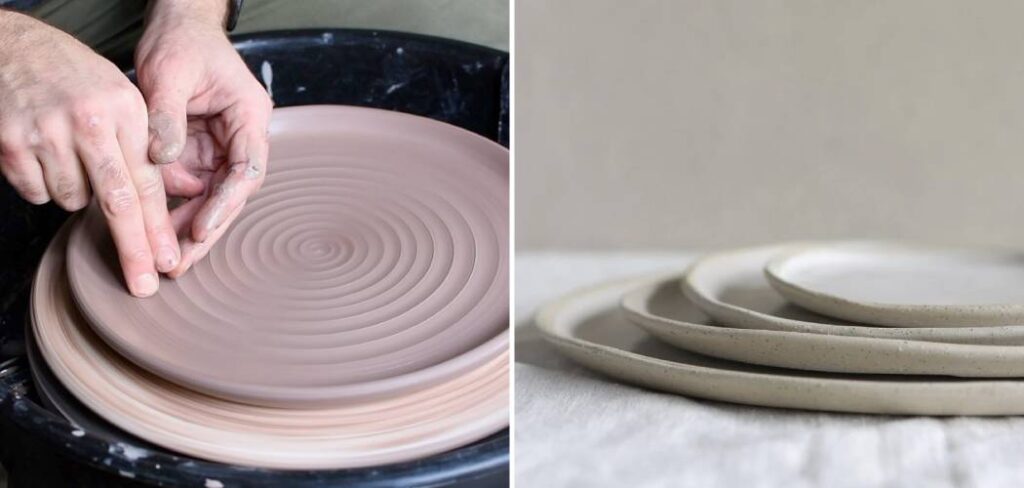
- Stoneware: Stoneware is known for its durability and strength. It’s a good choice for dinnerware and is waterproof even without glaze. It fires at a higher temperature than earthenware, resulting in a dense, sturdy plate.
- Porcelain: Porcelain clay is highly prized for its delicate transparency and smoothness. However, it is the most difficult to work with due to its fineness and needs a high firing temperature. The finished product showcases refined elegance and sophistication.
When deciding on the type of clay, consider the functionality of your plate, the desired finish, and your level of experience with pottery. Each clay type will provide a different tactile experience and aesthetic, allowing you to personalize your project even from this early stage.
Setting Up the Workspace
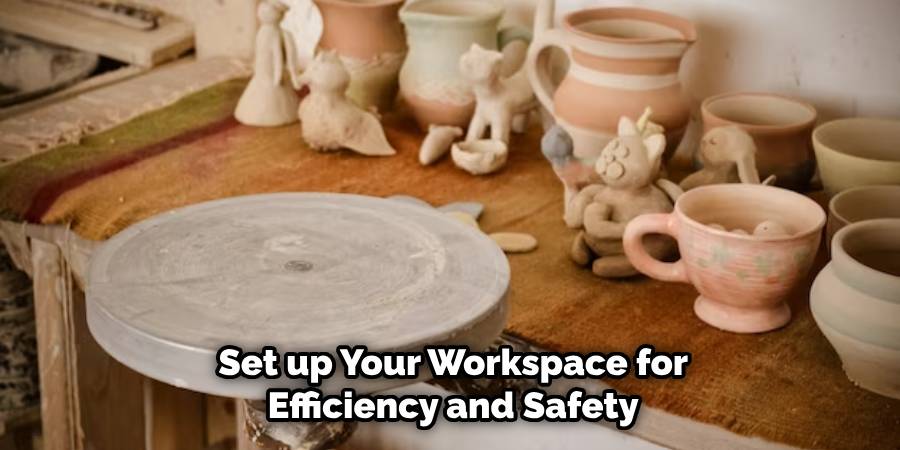
Before you dive into the actual process of making your ceramic plate, it’s essential to properly set up your workspace to ensure efficiency and safety. Here is how you can prepare your pottery environment:
- Surface: Ensure you have a clean, flat surface to work on. Cover your worktable with canvas or a similar material that clay won’t stick to easily.
- Organization: Keep your tools within reach but out of the way. Use shelving or containers to organize your tools and materials, so you can access what you need without clutter.
- Safety Measures: Wear an apron to protect your clothes, and if using a potter’s wheel, ensure it’s securely anchored to avoid movement.
- Lighting: Good lighting is vital. Position lamps or set up your space in a well-lit area to avoid eye strain and to ensure you can spot fine details on your workpiece.
- Ventilation: If using glazes or other materials that may release fumes when fired, make sure your workspace is well-ventilated to avoid inhaling any toxins.
- Accessibility: Position your clay, water, and any other frequently used materials close by to maintain a seamless workflow.
- Comfort: Adjust your chair or standing mat to a comfortable height in relation to your worktable or wheel to prevent any strain during long periods of crafting.
By creating an organized and functional workspace, you can keep your focus on the artistry of making the ceramic plate without unnecessary interruptions or hazards.
10 Steps How to Make a Ceramic Plate
Are you ready to roll up your sleeves and create a piece of functional art? If you’re drawn to the tactile joy of pottery, then crafting your own ceramic plate can be a fulfilling journey. From the first wedge of clay to the final glaze firing, here’s a step-by-step guide to making a ceramic plate that’s both beautiful and food-safe.
1. Prepare Your Materials and Workspace
Start by gathering your tools: clay, a potter’s wheel, a water bucket, a sponge, a wire tool, a needle tool, and a cutting wire. Also, ensure your workspace is well-ventilated and that you have a clean area for handling the clay.
2. Wedge Your Clay to Remove Air Pockets
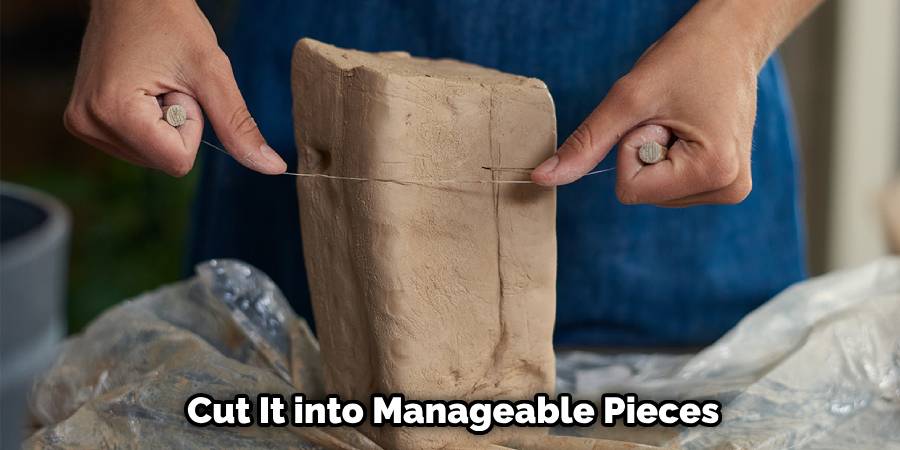
Take your block of clay and cut it into manageable pieces. Use a wedge or kneading motion to remove air bubbles. This step is crucial for the strength and functionality of your plate.
3. Center the Clay on the Potter’s Wheel
Place your clay on the wheel and use your hands to center it. This skill is foundational to throwing on the wheel. A centered piece will spin efficiently and evenly, which is essential for creating a well-proportioned plate.
4. Open the Ball of Clay to Form the Plate
Using both thumbs and the base of your palms, gently press down the center of the clay. Start small and gradually increase the size of the opening until you create a plate-sized disc.
5. Pull Up the Edges to Create the Walls
With your fingers on the inside and outside of the plate, slowly pull up the walls of the clay to create the height of your plate. Keep the walls consistently thick to support the structure.
6. Trim the Excess Clay
Once the plate has reached the desired height, use a wire tool to carefully cut off the excess clay from the bottom. This will also create a smooth, even foot for your plate to rest on.
7. Smooth and Shape the Plate
Wet your hands and gently smooth the surface of the plate to remove any blemishes. Use a sponge to refine the shape and clean up water marks.
8. Let the Plate Dry Slowly

Place your plate in a cool, dry area away from direct sunlight. Allow it to dry slowly for several days to prevent cracking. The plate should be bone dry before firing.
9. Bisque Fire the Plate
Once dry, the plate needs to be fired in a kiln to a temperature of around 1832°F (1000°C) to harden it. This initial firing is called a “bisque fire” and will turn the clay into ceramic, making it ready for glazing.
10. Glaze and High-Fire the Plate
After bisque firing, apply your chosen glaze to the plate. Then, fire it in a kiln once more at a higher temperature, typically around 2100°F (1150°C). This “high-fire” will seal the clay, making your plate safe for serving food, and give it a beautiful finish.
Creating a ceramic plate is a labor of love that requires patience and practice. Each plate you make will be a unique expression of your creativity and skill. Enjoy the process—happy crafting!
Drying and Finishing
After the application of paint or varnish, the drying and finishing process is crucial for achieving a flawless end result. Drying should occur in a dust-free environment to prevent imperfections. Additionally, the appropriate time for curing must be observed to ensure maximum durability and adhesion. Once fully dried, a finishing touch might include sanding for smoothness, applying a sealant for protection, or polishing to enhance the sheen and reveal the true depth of color.
Firing Process
Once your ceramic plate is bone dry and has undergone a bisque fire, you’re ready to move on to the final firing process known as glaze firing. Prior to this step, make sure your bisque-fired plate is free of any dust or debris, as these can affect the finished glaze. When applying your glaze, be meticulous to cover the surface evenly, and pay special attention to the edges and the bottom footring – areas prone to running or pooling.
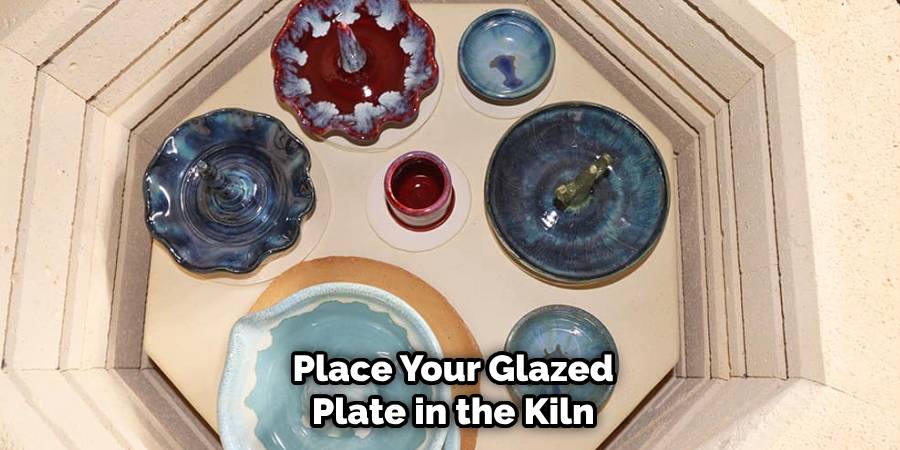
Place your glazed plate in the kiln for the glaze firing, ensuring it does not touch any other pieces to avoid sticking during firing. The temperature should be set according to the specific glaze instructions, as different glazes mature at different temperatures, typically between 2167°F (1186°C) to 2232°F (1222°C) for stoneware glazes.
Monitor the kiln to follow the correct rate of temperature increase and a controlled cooling cycle post glaze maturity to avoid thermal shock. Once the firing is complete and the kiln is fully cooled to room temperature, which can take up to 24 hours, you can then safely open the kiln and remove your finished ceramic plate. Be proud of your creation – the result is a durable, functional piece of art with a professionally finished appearance.
Conclusion
Creating a ceramic plate is not just a craft; it’s an endeavor that connects us to ancient traditions and modern artistry, intertwining the timeless nature of clay with the innovation of today’s creators. By taking you through each step of this intricate process, we’ve uncovered that at the heart of crafting a ceramic plate lies the balance between precision and passion.
The malleability of clay offers endless forms waiting to be shaped, while the kiln’s heat transforms these creations into functional art. It’s a journey that begins with a simple lump of earth and culminates in a vessel that might just cradle your next culinary masterpiece. Thanks for reading, and we hope this has given you some inspiration on how to make a ceramic plate!


