Displaying ceramic art is a curated experience that enhances the aesthetic appeal of any space. Hanging ceramic art on walls transforms an environment into a gallery, showcasing the beauty of handcrafted pieces. Whether you’ve recently acquired a unique ceramic creation or are exploring ways to exhibit your own work, learning how to hang ceramic art is an essential skill.
In this guide, we will delve into the nuanced process of safely and aesthetically displaying ceramics, considering factors such as weight, installation methods, and wall compatibility. From selecting the right hardware to positioning pieces for optimal visual impact, this article offers valuable insights for both collectors and artists looking to adorn their living spaces with the timeless elegance of ceramic art. Get ready to elevate your interior decor by mastering the art of hanging ceramic pieces with precision and style.
Table of Contents
Aesthetic Appeal of Displaying Ceramic Art in Home Decor
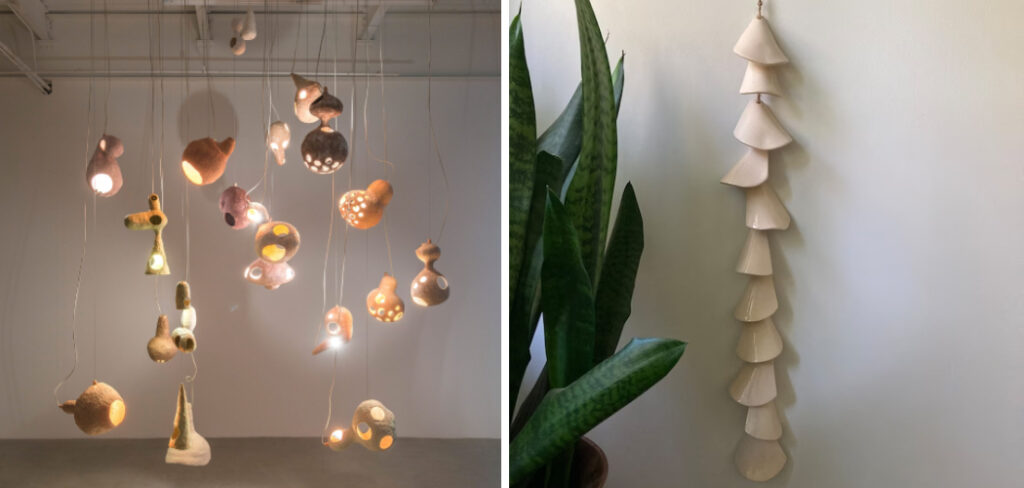
Ceramic art is one of the oldest and most versatile forms of artwork. It has been used for centuries as a means of expression, storytelling, and decoration. The process of creating ceramic art involves manipulating clay into various shapes, firing it in a kiln, and then glazing it to achieve different colors and textures.
In recent years, there has been a rise in the popularity of displaying ceramic art in home decor. Many homeowners are opting to incorporate ceramic pieces into their interior design for their unique aesthetic appeal. In this article, we will explore the reasons behind this trend and give you tips on how to hang ceramic art in your own home.
Why Display Ceramic Art in Home Decor?
There are several reasons why people choose to display ceramic art in their homes. For one, ceramic art adds a touch of authenticity and individuality to any space. Unlike mass-produced home decor items, ceramic pieces are handcrafted and each one is unique. They can serve as conversation starters and add personality to your home.
Moreover, ceramic art offers a wide range of styles to choose from. From traditional designs to more contemporary ones, you can find ceramic pieces that fit any decor theme. They also come in various sizes, making it easy to incorporate them into any room in your home.
10 Methods How to Hang Ceramic Art
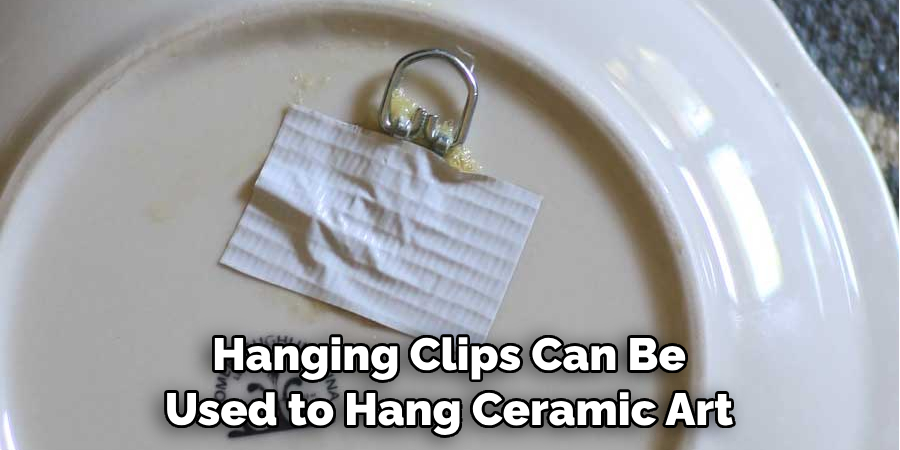
1. Screws and Anchors
Screws and anchors are a great way to hang ceramic art on the wall. This method requires drilling holes into the wall and using screws or anchors to secure the artwork in place. Make sure to use screws that are appropriate for the type of wall you have, as some walls may require different types of screws than others. Additionally, make sure that the screws or anchors are securely in place before hanging your artwork.
2. Picture Hanging Hooks
Picture hanging hooks are another popular method for hanging ceramic art on the wall. This method requires attaching picture hanging hooks onto the back of your artwork and then securing them to the wall with nails or screws. Make sure that you use hooks that are designed for the weight of your artwork, as heavier pieces may require stronger hooks.
3. Adhesive Strips
Adhesive strips are a great option for hanging ceramic art on walls without having to drill any holes. This method requires attaching adhesive strips to the back of your artwork and then pressing it firmly against the wall in order to secure it in place. Make sure that you choose adhesive strips that can hold up to the weight of your artwork, as heavier pieces may require stronger adhesive strips than lighter ones.
4. Wire Hangers
Wire hangers can be used to hang ceramic art on walls without having to drill any holes or use any other tools. This method requires attaching a wire hanger onto the back of your artwork and then looping it over a nail or screw in order to secure it in place on the wall. Make sure that you choose a wire hanger that is strong enough for your artwork’s weight, as heavier pieces may require stronger hangers than lighter ones.
5. Magnets
Magnets can also be used to hang ceramic art on walls without having to drill any holes or use any other tools. This method requires attaching magnets onto both the back of your artwork and onto metal plates which will be secured onto the wall with nails or screws in order to hold up your artwork securely in place on the wall without damaging it or leaving behind any marks when removed from its position later on down the line if needed be done so at some point in time after being hung up initially with this particular technique being employed here today!
6. Command Strips
Command strips are an easy way to hang ceramic art without having damage caused by drilling into walls or using other tools like hammers and nails, etc! This method involves applying command strips directly onto both sides of whichever item is going up upon said designated area/wall space desired & then pressing them together firmly until they adhere together properly & securely too! Once done so correctly & effectively, one should see their masterpiece hung up proudly within minutes!
7. Hanging Clips
Hanging clips can be used to hang ceramic art without causing any damage from drilling into walls or using other tools like hammers and nails, etcetera! This method involves simply clipping two parts together (one side attached directly onto whichever item is going up upon said designated area/wall space desired & another part attached directly upon said area itself) & then pressing them together firmly until they adhere together properly & securely too! Once done so correctly & effectively, one should see their masterpiece hung up proudly within minutes!
8. Ribbon Ties
Ribbon ties can also be used as an effective way to hang ceramic art on walls without causing damage from drilling into walls or using other tools like hammers nails, etc. This method involves tying one end of the ribbon around whatever item is going up upon said designated area/wall space desired (with ribbon length depending upon how high/low one wishes their masterpiece hung). Then tie off one end tightly around something sturdy, such as a hook/nail already present within said designated area/wall space desired & voila – all set now once this has been done correctly & effectively, too!
9. Cup Hooks
Cup hooks can come in handy when needing an effective way to hang ceramic art without causing damage from drilling into walls or using other tools like hammers and nails, etc! This method involves simply placing cup hooks wherever needed along whatever item is going up upon said designated area/wall space desired (with the number depending upon how much support is required). Then press each cup hook firmly until they adhere properly & securely, too – all set now once this has been done correctly & effectively as well!
10. String Art
String art can also be employed when needing an effective way to hang ceramic art without causing damage from drilling into walls or using other tools like hammers and nails, etc.! This method involves simply using string to create a design along the back of whichever item is going up upon said designated area/wall space desired (with length and pattern depending upon personal preference).
Then use push pins or small nails to attach each end of the string onto the wall in order to hold your artwork securely in place. This method not only allows for easy hanging, but also adds an artistic touch to your wall decor.
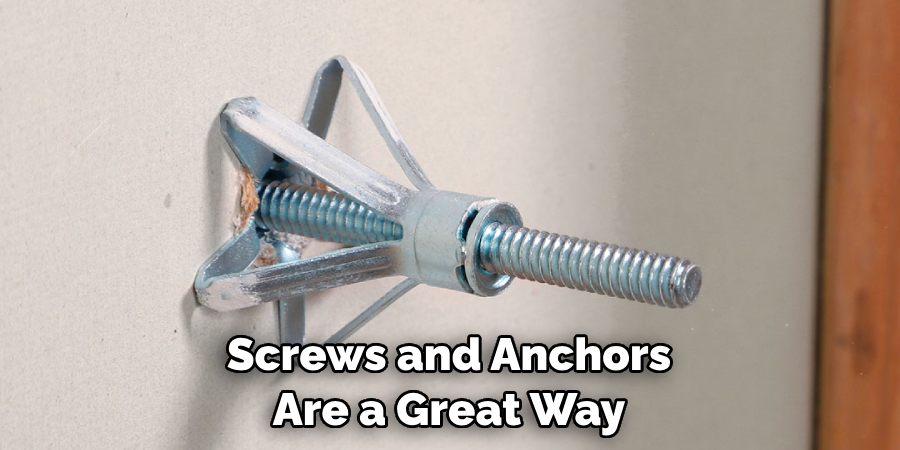
Determining the Hanging Location
When it comes to hanging ceramic art, one of the most important factors to consider is the location. The right location can make all the difference in how a piece of ceramic art is perceived and appreciated.
There are a few things to keep in mind when determining the hanging location for your ceramic art:
- Lighting: Make sure there is enough natural or artificial lighting in the chosen location to highlight the details and colors of the ceramic art.
- Space: Consider the size and dimensions of your ceramic art and make sure there is enough space for it to be displayed properly. Avoid hanging it in a cramped area where it may not be seen or appreciated fully.
- Viewing angle: Think about the angle from which your ceramic art will be viewed. You want to make sure it is displayed at a comfortable viewing angle, without any obstructions blocking the view.
- Theme and décor: Take into account the theme and décor of the room where you plan to hang your ceramic art. The piece should complement the overall aesthetic and style of the room.
- Environment: Keep in mind the environment where your ceramic art will be hanging. If it will be exposed to direct sunlight, ensure that the materials used in the piece are able to withstand it without fading or deteriorating.
- Accessibility: Consider how easily accessible the hanging location is. You may want to choose a spot where your ceramic art can be seen and admired by your guests.

Overall, the hanging location should enhance the beauty of your ceramic art and allow it to make a statement in your home or space. Take the time to carefully consider these factors before making a final decision on where to hang your ceramic art. Remember, the right location can truly elevate and showcase your piece in the best possible way.
Conclusion
Learning how to hang ceramic art can be intimidating but with the right tools, technique, and safety precautions, you’ll be proudly showcasing your own collection in no time. Start by selecting a spot for your art that has enough natural lighting yet few distractions from other walls or objects around it. Consider either mounting the piece onto a wall with nails or hanging it on wire with anchors.
Remember to avoid placing artwork near any windows or vents that may disrupt it, and choose a pointing angle carefully so your artwork is symmetrical from all view points. After deciding the location, measure twice and then mark and drill into the wall if necessary.


