A cherished ceramic figurine can hold sentimental value, making it disheartening when it suffers damage. Whether it’s a family heirloom, a collectible item, or a piece of art, knowing how to repair a broken ceramic figurine can help you restore its beauty and significance. In this comprehensive guide, we will explore the steps and techniques to mend your fractured figurine with care and precision.
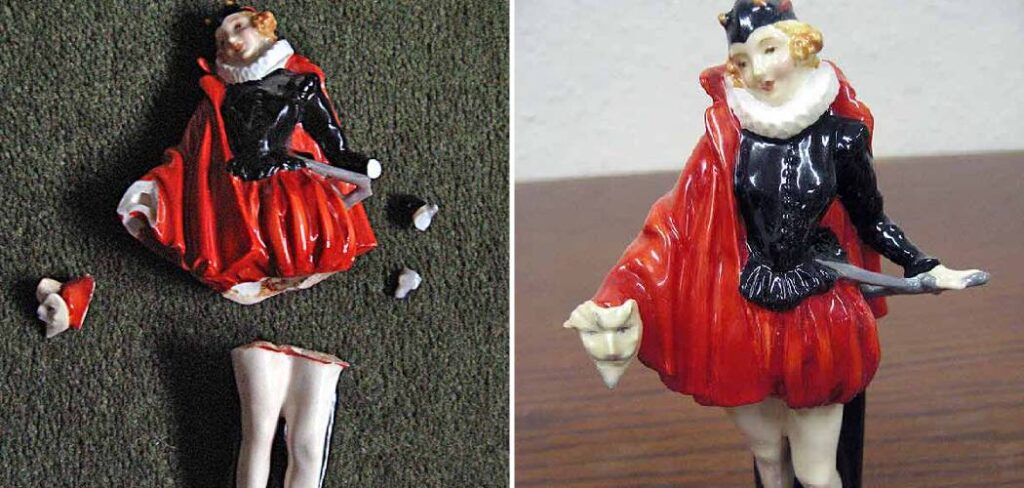
From gathering the necessary materials to cleaning, aligning, and securing the broken pieces, we’ll provide you with a step-by-step roadmap for how to fix broken ceramic figurine. Whether you’re a seasoned DIY enthusiast or a novice in the world of ceramics, these methods will empower you to breathe new life into your beloved figurine, allowing you to continue cherishing its presence for years to come.
Table of Contents
Assessing the Damage: Types of Breaks and Cracks
Before starting the repair process, it is essential to assess the damage to the ceramic figurine. There are different types of breaks and cracks that can occur, each requiring a specific approach to repair. The most common types of breaks include clean breaks, hairline cracks, and shattered pieces.
Clean breaks occur when a figurine breaks into two or more large pieces. Hairline cracks are thin cracks that may not be immediately visible but can weaken the structure of the figurine over time. Shattered pieces occur when a figurine breaks into numerous small fragments. Understanding the type of damage will help determine the best approach for repair.
Safety Precautions Before Starting the Repair Process
Repairing broken ceramic figurines requires taking safety precautions to protect yourself and the figurine. It is important to wear protective gloves to prevent any injuries from sharp edges or broken pieces. Additionally, working in a well-ventilated area is crucial when using adhesives or other chemicals.
It is also advisable to work on a clean and stable surface to avoid any accidents or further damage to the figurine. If the figurine has any sharp edges, it is recommended to use sandpaper or a file to smooth them out before starting the repair process.
Materials and Tools Required for Ceramic Figurine Repair
To repair a broken ceramic figurine, you will need several materials and tools. The materials include adhesive or glue suitable for ceramic repairs, epoxy putty or filler for filling gaps, and paint or varnish for finishing touches. It is important to choose high-quality materials to ensure a strong and long-lasting repair.
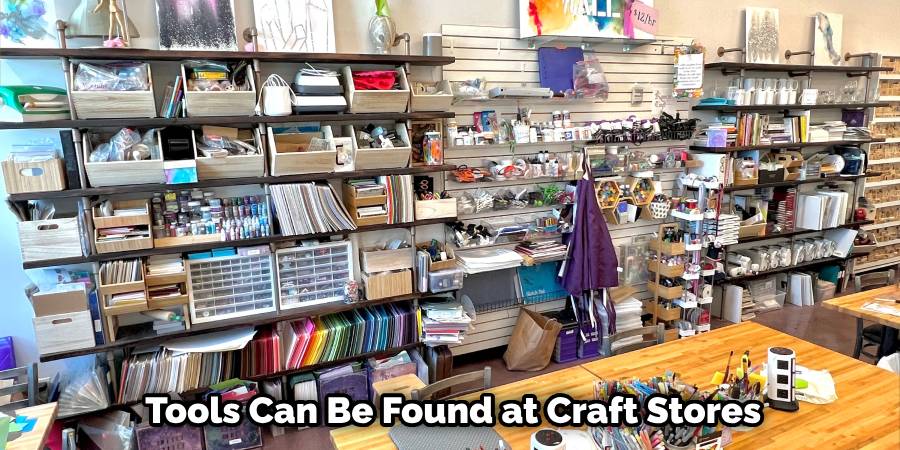
The tools required for ceramic figurine repair include a small brush for applying adhesive or filler, sandpaper or a file for smoothing out rough edges, and a paintbrush for painting or varnishing. These tools can be easily found at craft stores or online retailers specializing in ceramic repair supplies.
10 Steps How to Fix Broken Ceramic Figurine
Step 1: Gather Your Materials
Before you begin the repair process, assemble the necessary materials and tools:
- Broken ceramic figurine
- Epoxy adhesive (clear or white)
- Disposable mixing cups and stirrers
- Masking tape
- Toothpicks or wooden skewers
- Small clamps (optional)
- Acetone (for cleaning)
- Latex or nitrile gloves
- Fine-grit sandpaper (800-1200 grit)
- Soft cloth
- Protective eyewear
Step 2: Prepare Your Workspace
When repairing a figurine, it is important to choose a workspace that is well-lit and clean. This will help you to see the details of the figurine clearly and ensure that you are able to work with precision. A clean workspace will also help to prevent any dirt or debris from getting into the repair area, which could cause further damage to the figurine.
Step 3: Clean the Broken Edges
When repairing broken ceramic pieces, it is important to ensure that the edges are clean and free from any debris or oils. This is because any dirt or oil on the surface of the ceramic can interfere with the bonding process, making it difficult for the adhesive to stick properly. To clean the edges of the ceramic pieces, you can use a small amount of acetone on a cotton swab or cloth.
Step 4: Mix the Epoxy
Follow the instructions on the epoxy adhesive packaging to prepare the adhesive mixture. Typically, this involves squeezing equal parts of the epoxy resin and hardener into a disposable cup and stirring them together thoroughly. Ensure you work quickly, as epoxy adhesives can have a relatively short working time.
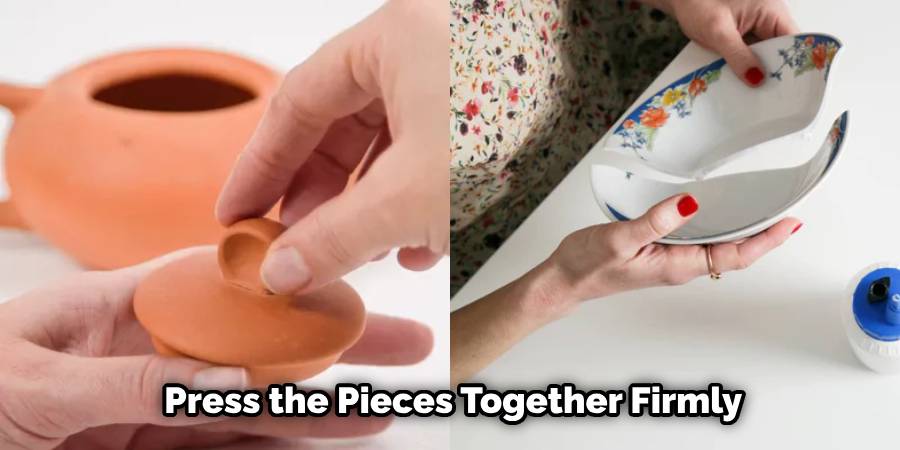
Step 5: Align and Hold the Pieces
With your epoxy mixture ready, carefully align the broken pieces of the figurine. Use masking tape to temporarily secure them in place. If the figurine has intricate or delicate parts, you can use small clamps to hold them together while the epoxy cures.
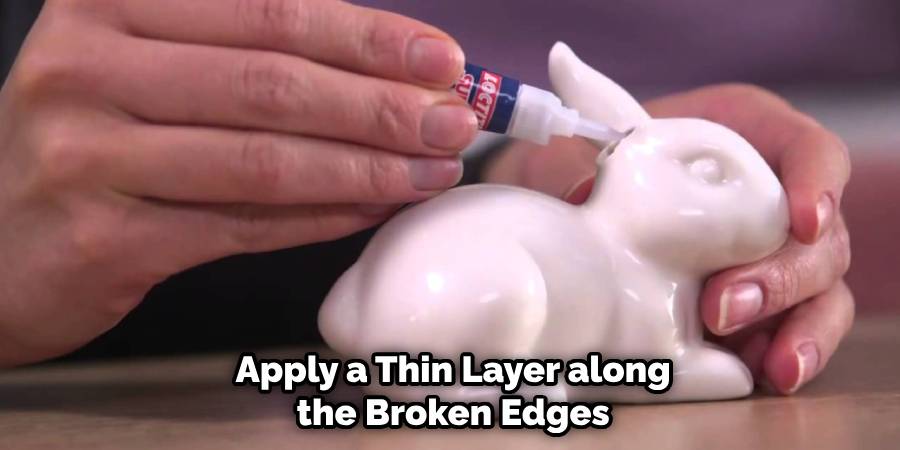
Step 6: Apply the Epoxy Adhesive
Dip a toothpick or wooden skewer into the epoxy mixture and apply a thin layer along one of the broken edges. Press the pieces together, and excess epoxy should squeeze out. Use a toothpick or a cotton swab to remove any excess adhesive, ensuring a clean and tidy seam.
Step 7: Let It Cure
After applying the epoxy adhesive to the figurine, it is important to let it cure properly. The curing time will depend on the specific product and manufacturer’s instructions, but it is typically several hours for the adhesive to set. However, it is recommended to wait for a full cure, which may take 24 hours or more. During this time, it is crucial to ensure that the figurine remains undisturbed.
Step 8: Remove the Tape and Excess Adhesive
After the epoxy has fully cured, it is important to take the time to remove any masking tape and excess adhesive from the repaired area. This will help to ensure that the figurine looks as good as new and that there are no unsightly marks or residue left behind. When removing the masking tape, be sure to do so slowly and carefully, so as not to damage the surrounding area or the figurine itself.
Step 9: Sand and Blend
After applying the epoxy or glue to repair the figurine, it is important to wait for it to dry completely before using sandpaper. Once the adhesive has dried, you can begin sanding the repaired area with fine-grit sandpaper. It is recommended to use sandpaper with a grit between 800 and 1200, as this will ensure a smooth finish without damaging the figurine.
Step 10: Final Touches
Inspect the repaired figurine closely. If there are any remaining gaps or imperfections, you can fill them with a small amount of epoxy adhesive and smooth it with a toothpick or wooden skewer. Once you’re satisfied with the repair, give the figurine a final cleaning to remove any residual dust or adhesive.
Tips for Gluing and Bonding Ceramic Pieces Together
Choosing the right adhesive is crucial for a successful repair. There are different types of adhesives available for ceramic repairs, including epoxy, cyanoacrylate (super glue), and polyurethane glue. Epoxy is a popular choice as it provides a strong bond and is resistant to moisture and heat.
When gluing ceramic pieces together, it is important to apply the adhesive sparingly to avoid excess glue seeping out. Press the pieces together firmly and hold them in place for a few minutes to allow the adhesive to bond. It is also advisable to use clamps or rubber bands to hold the pieces together while the adhesive dries.
Filling and Sanding Techniques for Smooth Repairs
To fill gaps or missing pieces in a ceramic figurine, epoxy putty or filler can be used. Apply the putty or filler with a small brush, ensuring it fills the gap completely. Smooth out the putty or filler with your fingers or a damp cloth before it dries.
Once the adhesive and filler have dried, use sandpaper or a file to smooth out any rough edges or excess putty. Start with a coarse-grit sandpaper and gradually move to finer grits for a smooth finish. Be gentle and take your time to avoid damaging the figurine.
Painting and Finishing Touches for a Seamless Look
If necessary, paint or varnish the repaired area to match the color and texture of the original figurine. It is important to choose paint or varnish specifically designed for ceramics to ensure a long-lasting finish. Use a small brush and apply thin layers, allowing each layer to dry before applying the next.
When painting, it may be helpful to mix different colors to achieve the desired shade. Take your time and be patient, as matching the color and texture of the original figurine can be challenging. Once the paint or varnish has dried, inspect the repaired figurine for any imperfections and make any necessary touch-ups or adjustments.
Preventing Future Damage to Ceramic Figurines
To prevent future damage to ceramic figurines, it is important to handle them with care. Avoid dropping or mishandling the figurines, as this can lead to breakage or cracks. When moving or storing them, use padding or bubble wrap to protect them from impact.
It is also advisable to store ceramic figurines in a cool and dry place to prevent moisture damage. Avoid exposing them to direct sunlight or extreme temperatures, as this can cause fading or warping. Regularly dusting and cleaning the figurines will help maintain their appearance and prevent dirt or debris from accumulating.
Conclusion and Final Thoughts
Embarking on the journey of repairing broken ceramic figurines is a truly fulfilling experience that allows you to revive their beauty and sentimental value. With the help of a comprehensive step-by-step guide and necessary safety precautions, you can effortlessly restore a broken ceramic figurine to its former glory.
It is crucial to select high-quality materials and tools to ensure a robust and long-lasting repair. As repairing ceramic figurines demands precision and attention to detail, it is essential to take your time and exercise patience throughout the process. Follow these simple instructions outlined in this blog post about how to fix broken ceramic figurine, and you’ll be able to get the job done with ease.


