Drying clay in the oven is a precise and essential step in the ceramics process, allowing artists and enthusiasts to transform their creations into durable, finished pieces. Whether you’re a seasoned potter or a novice exploring the world of clay crafting, understanding the proper techniques for oven drying is crucial for preventing cracking or warping. In this article, we embark on a comprehensive guide on how to dry clay in the oven, demystifying the process for optimal results.
From preparing your clay creations for baking to selecting the right temperature and duration, we delve into the intricacies of oven drying. Whether you’re working on hand-built sculptures or wheel-thrown pottery, this guide provides valuable insights to ensure a successful drying process, bringing your clay creations one step closer to their final, fired form. Join us as we explore the art and science of oven drying clay, fostering a deeper appreciation for the craftsmanship involved in ceramics.
Table of Contents
Pre-Drying Preparation
Before starting the process of drying clay in the oven, there are a few crucial pre-drying preparations to consider. First, ensure that the clay piece is thoroughly conditioned and all air bubbles are removed to prevent cracking during the drying process. Next, shape your clay piece as desired, keeping it no more than 1 inch thick for even drying.
Once your piece is shaped, allow it to dry naturally at room temperature for at least 24 hours. This stage is often referred to as leather-hard, where the clay piece is still damp enough to be worked on but dry enough to hold its shape. The pre-drying sequence is vital to achieving a successful oven-drying process for your clay.
Clay Suitability
Not all clays are oven-safe! Clearly identify clays compatible with oven drying (e.g., polymer clay, air-dry clay) and explain why other types (e.g., earthenware) should not be oven-dried. There are various types of clay available in the market, each with its own unique properties. While some are suitable for oven drying, others are not. It is important to know which type of clay can be safely dried in the oven to avoid any mishaps.
Thickness Matters
Explain how thicker pieces require slower drying to prevent cracking. Suggest dividing thick pieces into smaller sections for safe oven drying. Thick clay pieces require special attention when it comes to oven drying. Unlike thinner pieces, thicker ones tend to crack easily if they are dried too quickly. This is because the outside of the clay dries faster than the inside, causing tension and resulting in cracks. To prevent this from happening, it is important to dry thick pieces slowly.

Pre-Drying Stage
Recommend air-drying the clay partially before oven drying to avoid rapid moisture loss and potential fissures. Place the clay on a flat, non-porous surface and allow it to dry for about 4-6 hours or until it is firm to touch.
10 Methods How to Dry Clay in The Oven
1. Preheat the Oven
Before drying your clay in the oven, make sure to preheat it to a low temperature of around 200-250 degrees Fahrenheit. This will help to evenly warm up the clay and prevent any cracking or warping. However, avoid using a higher temperature as it can cause the clay to dry too quickly and lead to cracks.
2. Roll out The Clay
Roll out your clay into a thin, even layer using a rolling pin. This will help to speed up the drying process and ensure that all parts of the clay are evenly exposed to heat. If the clay is too thick, it may take longer to dry and could potentially crack or break during the drying process.
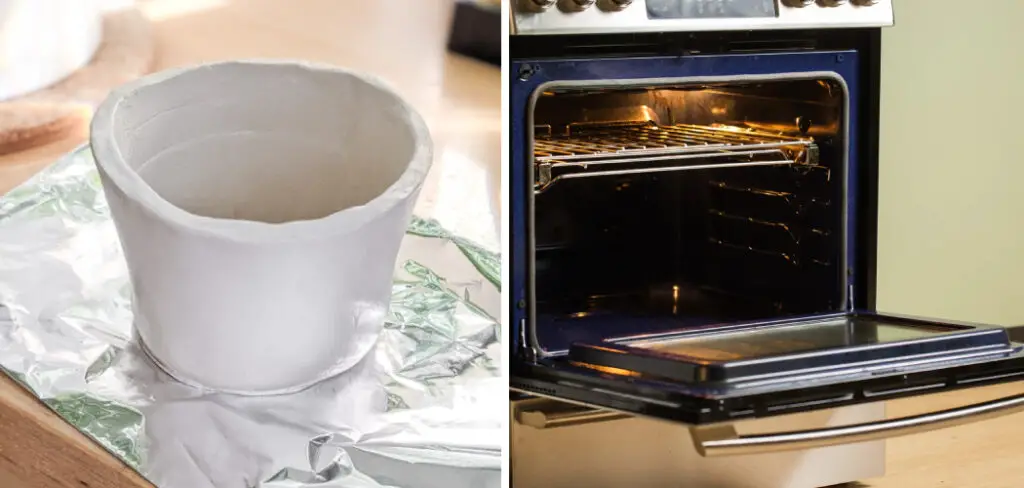
3. Use a Baking Sheet
Place your rolled-out clay on a baking sheet lined with parchment paper or aluminum foil. This will prevent the clay from sticking to the pan and make it easier to remove once it’s dry. If you don’t have parchment paper or aluminum foil, you can also use a silicone baking mat.
4. Monitor Closely
Keep an eye on your clay while it’s in the oven, as different types of clay may require different amounts of time to dry. Check on it periodically and rotate if necessary to ensure even drying. If you notice any cracking or uneven drying, you may need to adjust the temperature of the oven or the placement of your clay.
5. Create Vents
To prevent air bubbles from forming and causing cracks in your clay, create small vents by poking holes with a toothpick or fork before placing them in the oven. This allows any trapped air to escape during the drying process.
6. Keep an Eye on Temperature
Make sure that your oven is not too hot, as this can cause your clay to crack or warp. If necessary, adjust the temperature accordingly during the drying process. A good starting temperature is around 200-250 degrees Fahrenheit (93-121 degrees Celsius).

7. Use a Fan
Placing a fan near your oven can help circulate air and speed up the drying process for thicker pieces of clay. This can also help prevent any uneven drying or cracking. Make sure to check on your clay periodically to ensure it is drying evenly, and adjust the fan as needed.
8. Add Extra Time for Thicker Pieces
Thicker pieces of clay will take longer to dry than thinner ones, so be prepared to leave them in the oven for additional time if needed. The exact time will depend on the thickness of your clay and the type of oven you are using. In general, thicker pieces may need an extra 30 minutes to an hour in the oven.
9. Allow for Cooling Time
Once you have turned off your oven, allow for some cooling time before removing your clay from the inside. This will prevent any sudden changes in temperature that could cause cracking. Depending on the size and thickness of your clay piece, cooling time can range from 30 minutes to several hours. Avoid placing hot clay pieces directly onto a cold surface, as this could also cause cracks.
10. Test for Dryness
To ensure that your clay is completely dry, lightly tap on it with your fingernail. If it makes a hollow sound, then it is ready to be removed from the oven and cooled. If not, place it back in the oven for a little longer. It is important not to overbake your clay as it can become brittle and crack.
Post-Drying Tips
After drying clay in the oven, several maintenance steps can help preserve its quality. Always allow the clay to cool down completely in the oven before handling it. This gradual cooling process helps prevent the formation of cracks. If you notice any rough spots or edges on the clay post-drying, use fine-grit sandpaper to smoothen these areas. Remember to seal the dried clay with a proper sealant to protect it from moisture and prolong its lifespan. Lastly, store your clay items in a cool, dry place to prevent any potential damage.
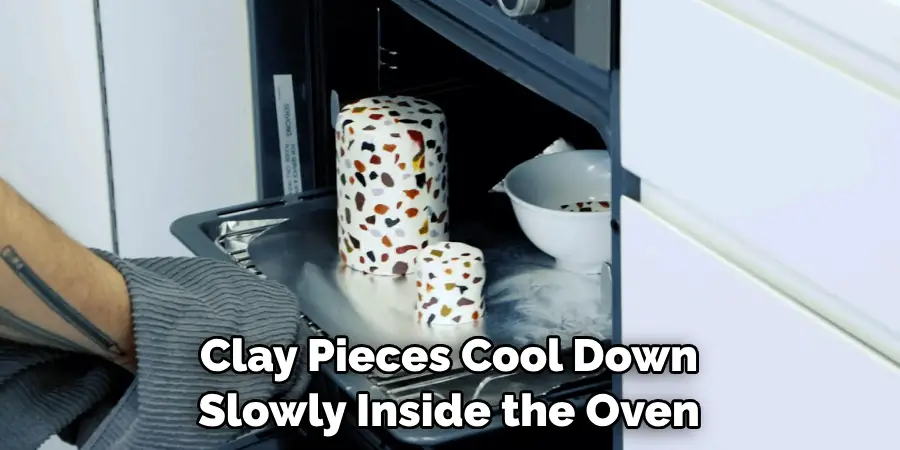
Cooling Down
Let the clay pieces cool down slowly inside the oven with the door ajar to avoid thermal shock and cracking. This is especially important for thicker pieces of clay as they may retain heat and continue to dry even after being removed from the oven.
Finishing Touches
Once completely cool, explain additional steps like sanding, polishing, or painting based on the intended use of the clay creation. Additionally, if the clay has any cracks or breaks, explain how to repair them using fresh clay and oven-drying techniques.
Avoiding Overcrowding to Ensure Proper Air Circulation
When it comes to drying clay in the oven, overcrowding is a common mistake that many beginners make. It may seem efficient to place multiple pieces of clay on one tray, but this can actually hinder the drying process and create unevenly dried pieces.
To ensure proper air circulation and prevent overcrowding, there are a few key steps you should follow when drying clay in the oven.
First, it’s important to choose the right tray size for your pieces of clay. The tray should have enough space between each piece for air to circulate and allow the clay to dry evenly. If you don’t have a large enough tray, consider using multiple smaller trays or staggering the placement of your pieces on one larger tray.
Next, make sure that there is enough space between the clay pieces and the sides of the tray. This will also allow for proper air circulation and prevent any sections of the clay from being under or overbaked.
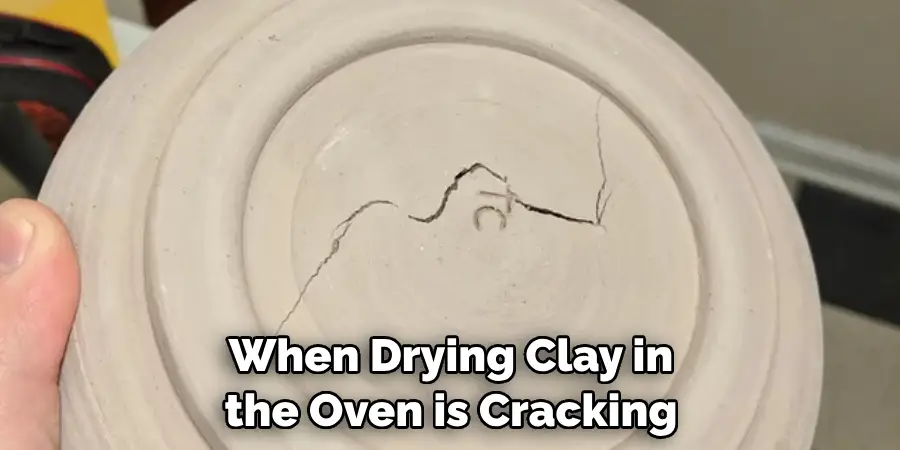
Checking for Any Signs of Uneven Drying or Cracking
When drying clay in the oven, it is important to check for any signs of uneven drying or cracking. This can occur if the clay is not properly prepared before being placed in the oven or if the temperature and timing are not set correctly. In this section, we will discuss how to identify these issues and provide tips on how to avoid them.
Uneven Drying
Uneven drying occurs when different parts of the clay dry at different speeds, resulting in an uneven surface or even cracks. This can happen if the clay is too thick or if it is not properly conditioned before being placed in the oven. To check for uneven drying, you can gently press on the clay with your fingers and feel for any areas that are still soft while others are already dry.
Cracking
Another common issue when drying clay in the oven is cracking. This can occur for a variety of reasons, including uneven thickness of the clay, air bubbles trapped inside, or sudden temperature changes during baking. To check for cracks, you can gently wiggle the clay and see if any pieces start to separate. If you do notice cracks, don’t panic! There are ways to fix them before they fully harden.
Conclusion
In conclusion, drying clay in the oven is not only a quick and efficient method but also a great way to achieve professional results. By following the steps outlined above, you can easily dry your clay pieces without worrying about them cracking or losing their shape. Plus, with the right precautions and temperature settings, you can avoid any potential hazards and ensure the safety of your oven and home.
So why wait? Grab some clay, preheat your oven, and start creating amazing sculptures today. Your creativity knows no bounds when it comes to how to dry clay in the oven – let your imagination run wild! Remember to share your creations and tips with others in the comments below. Together, we can unleash our inner artists and create beautiful pieces that will last a lifetime. Happy baking!


