Bubble glazing is a technique used in pottery to create unique and eye-catching patterns on the surface of the ceramic pieces. It involves the intentional formation of bubbles in the glaze, which can result in a variety of interesting textures and colors. Learning how to bubble glaze is important for potters who want to add depth and visual interest to their work. By understanding the science behind bubble formation, mastering the necessary materials and techniques, and experimenting with colors and textures, potters can elevate their pottery to a whole new level.
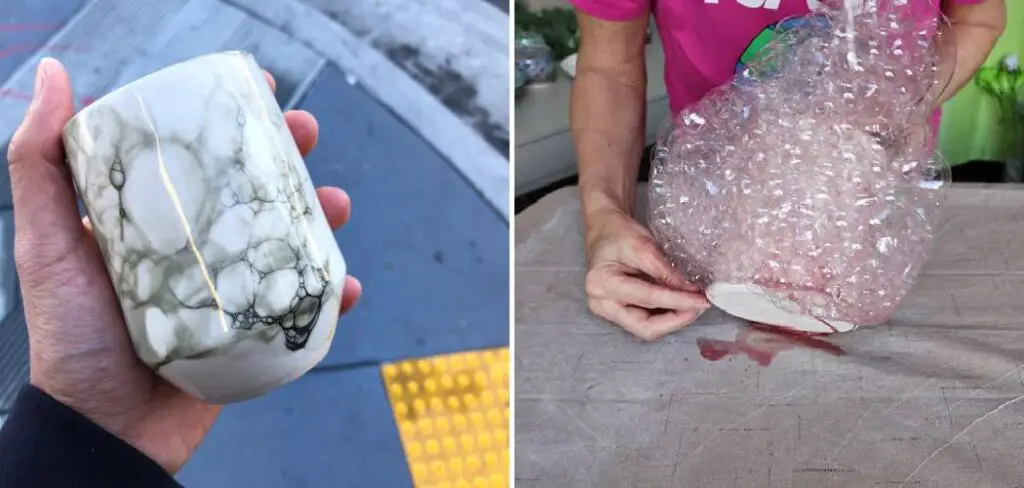
Table of Contents
Understanding the Science Behind Bubble Glazing
To understand bubble glazing, it is important to understand how bubbles are formed in glazes. Bubbles are created when gases trapped within the glaze expand and rise to the surface during the firing process. This expansion is caused by the release of gases, such as carbon dioxide, from the materials used in the glaze. The size and distribution of the bubbles can be controlled by factors such as the composition of the glaze, the firing temperature, and the thickness of the glaze layer.
Factors that affect bubble formation include the type and amount of fluxes and opacifiers used in the glaze, as well as the firing temperature and duration. Fluxes help to lower the melting point of the glaze, allowing it to flow and form bubbles more easily. Opacifiers, on the other hand, can hinder bubble formation by increasing the viscosity of the glaze. Firing temperature and duration also play a role in bubble formation, as higher temperatures and longer firing times can allow more gases to escape from the glaze.
Understanding the science behind bubble glazing is important because it allows potters to have more control over the final result. By manipulating factors such as glaze composition, firing temperature, and thickness, potters can create different bubble patterns and textures. This knowledge also helps potters troubleshoot common issues that may arise during the bubble glazing process.
Materials Required for Bubble Glazing
To create bubble glazes, potters will need a few specific materials. These include:
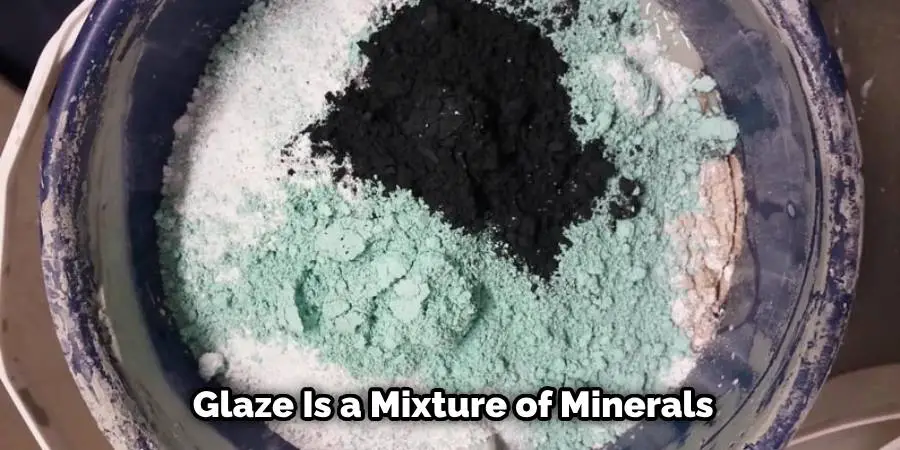
1. Glaze: A glaze is a mixture of minerals and other materials that, when fired, forms a glassy coating on the surface of the pottery. For bubble glazing, potters can use any glaze that is compatible with their clay body. It is important to choose a glaze that has a high flux content, as this will promote bubble formation.
2. Fluxes: Fluxes are materials that lower the melting point of the glaze, allowing it to flow and form bubbles more easily. Common fluxes used in bubble glazes include feldspar, borax, and lithium carbonate.
3. Opacifiers: Opacifiers are materials that increase the viscosity of the glaze, making it more difficult for bubbles to form. While opacifiers are typically used to create opaque glazes, they can also be used in bubble glazes to control the size and distribution of the bubbles. Common opacifiers used in bubble glazes include tin oxide and zirconium silicate.
4. Firing Kiln: A firing kiln is necessary to heat the pottery and glaze to the appropriate temperature for bubble formation. Kilns can be electric or gas-fired, and they come in a variety of sizes and designs.
5. Pottery Tools: Various pottery tools, such as brushes, sponges, and carving tools, may be needed to apply and manipulate the glaze.
Each material serves a specific purpose in the bubble glazing process. The glaze provides the base for the bubbles to form, while the fluxes and opacifiers control the size and distribution of the bubbles. The firing kiln is used to heat the pottery and glaze to the appropriate temperature, and the pottery tools are used to apply and manipulate the glaze.
Preparing Your Pottery for Bubble Glazing
Before applying the glaze, it is important to properly prepare the pottery to ensure a successful bubble glazing process. The following steps can help potters prepare their pottery for bubble glazing:
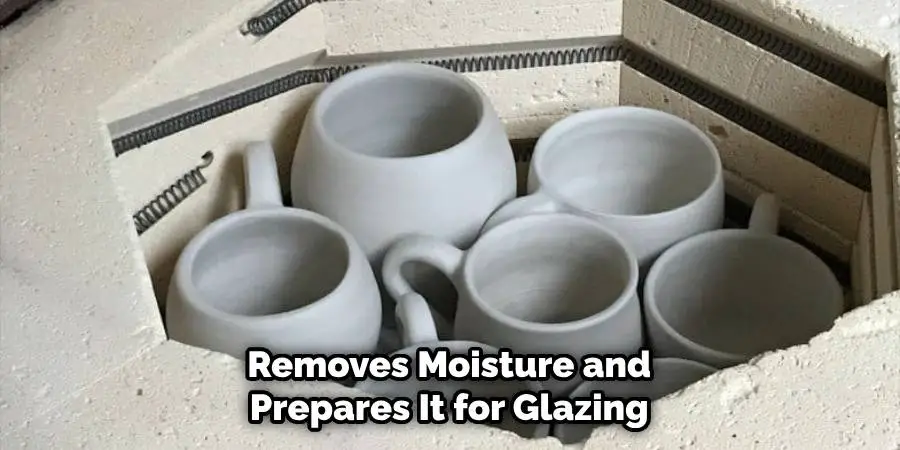
1. Bisque Firing: Bisque firing is the first firing of the pottery, which removes any moisture and prepares it for glazing. It is important to bisque fire the pottery before applying the glaze, as the glaze will not adhere properly to unfired clay.
2. Cleaning: Before applying the glaze, the pottery should be thoroughly cleaned to remove any dust or debris. This can be done by wiping the surface of the pottery with a damp sponge or cloth.
3. Wax Resist: To create intentional bubble patterns, potters can apply a wax resist to certain areas of the pottery. The wax resist will prevent the glaze from adhering to those areas, creating a contrast between the glazed and unglazed areas.
4. Glaze Application: The glaze can be applied to the pottery using various techniques, such as brushing, dipping, or spraying. It is important to apply the glaze evenly and in a thin layer to promote bubble formation.
Properly preparing the pottery is essential for achieving successful bubble glazing results. Bisque firing removes any moisture from the clay, ensuring that the glaze adheres properly. Cleaning the pottery removes any dust or debris that could interfere with the glaze application. Applying a wax resist allows potters to create intentional bubble patterns by preventing the glaze from adhering to certain areas. Finally, applying the glaze evenly and in a thin layer promotes bubble formation.
10 Steps How to Bubble Glaze
Step 1: Gather Your Materials and Workspace
Before you embark on your bubble glazing journey, gather all the necessary materials: ceramic pieces, glazes (including a base glaze and bubble glaze), a glaze mixer, kiln, safety equipment (gloves, mask, apron), brushes, and a well-ventilated workspace. Organize your materials to ensure a smooth workflow.
Step 2: Choose Your Ceramic Pieces
Select the ceramic pieces you want to bubble glaze. This technique works best on pottery with textured surfaces, as the bubbles will adhere more effectively. Handcrafted pieces or those with carved designs create an excellent canvas for bubble glazing.
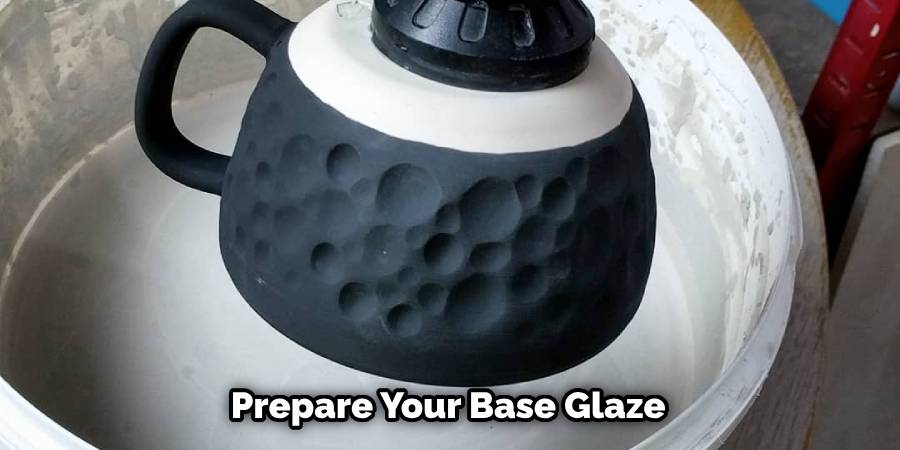
Step 3: Prepare Your Base Glaze
Prepare your base glaze, which serves as the foundation for the bubble glaze. The base glaze provides the necessary viscosity and adhesion for the bubble glaze to cling onto. Mix the base glaze thoroughly using a glaze mixer to ensure consistency.
Step 4: Create Your Bubble Glaze
Bubble glaze is formulated with specific ingredients that encourage bubble formation during firing. This might include ingredients like manganese dioxide or zinc oxide, which generate gases when fired at high temperatures. Consult glaze recipes or collaborate with experienced potters to formulate your bubble glaze.
Step 5: Apply the Base Glaze
Apply a thin and even layer of the base glaze to your ceramic pieces using brushes. Ensure that the application is smooth and free from drips or excess glaze. Allow the base glaze to dry completely before proceeding.
Step 6: Apply the Bubble Glaze
Using the same technique, apply the bubble glaze over the dried base glaze. Be mindful of the thickness – a slightly thicker application can lead to more pronounced bubbles. Experiment with various brush strokes and application methods to achieve the desired texture and look.
Step 7: Introduce Bubbles
To encourage the formation of bubbles, introduce certain elements into the process. You can sprinkle sawdust, sugar, or other combustible materials onto the glaze surface. These materials will burn off during firing, leaving behind small voids that transform into bubbles.
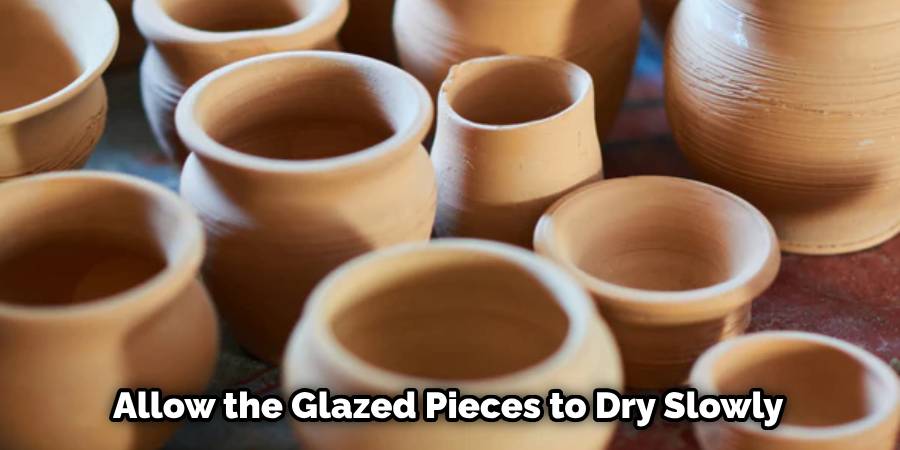
Step 8: Controlled Drying
Allow the glazed pieces to dry slowly in a controlled environment. This helps prevent cracks, blisters, or other defects that may arise from uneven drying. Maintain a consistent temperature and humidity to ensure optimal results.
Step 9: Firing Process
Load the dried glazed pieces into the kiln, making sure they are properly spaced to avoid touching. Follow the firing schedule recommended for your specific glazes. The controlled release of gases during firing will create beautiful bubbles in the glaze.
Step 10: Unveil Your Masterpiece
Once the firing process is complete and the kiln has cooled, carefully remove your glazed pieces. The result will be a stunning display of bubble patterns and textures. Inspect your pieces for any irregularities or imperfections and, if desired, apply a clear glaze to enhance the glossy finish.
Tips for Achieving Consistent Bubble Patterns
Achieving consistent bubble patterns can be challenging, but with some tips and practice, potters can improve their results. The following tips can help potters achieve consistent bubble patterns:
1. Control Glaze Thickness: The thickness of the glaze layer can affect the size and distribution of the bubbles. To achieve consistent bubble patterns, it is important to apply the glaze in a thin and even layer. This can be done by using a brush or sponge and applying multiple thin coats of glaze.
2. Experiment with Firing Temperature: Firing temperature plays a role in bubble formation. Higher temperatures can allow more gases to escape from the glaze, resulting in larger bubbles. Lower temperatures can result in smaller and more numerous bubbles. By experimenting with different firing temperatures, potters can achieve the desired bubble pattern.
3. Practice Technique: Consistency in bubble glazing comes with practice. Potters should take the time to experiment with different techniques and practice their skills. By practicing regularly, potters can develop a better understanding of how to achieve consistent bubble patterns.
Consistency in bubble glazing is important because it allows potters to create intentional and controlled bubble patterns. By controlling the glaze thickness, experimenting with firing temperature, and practicing their technique, potters can achieve consistent and desired bubble patterns.
Experimenting with Colors and Textures in Bubble Glazing
Bubble glazing offers potters the opportunity to experiment with colors and textures in their pottery. By using different glazes, colorants, and opacifiers, potters can create a wide range of effects. Additionally, by manipulating the thickness of the glaze layer and the firing temperature, potters can achieve different textures and bubble patterns.
To experiment with colors in bubble glazing, potters can use different glazes and colorants. Glazes come in a variety of colors, from earth tones to vibrant hues. Colorants, such as oxides and stains, can be added to the glaze to create custom colors. By layering different glazes or applying multiple coats of glaze, potters can create depth and variation in color.
To experiment with textures in bubble glazing, potters can manipulate the thickness of the glaze layer and the firing temperature. Thicker layers of glaze can result in larger bubbles and a more textured surface. Thinner layers of glaze can result in smaller bubbles and a smoother surface. By adjusting the firing temperature, potters can control the size and distribution of the bubbles, creating different textures.
Experimenting with colors and textures in bubble glazing allows potters to add depth and visual interest to their pottery. By using different glazes, colorants, and opacifiers, potters can create unique and personalized effects. By manipulating the thickness of the glaze layer and the firing temperature, potters can achieve different textures and bubble patterns.
Troubleshooting Common Issues in Bubble Glazing
Like any pottery technique, bubble glazing can come with its own set of challenges. However, with some problem-solving skills, potters can troubleshoot common issues that may arise. The following are some common issues in bubble glazing and how to troubleshoot them:
1. Uneven Bubble Distribution: If the bubbles are not evenly distributed across the surface of the pottery, it may be due to an uneven application of the glaze. To troubleshoot this issue, potters can try applying the glaze in thinner and more even coats. They can also experiment with different application techniques, such as brushing, dipping, or spraying.
2. Small or No Bubbles: If the bubbles are too small or nonexistent, it may be due to a lack of fluxes in the glaze. Fluxes help to lower the melting point of the glaze, allowing it to flow and form bubbles more easily. To troubleshoot this issue, potters can try adding more fluxes to the glaze recipe. They can also experiment with different firing temperatures and durations to allow more gases to escape from the glaze.
3. Large Bubbles: If the bubbles are too large, it may be due to a high firing temperature or a thick layer of glaze. To troubleshoot this issue, potters can try reducing the firing temperature or applying thinner layers of glaze. They can also experiment with different glaze recipes that have lower flux content.
Troubleshooting common issues in bubble glazing requires problem-solving skills and experimentation. By adjusting the glaze application, glaze composition, and firing parameters, potters can overcome these challenges and achieve the desired bubble patterns.
Alternative Bubble Glazing Techniques to Try
While the techniques mentioned earlier are common and widely used, there are also alternative bubble glazing techniques that potters can try. These techniques offer different ways to create bubble patterns and textures on the surface of the pottery. Some alternative bubble glazing techniques include:
1. Bubble Marbling Technique: This technique involves swirling different colors of glaze together to create a marbled effect. By blowing air into the glaze, bubbles are formed and trapped within the swirls of color.
2. Bubble Spraying Technique: This technique involves using a spray bottle to mist the glaze onto the pottery. By adjusting the nozzle and pressure of the spray bottle, potters can create different bubble patterns and textures.
3. Bubble Dipping Technique: This technique involves dipping the pottery into a bucket or tray of glaze. By quickly pulling the pottery out of the glaze, bubbles are formed and trapped on the surface.
Exploring alternative bubble glazing techniques allows potters to expand their repertoire and create unique effects. By trying different techniques, potters can discover new ways to manipulate bubbles and create interesting patterns and textures.
Conclusion
Bubble glazing is a captivating technique that requires patience, practice, and a willingness to experiment. With the right materials, techniques, and guidance, you can master the art of bubble glazing and create ceramic pieces that are truly one-of-a-kind. As you gain experience, you’ll develop your own unique style and approach to this fascinating glazing method, adding a touch of magic to your pottery creations. Hopefully, this article gave you some helpful tips about how to bubble glaze successfully, so now that you have the proper knowledge on how to get the job done, why not give it a try today?


