Yes, you can carve air dry clay. It is best to carve it when it is partially dry.
Air dry clay is a versatile medium popular among artists and crafters. It offers the flexibility to create intricate designs without needing a kiln. You can mold, shape, and carve it, making it ideal for various projects. Carving air dry clay when it’s partially dry ensures better control and precision.
This stage allows for smooth cuts and reduces the risk of cracking. Artists and hobbyists appreciate its ease of use and accessibility. Whether you’re a beginner or an experienced sculptor, air dry clay offers endless creative possibilities. It’s a great material to experiment with and bring your artistic visions to life.

Credit: www.adelepo.com
Table of Contents
Introduction To Carve Air Dry Clay
Air dry clay is a popular crafting material. It’s easy to use and doesn’t need a kiln or oven. This clay is perfect for kids and beginners. You can create many fun projects with it.
What Is Air Dry Clay?
Air dry clay is a type of clay that hardens by drying in the air. It doesn’t need heat to set. This clay is soft and easy to mold. It is available in various colors and types.
Benefits Of Using Air Dry Clay
- Easy to Use: No special tools are needed.
- Safe for Kids: Non-toxic and safe for all ages.
- Versatile: Can be painted, sanded, and carved.
- Affordable: Cost-effective for many projects.
- Readily Available: Found in most craft stores.
Credit: www.adelepo.com
Tools Needed For Carving
Carving air dry clay can be a fun and creative activity. To get started, you need the right tools. This section covers the essential and optional tools for carving air dry clay.
Essential Tools
These are the must-have tools for carving air dry clay. They help you shape and detail your creations.
- Clay Knives: Useful for cutting and trimming.
- Loop Tools: Ideal for removing clay and creating textures.
- Needle Tools: Great for fine details and scoring.
- Wire Cutters: Helpful for slicing large blocks of clay.
- Rolling Pin: Flattens clay evenly.
Optional Tools
These tools are not essential but can enhance your carving experience. They offer more precision and variety.
- Sculpting Tools: Various shapes for different textures.
- Sponges: Smooth out surfaces and remove excess clay.
- Sandpaper: Refines and polishes dried clay.
- Texturing Brushes: Adds unique textures to your work.
- Carving Ribs: Useful for smoothing and shaping.
Using these tools, you can create detailed and intricate designs with air dry clay. Whether you are a beginner or a pro, these tools will help you bring your ideas to life.
Preparing Your Workspace
Carving air dry clay can be a fun and rewarding activity. Before you begin, you must prepare your workspace. A well-organized area ensures a smoother carving process and keeps your tools and materials handy.
Setting Up Your Area
Choose a clean, flat surface as your workspace. Cover it with a protective layer, such as a plastic sheet or an old newspaper. This will help keep your area clean and make cleanup easier.
- Make sure you have good lighting. Natural light is best.
- Keep your tools within reach. Place them in a small container.
- Have a bowl of water nearby. This helps to smooth the clay.
Safety Precautions
Safety is important when carving air dry clay. Follow these simple tips:
- Wear an apron to protect your clothes.
- Use a dust mask if sanding the clay. Clay dust can be harmful.
- Keep sharp tools away from children. Store them safely after use.
| Item | Purpose |
|---|---|
| Plastic Sheet | Protects your workspace |
| Container | Holds your tools |
| Bowl of Water | For smoothing clay |
| Apron | Protects your clothes |
| Dust Mask | Protects from clay dust |
Basic Carving Techniques
Carving air dry clay can be fun and creative. Knowing the basic techniques makes it easier. Let’s dive into some simple methods to get started.
Simple Cuts
Simple cuts are the first step in carving air dry clay. Use a sharp knife or a carving tool. Start with straight lines and basic shapes.
- Hold the tool firmly.
- Make shallow cuts first.
- Gradually deepen the cuts.
- Remove excess clay carefully.
Practice makes perfect. Start with easy designs to build your confidence.
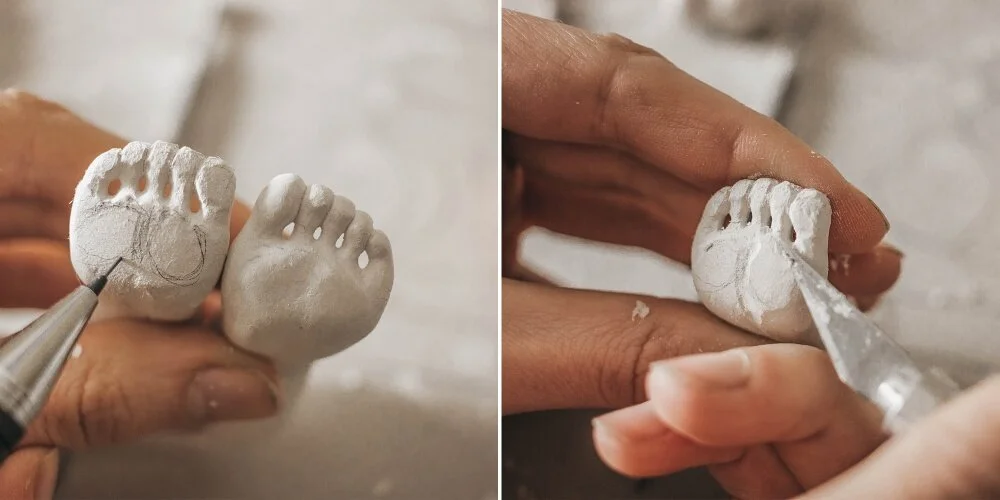
Adding Details
Adding details brings your clay creation to life. Use fine tools for intricate designs. Focus on small sections at a time.
- Sketch your design on the clay.
- Use a pointed tool for fine lines.
- Press lightly to avoid breaking the clay.
- Smooth edges with a damp sponge.
Details can include textures, patterns, and tiny features. Small dots and lines can make a big difference.
| Tool | Purpose |
|---|---|
| Knife | Simple cuts |
| Pointed Tool | Fine details |
| Damp Sponge | Smoothing edges |
Experiment with different tools. Each tool creates a unique effect on the clay.
Advanced Carving Methods
Carving air dry clay can be a fun and creative activity. Advanced techniques can help you create stunning pieces. This section covers some advanced carving methods.
Creating Textures
Textures bring life to your clay projects. Use various tools to create interesting surfaces. Common tools include:
- Needle tools
- Wire brushes
- Sponge stamps
Press these tools into the clay to make unique patterns. You can also use household items. For example, press a fork into the clay for a lined texture. Experiment with different objects to see what works best.
Layering Techniques
Layering adds depth to your clay pieces. Start by carving a base layer. Then, add more layers of clay on top. Each new layer should be thinner than the one below. This technique can create a 3D effect.
Follow these steps for effective layering:
- Carve the base layer.
- Apply slip to the surface.
- Press the new layer of clay onto the slip.
- Carve the new layer as desired.
Repeat these steps for multiple layers. Make sure each layer is smooth before adding the next one. This ensures a clean, polished look. Layering can transform simple projects into complex masterpieces.
| Tool | Purpose |
|---|---|
| Needle Tool | Fine lines and details |
| Wire Brush | Rough textures |
| Sponge Stamp | Soft, patterned textures |
Credit: www.quora.com
Common Mistakes To Avoid
Carving air dry clay can be fun. But, you might make mistakes. These mistakes can ruin your project. Here are some common mistakes to avoid.
Overworking The Clay
Overworking the clay is a big mistake. This can make the clay weak. Weak clay can break easily. To avoid this, handle the clay gently. Use soft tools and light pressure.
Here are some tips to avoid overworking the clay:
- Keep your tools clean.
- Take breaks while working.
- Use small amounts of clay at a time.
Inadequate Drying Time
Inadequate drying time is another common mistake. Clay needs time to dry. If you rush, the clay can crack. Cracked clay is hard to fix. To ensure proper drying, let the clay sit for 24 hours.
Follow these steps for adequate drying:
- Place the clay in a dry, cool place.
- Turn the clay occasionally for even drying.
- Check the clay for dryness before carving.
| Mistake | Solution |
|---|---|
| Overworking the clay | Handle gently, use soft tools. |
| Inadequate drying time | Let dry for 24 hours. |
Finishing Touches
Adding the finishing touches to your air dry clay project can elevate its appearance. This section delves into the vital steps to perfect your creation.
Sanding And Smoothing
Once the clay is dry, it’s time to sand and smooth it. Use fine-grit sandpaper for this task. Gently rub the surface to remove any bumps or rough spots. Be careful not to press too hard. You want to achieve a smooth and even surface.
- Start with 120-grit sandpaper.
- Move to 220-grit for a finer finish.
- Use a damp cloth to wipe away dust.
Painting And Sealing
After sanding, you can paint and seal your clay piece. Choose acrylic paints for vibrant colors. Apply a base coat first. Let it dry completely. Then, add more layers as needed.
- Apply a base coat of paint.
- Let the base coat dry.
- Add additional layers for depth.
Once the paint is dry, use a sealer to protect your work. A clear acrylic sealer works well. Spray or brush it on evenly. Allow it to dry according to the manufacturer’s instructions.
| Step | Material | Purpose |
|---|---|---|
| Sanding | 120-grit sandpaper | Initial smoothing |
| Sanding | 220-grit sandpaper | Fine smoothing |
| Painting | Acrylic paint | Add color |
| Sealing | Clear acrylic sealer | Protect finish |
Inspiring Project Ideas
Air dry clay offers endless possibilities for creativity. Whether you’re a beginner or an experienced artist, there are many ways to use this versatile material. Here are some inspiring project ideas to get you started.
Decorative Pieces
Creating decorative pieces with air dry clay is fun and easy. You can make beautiful wall hangings with simple tools. Shape the clay into different forms like leaves, stars, or animals. Paint them with bright colors for a vibrant look.
Another idea is to craft miniature sculptures. These can be small animals, people, or abstract shapes. Place them around your home for a unique touch. Consider adding a glossy finish for extra shine.
For a festive touch, make your own holiday ornaments. Use cookie cutters to shape the clay. Decorate them with glitter or paint. Hang them on your tree or give them as gifts.
Functional Items
Air dry clay is also great for making functional items. Create a set of coasters with custom designs. Roll out the clay and cut circles or squares. Paint them with your favorite colors and patterns.
Another practical project is to make jewelry holders. Shape the clay into small dishes or stands. These can hold rings, earrings, or necklaces. Personalize them with your name or initials.
Make your workspace more organized with pen holders. Form the clay into a cylinder shape. Decorate it with fun patterns or your favorite colors. This keeps your desk neat and stylish.
Here’s a quick table of ideas:
| Project | Materials Needed |
|---|---|
| Wall Hangings | Clay, Paint, Brushes |
| Miniature Sculptures | Clay, Paint, Gloss |
| Holiday Ornaments | Clay, Cookie Cutters, Glitter |
| Coasters | Clay, Paint |
| Jewelry Holders | Clay, Paint |
| Pen Holders | Clay, Paint |
These projects are perfect for all ages. They are simple yet effective. Get creative and enjoy the process!
Conclusion
Carving air dry clay is a rewarding and creative process. It offers versatility for various art projects. With patience and the right tools, anyone can achieve stunning results. So, grab your clay and start carving today. Enjoy the journey of turning simple clay into beautiful art pieces.


