
How to Use Pottery Bats on the Wheel
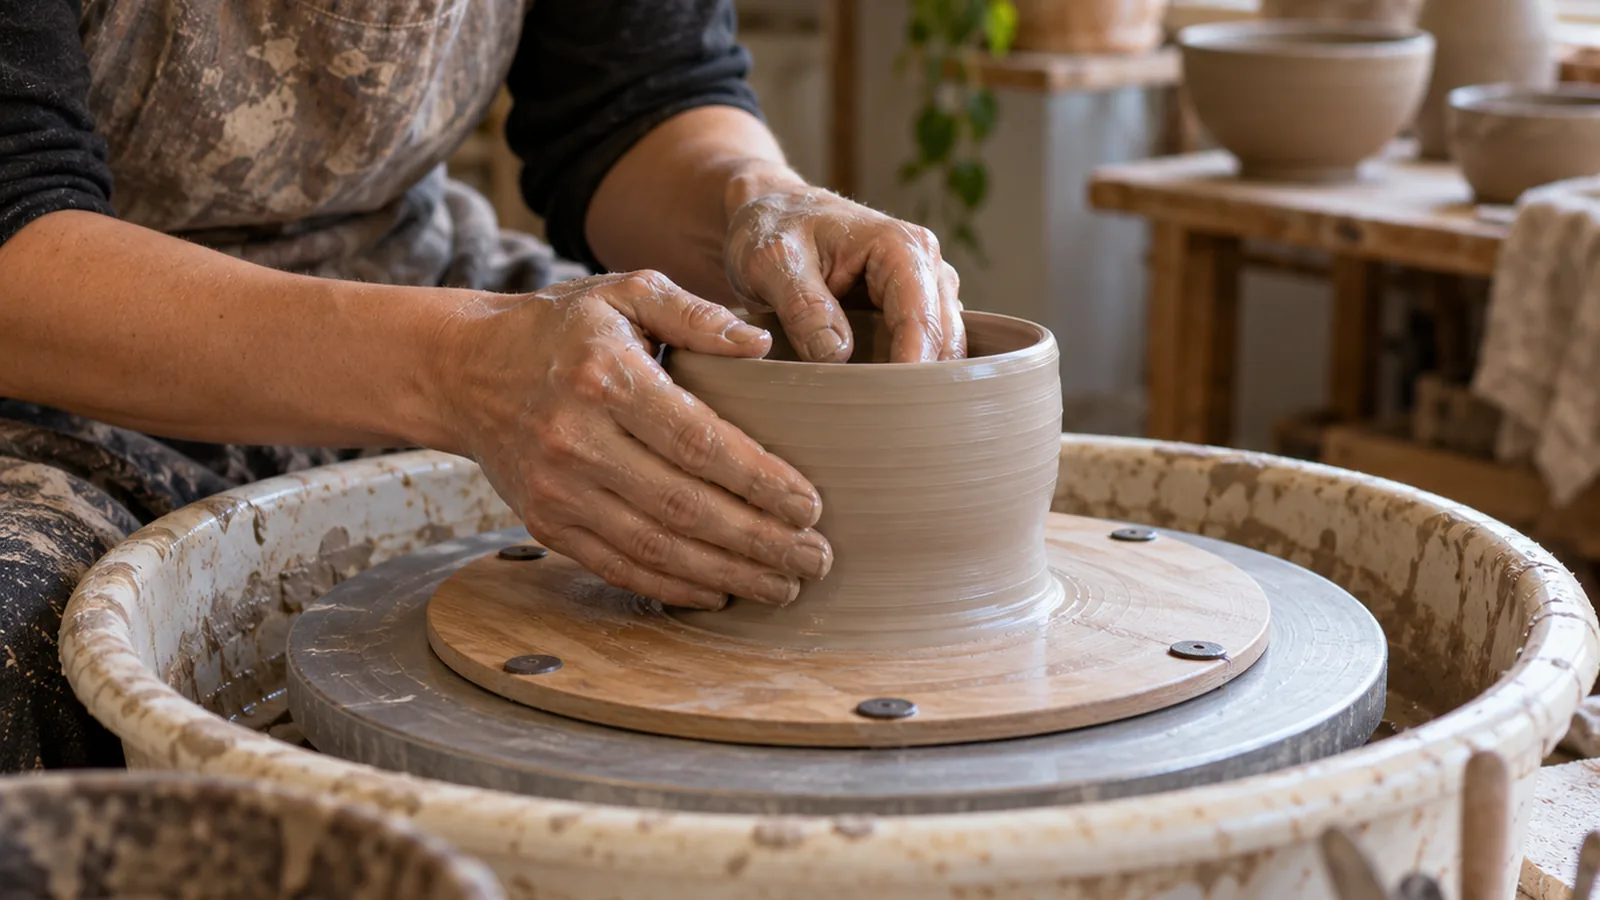
To learn how to use pottery bats, secure the bat to the stopped, clean wheelhead, check that it doesn’t wobble, then center and throw your clay on it. Let the pot firm up before removal; the right stage depends on the bat and technique, so don’t force a piece that resists.
Quick answer
How do you use pottery bats?
Secure the bat to the stopped, clean wheelhead, check that it doesn’t wobble, then center and throw your clay on it. After throwing, cut beneath the pot with a taut wire; the firmness needed for removal depends on the bat and method, so don’t force a piece that resists.
- Match the attachment: Align pin-mounted bat holes with the wheel pins, or use a clay pad on a pinless wheel if the system is compatible.
- Seat and check: With the wheel stopped and surfaces clean, press the bat flat and confirm it doesn’t wobble before adding clay.
- Throw: Center the clay on the attached bat and throw as usual.
- Wait and cut: For a wire-cut pot on a StudioPro bat, wait until leather hard, while a Flexi Bat instruction calls for medium leather hard; then run a taut cutoff wire flat beneath the pot.
- Remove carefully: Use the method suited to your bat and clay stage, such as gently twisting a soft-leather-hard piece or undercutting wet clay on a Hydro-Bat with a wooden knife.
Attach, Throw, and Remove a Pottery Bat
Stop the wheel and clean the wheel head, the bat’s underside, and the attachment points before fitting the bat. For a pin-mounted bat, align its holes with the wheel-head pins, press it flat, and check that it sits securely without wobbling.
| Bat system | Pin spacing (inches, center to center) | Pin diameter (inches) | Source |
|---|---|---|---|
| StudioPro | 10 | 3/8 | studioprobats.com |
Those dimensions apply to StudioPro bats, not every pin-mounted system, so check the spacing and pin fit for your bat and wheel before attaching it.
- Identify the attachment method. Match a pin-mounted bat’s holes to the wheel-head pins; on a pinless wheel, a clay pad can secure a bat, but compatibility depends on the system.
- Seat the bat. With the wheel stopped and the surfaces clean, align the pin holes, press the bat down flat, and confirm it is secure.
- Check for movement. Make sure the bat does not wobble before you add clay; correct any instability before throwing.
- Center and throw. Center the clay on the attached bat, then throw as usual. Leaving the piece on its support makes wide or delicate forms easier to move.
- Wait for the right firmness. Removal timing depends on the bat and technique. For a wire-cut pot on a StudioPro bat, the recommendation is leather hard; a Flexi Bat instruction recommends medium leather hard, when fingerprints don’t press in easily but a fingernail still marks the clay with mild pressure.
- Remove the piece and bat carefully. Follow the removal method for your bat and technique: some soft-leather-hard pieces can be gently twisted free, while Hydro-Bat instructions recommend patience and undercutting with a wooden knife while the clay is still wet. The pot can stay on a StudioPro bat as it dries.
Choose a Bat and Attachment Method
Choose a bat by matching its material and attachment system to your clay work and wheel; pin spacing must match the wheel for a pin-mounted bat. If you’re learning how to use pottery bats, start by checking whether your wheel has pins or a pinless head, then choose a compatible bat.
Wood and wood-composite bats, plastic bats, and plaster bats are common options. Porous wood and plaster absorb water from the clay, while plastic does not. That difference affects how the clay contacts the bat, but the available guidance doesn’t establish one material as best for every pot or technique.
For a pin-mounted bat, compare the holes with your wheel’s pins before attaching it. StudioPro bats use holes spaced 10 inches on center for standard 3/8-inch bat pins, but pin spacing isn’t universal, so check the fit between your specific bat and wheel. StudioPro makes one hole oval to allow for small spacing variations. If one of these bats fits too tightly, repeatedly place and remove it, or pass rolled sandpaper through the hole once or twice to loosen it.
A pinless wheel needs a different setup. You can secure a bat with a clay pad, but compatibility depends on the particular system. The Aspire bat system is designed only for Shimpo/Nidec Aspire wheels. Check the wheel and bat pairing before you commit to a system.
Before attaching any bat, stop the wheel and clean the wheelhead, bat underside, and attachment points. With a pin-mounted bat, align the holes with the pins and press the bat flat onto the wheelhead; confirm it sits securely without wobbling before throwing. A loose or worn pin, loose fitting, poor hole fit, or clay trapped between the surfaces can cause wobble. Check the pins and fittings, clean both surfaces, and make sure the bat sits fully down.
When Should You Remove the Bat?
Removal timing depends on the bat and method: recommendations range from leather hard to medium leather hard, and some methods call for removing the piece while it’s still wet.
For a wire-cut piece, pass a taut cutoff wire flat beneath the pot after throwing, then leave the pot on the bat as it dries. StudioPro recommends removing wire-cut work at leather hard, while a Flexi Bat instruction calls for medium leather hard. For the Flexi Bat method, medium leather hard means fingerprints don’t press in easily, but a fingernail still marks the clay with mild pressure.
Note
The recommended timing depends on the bat and removal technique.
Other methods use different cues. Follow the method that matches your bat, and avoid forcing the piece when it resists, since the supported methods rely on a particular clay stage or an undercut.
Fix Wobbling, Sticking, and Other Problems
A wobbling bat usually points to a problem with the pins, fittings, fit, or contact between the bat and wheelhead. Before throwing, stop the wheel and check that the pins and fittings are secure, both surfaces are clean, and the bat sits fully down. Clay trapped underneath can keep the bat from sitting flat.
If the bat still wobbles, check whether its holes fit the pins; poorly fitting holes can cause instability. Pin spacing isn’t universal, so compare the bat’s holes with your wheel’s pins rather than forcing the bat into place. StudioPro bats use holes spaced 10 inches on center for standard 3/8-inch pins, but that measurement applies to those bats, not every system. If a StudioPro bat fits too tightly, repeatedly place and remove it, or pass rolled sandpaper through each hole once or twice.
If clay won’t hold on a Hydro-Bat, dampen the surface with a sponge without soaking it; this remedy is for a new or bone-dry Hydro-Bat. Don’t saturate the bat, since the guidance calls for dampening, not soaking.
For a piece that’s difficult to remove, the right approach depends on the bat and clay stage, so don’t force one method across every setup.
Other methods include gently twisting a soft-leather-hard piece free or, for a Hydro-Bat, undercutting with a wooden knife while the clay is still wet. Follow the method suited to your bat rather than prying at a piece that hasn’t reached the stage its method calls for.
Frequently Asked Questions
How do you clean and dry a pottery bat after throwing?
Scrape off remaining clay, then clean the bat without soaking it; for wood-based Hardboard and Medex bats, occasional sponge cleaning is acceptable. Store it stacked or vertically on a back rack after cleaning. The available guidance doesn’t specify a drying time, so let the bat dry before storage.
Can pottery bats go in a kiln?
Guidance covers cleaning and storage, not firing pottery bats. Keep a bat out of the kiln unless its maker confirms that the particular bat can be fired. Wood and wood-composite bats are common types, and storage guidance advises against soaking them.
What size pottery bat should I use for my wheel?
Choose a bat whose attachment points fit your wheel; for a pin-mounted bat, match the hole spacing to the wheel pins. StudioPro bats use holes 10 inches apart, center to center, for standard 3/8-inch pins, but those measurements aren’t universal. For a pinless wheel, confirm that the bat system works with that wheel.
How do you store pottery bats to prevent warping?
Scrape off clay and store bats stacked or vertically on a back rack; shorter contact with wet pots can limit warping in wood bats. Some warping is expected because wood absorbs water from the clay, so remove pots when your chosen method calls for it rather than leaving them on the bat longer than needed.
Are pottery bats reusable for multiple pieces?
Yes, pottery bats can be cleaned and stored for reuse; scrape off leftover clay after use and avoid soaking wood-based bats. Keep the bat clean and flat against the wheelhead before attaching it again, since clay trapped between the surfaces can cause wobbling.
Conclusion
If you’re choosing a setup, match the bat to your wheel first: use a pin-mounted bat when its holes fit the wheel pins, or a compatible clay-pad system on a pinless wheel. Then throw on the bat and keep the pot supported until it reaches the firmness required by your removal method. For your next piece, check the fit and stability with the wheel stopped before adding clay.
Sources
- Product Info (studioprobats.com)
- thecrucible.org (thecrucible.org)
- potterymill.com (potterymill.com)
- ceramicartsnetwork.org (ceramicartsnetwork.org)
- theceramicshop.com (theceramicshop.com)
- ceramicartsnetwork.org (ceramicartsnetwork.org)
- potterycrafters.com (potterycrafters.com)
- ceramicartsnetwork.org (ceramicartsnetwork.org)
- bluebuckettools.com (bluebuckettools.com)
